
Hi! We’re here to help you get started with the Pig Counter—your indispensable tool for managing your farm. This guide will show you how to set it up quickly and easily. Let’s get started!
Automating herd management requires accurate data. The following step-by-step guide explains how to properly install a camera in a pig farm’s production environment.
How do I install a camera correctly?
Automating herd management requires accurate data. The following step-by-step guide explains how to properly install a camera in a pig farm’s production environment.
1. Selecting an Installation Site
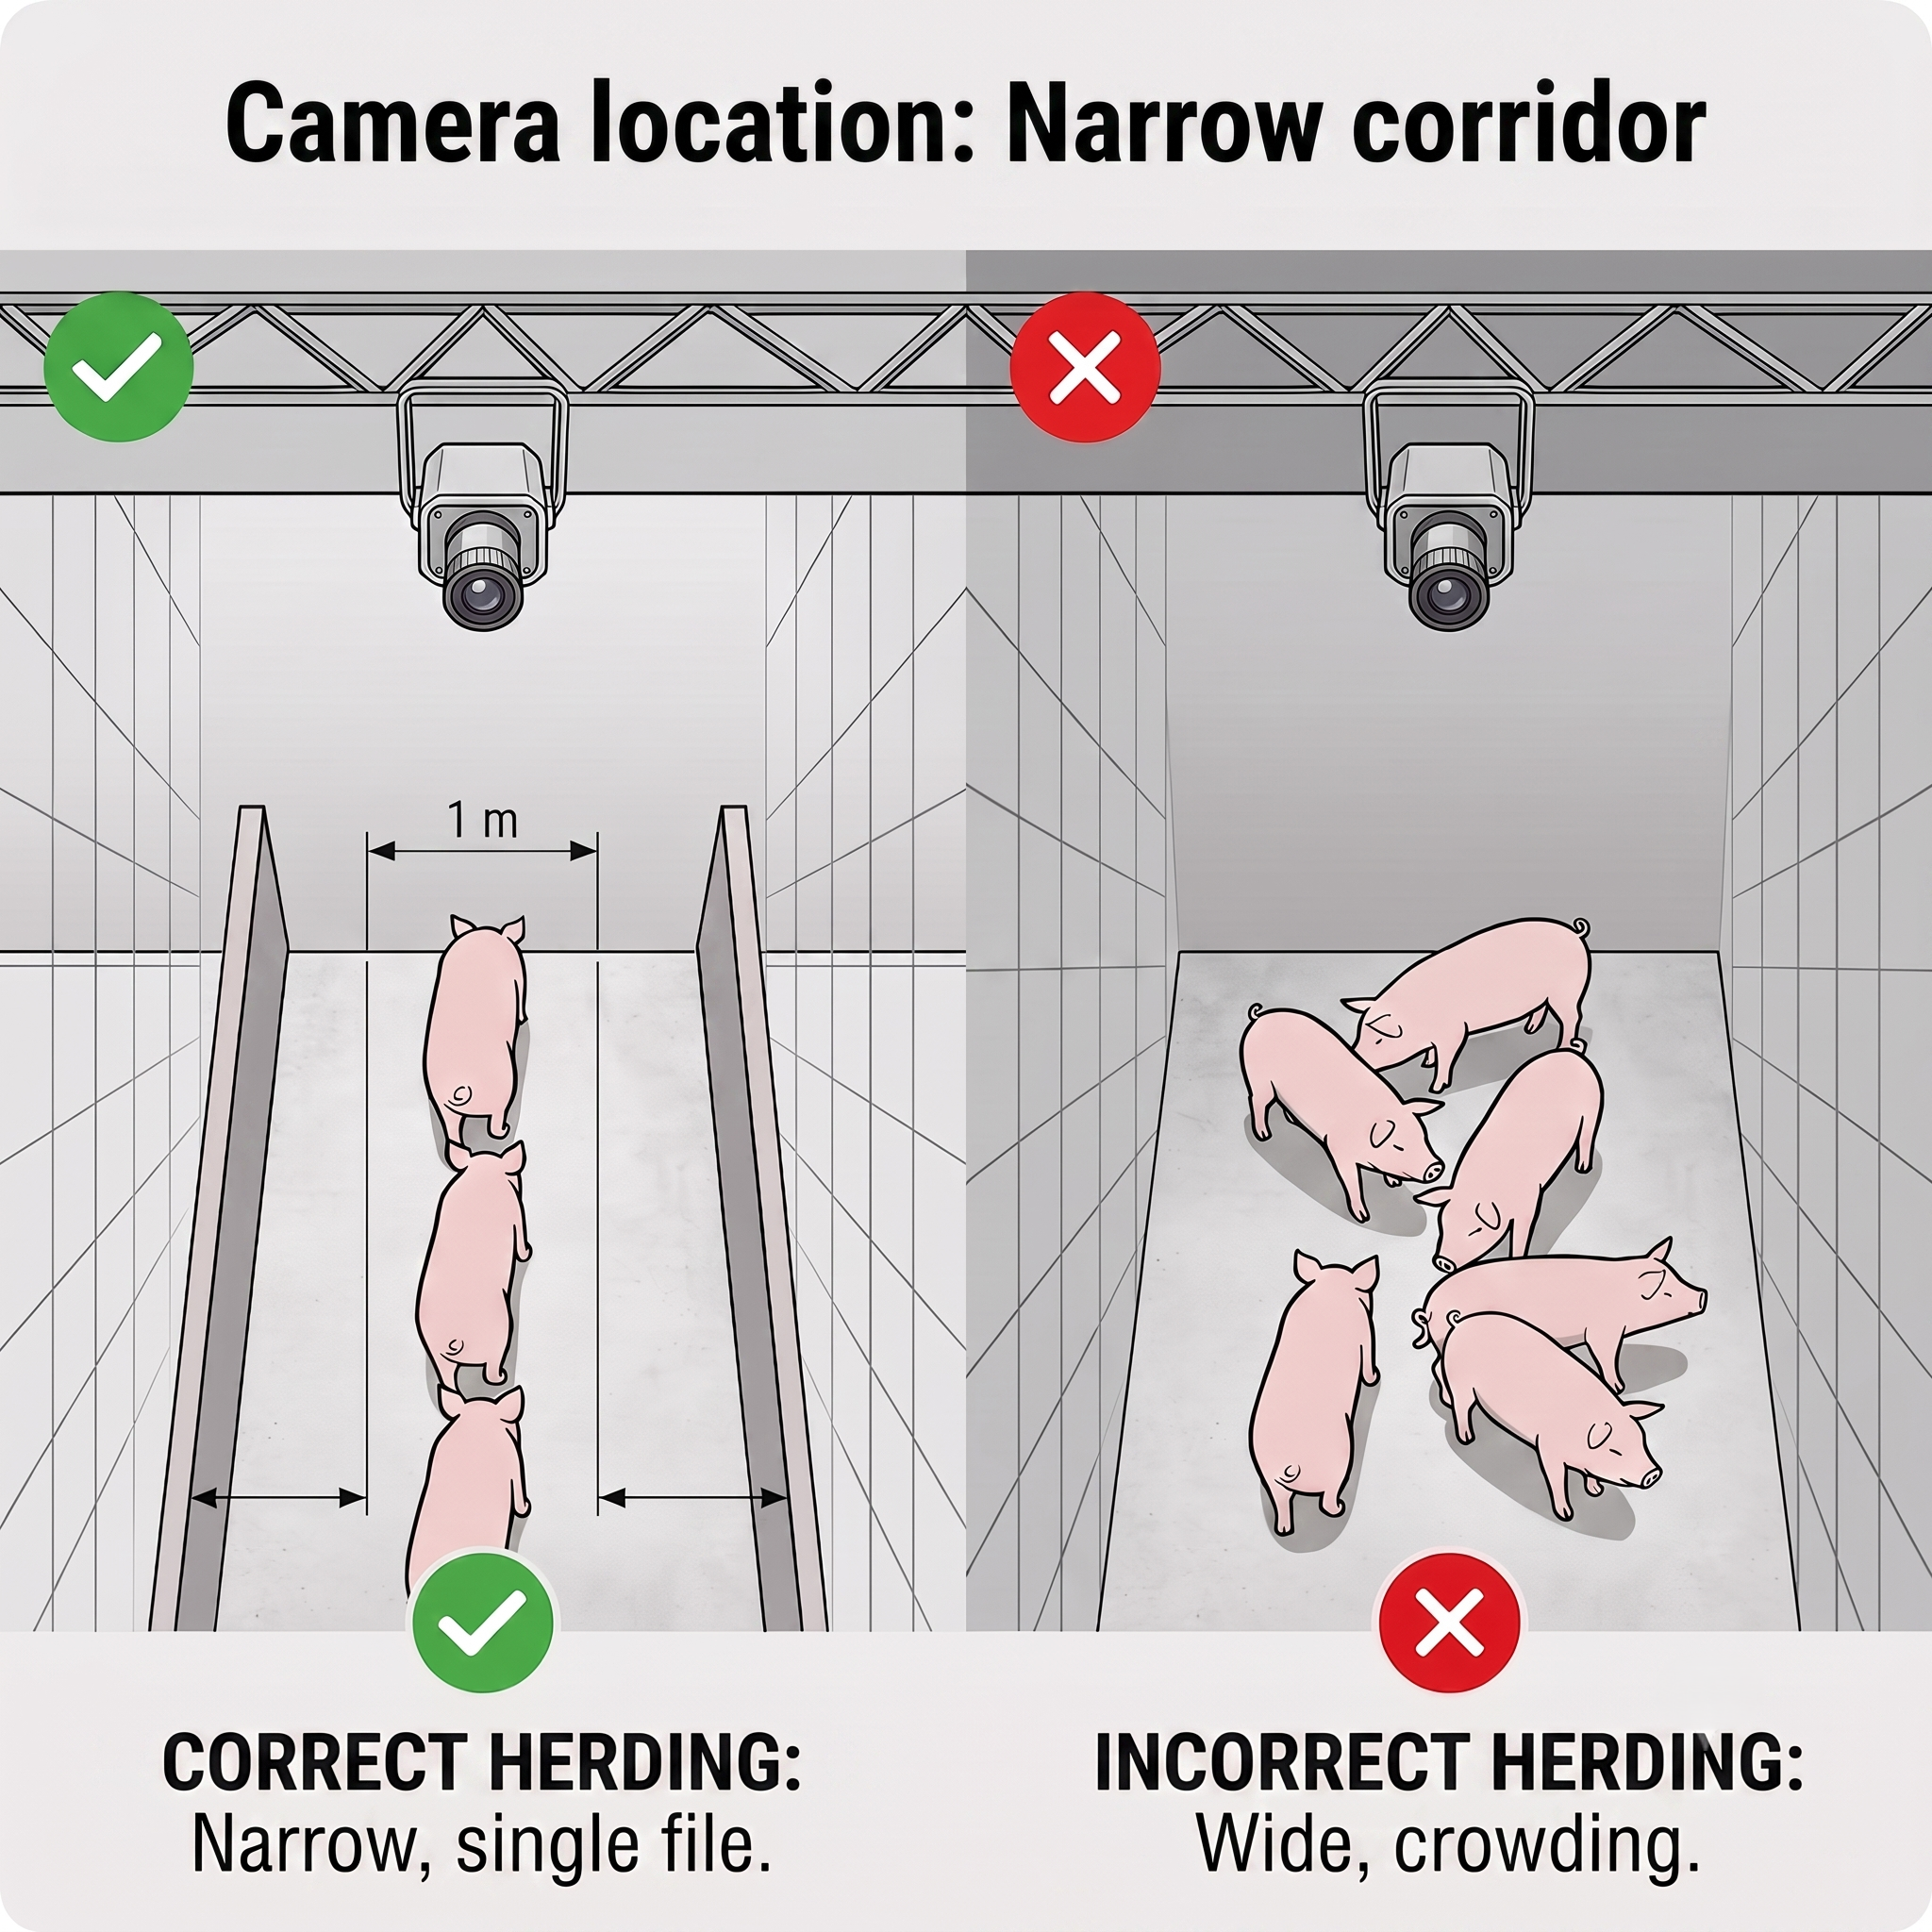
The camera must be able to “see” the animals in an organized manner. The best place to install it is in the drive-through corridor or the so-called “funnel” (narrow passage) at the exit of the pen.
- Corridor width: The ideal width is 0.8 m to 1.5 m. This forces the pigs to move in single file or in pairs. A corridor that is too wide allows the animals to turn around, crowd together, and overlap, which drastically reduces the effectiveness of the algorithms.
- No obstructions: There must be no feed pipes, cables, gates, or waterers within the camera’s field of view (FOV). The camera must be able to see a clear floor.
- Direction of Movement: Choose a location where the pigs move smoothly. Avoid installing the system directly above turns in the corridor—the animals slow down there and adjust their body position.
2. Lens Height and Angle of Installation
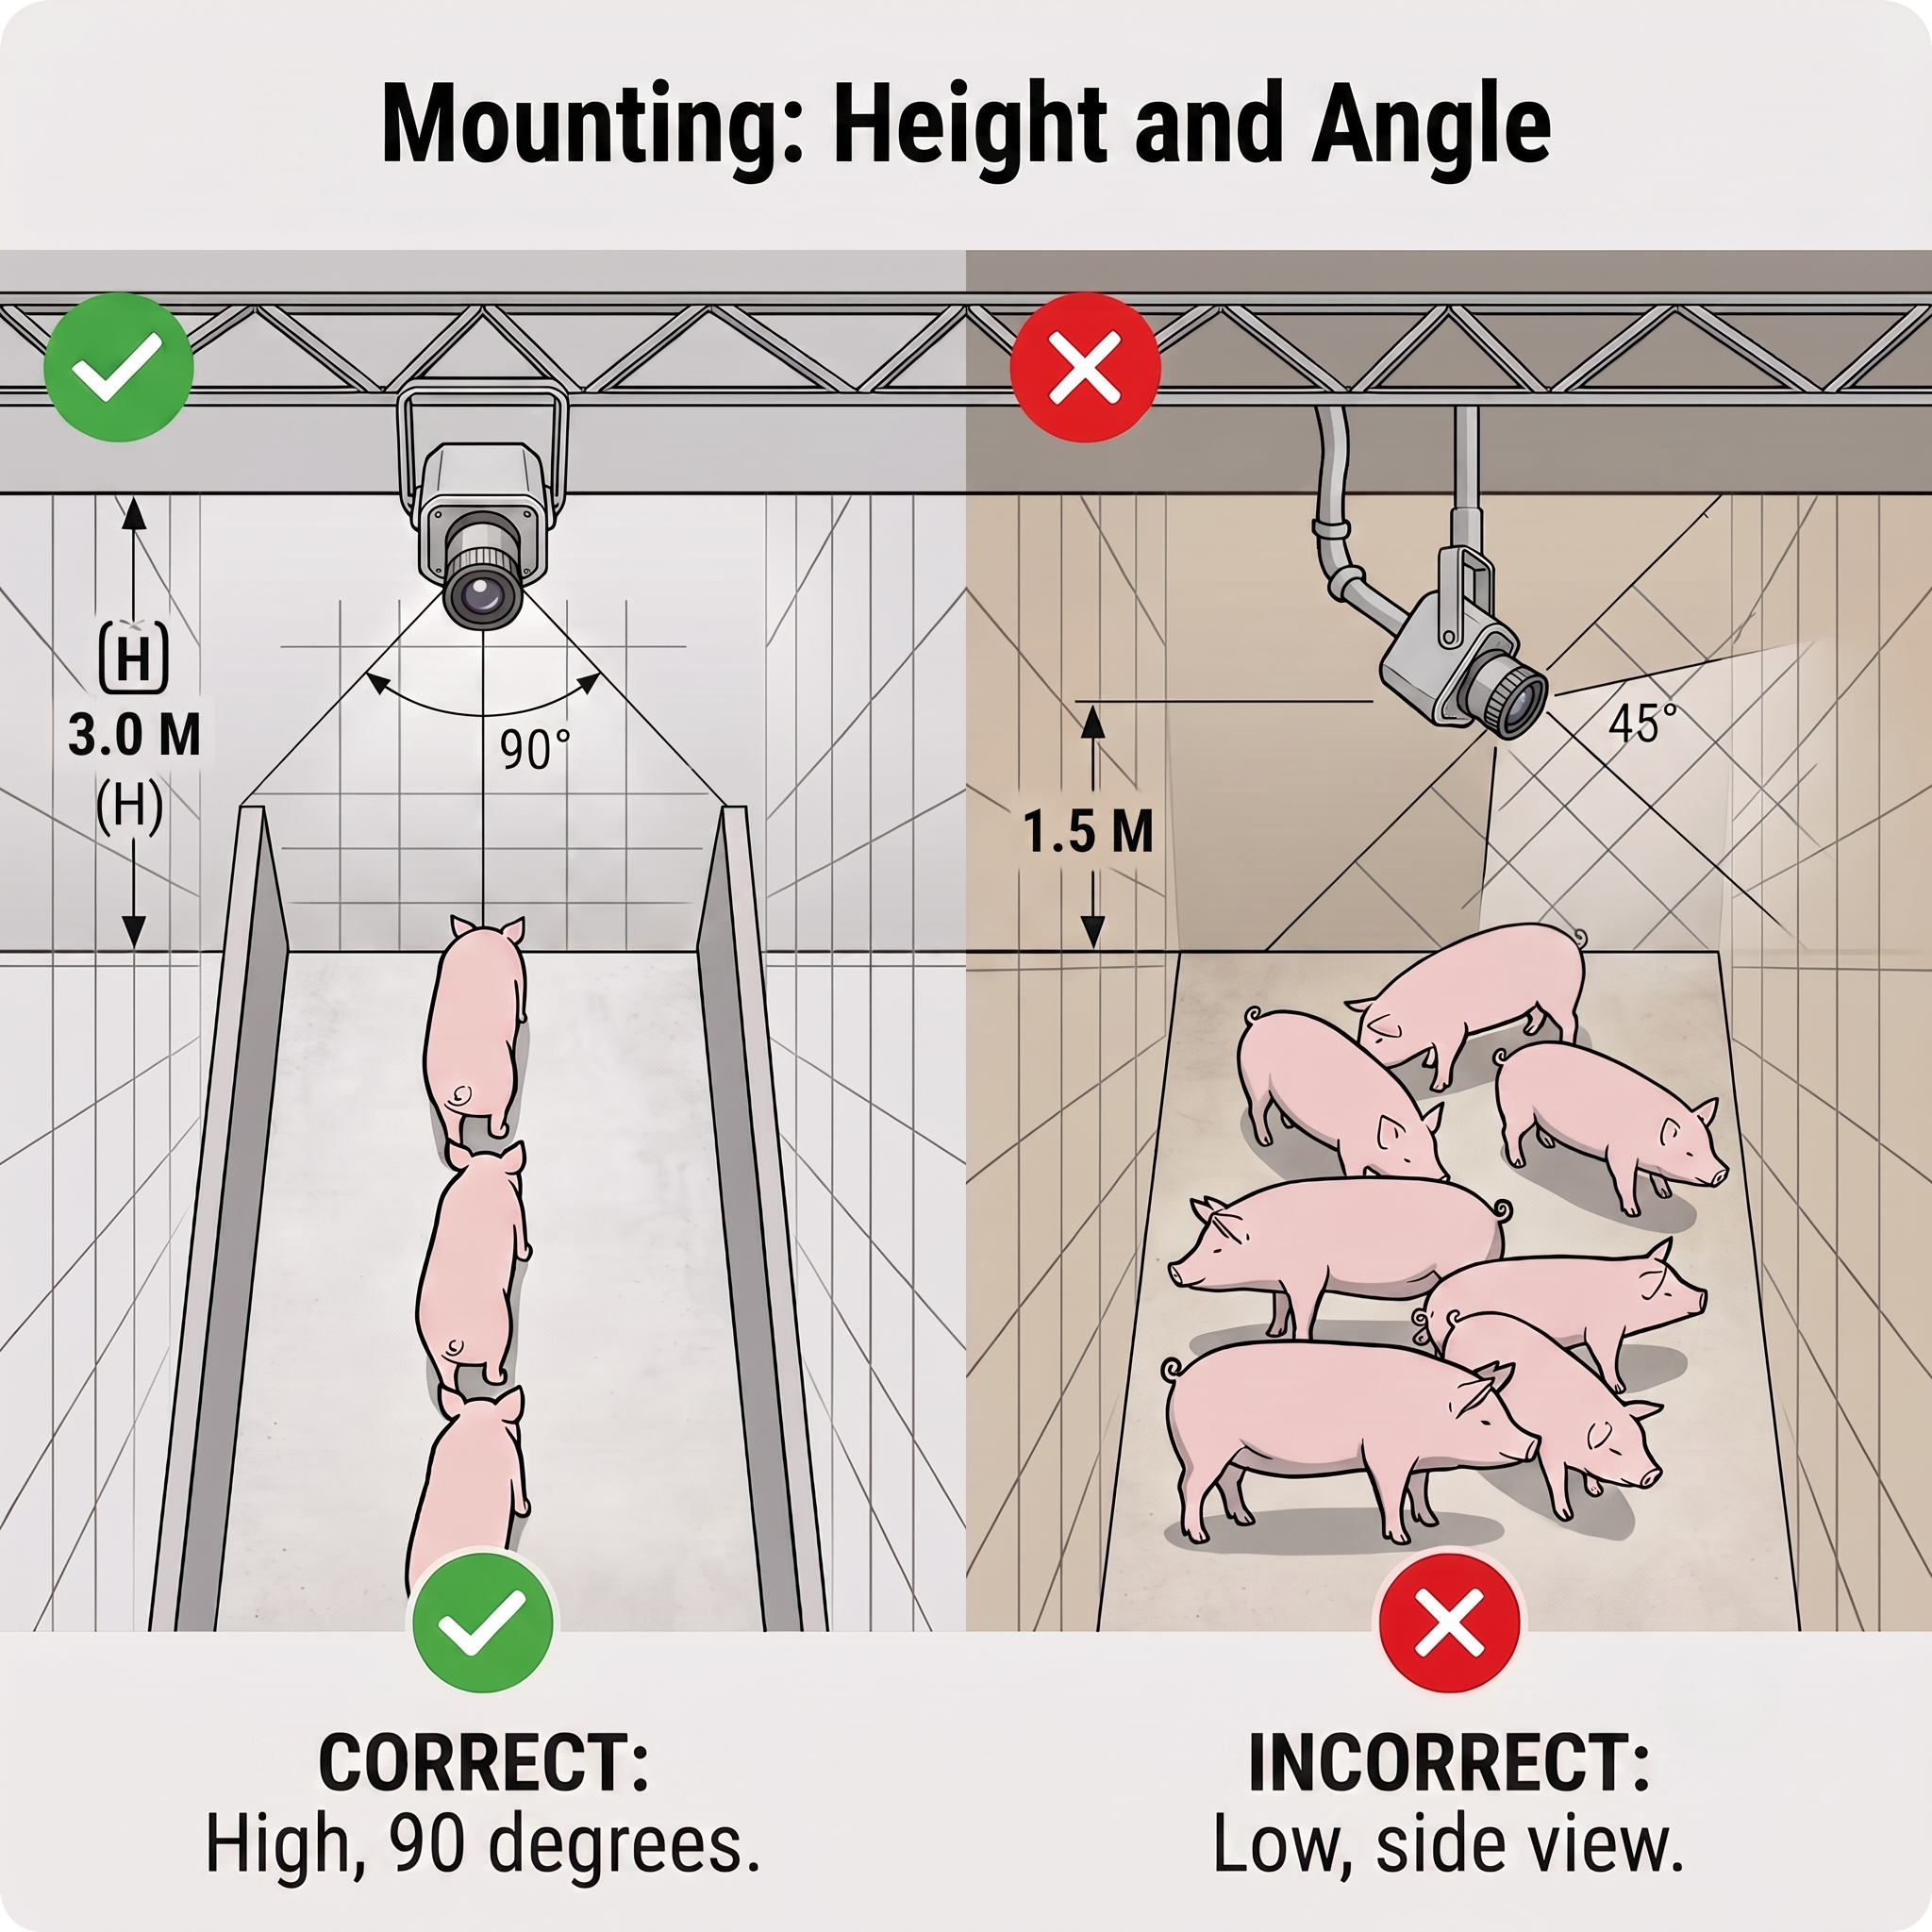
This is the most critical stage of installation. The camera must capture the natural contour of the pig’s back.
- Angle: The camera must be pointed exactly straight down (at a 90° angle to the floor). Any deviation will cause the system to analyze the sides of the animals, leading to size distortions and incorrect counts.
- Mounting height: Typically ranges from 2.5 m to 3.5 m above floor level (check the manufacturer’s recommendations for the specific lens focal length).
- Too low: The camera won’t be able to capture the full width of the corridor, and the large pigs will “fall out” of the frame.
- Too high: Decreased image resolution per individual animal; loss of detail.
3. Minimum Lighting Requirements
The counting algorithms rely on the contrast between the pig and the background. Lighting is just as important as the camera itself.
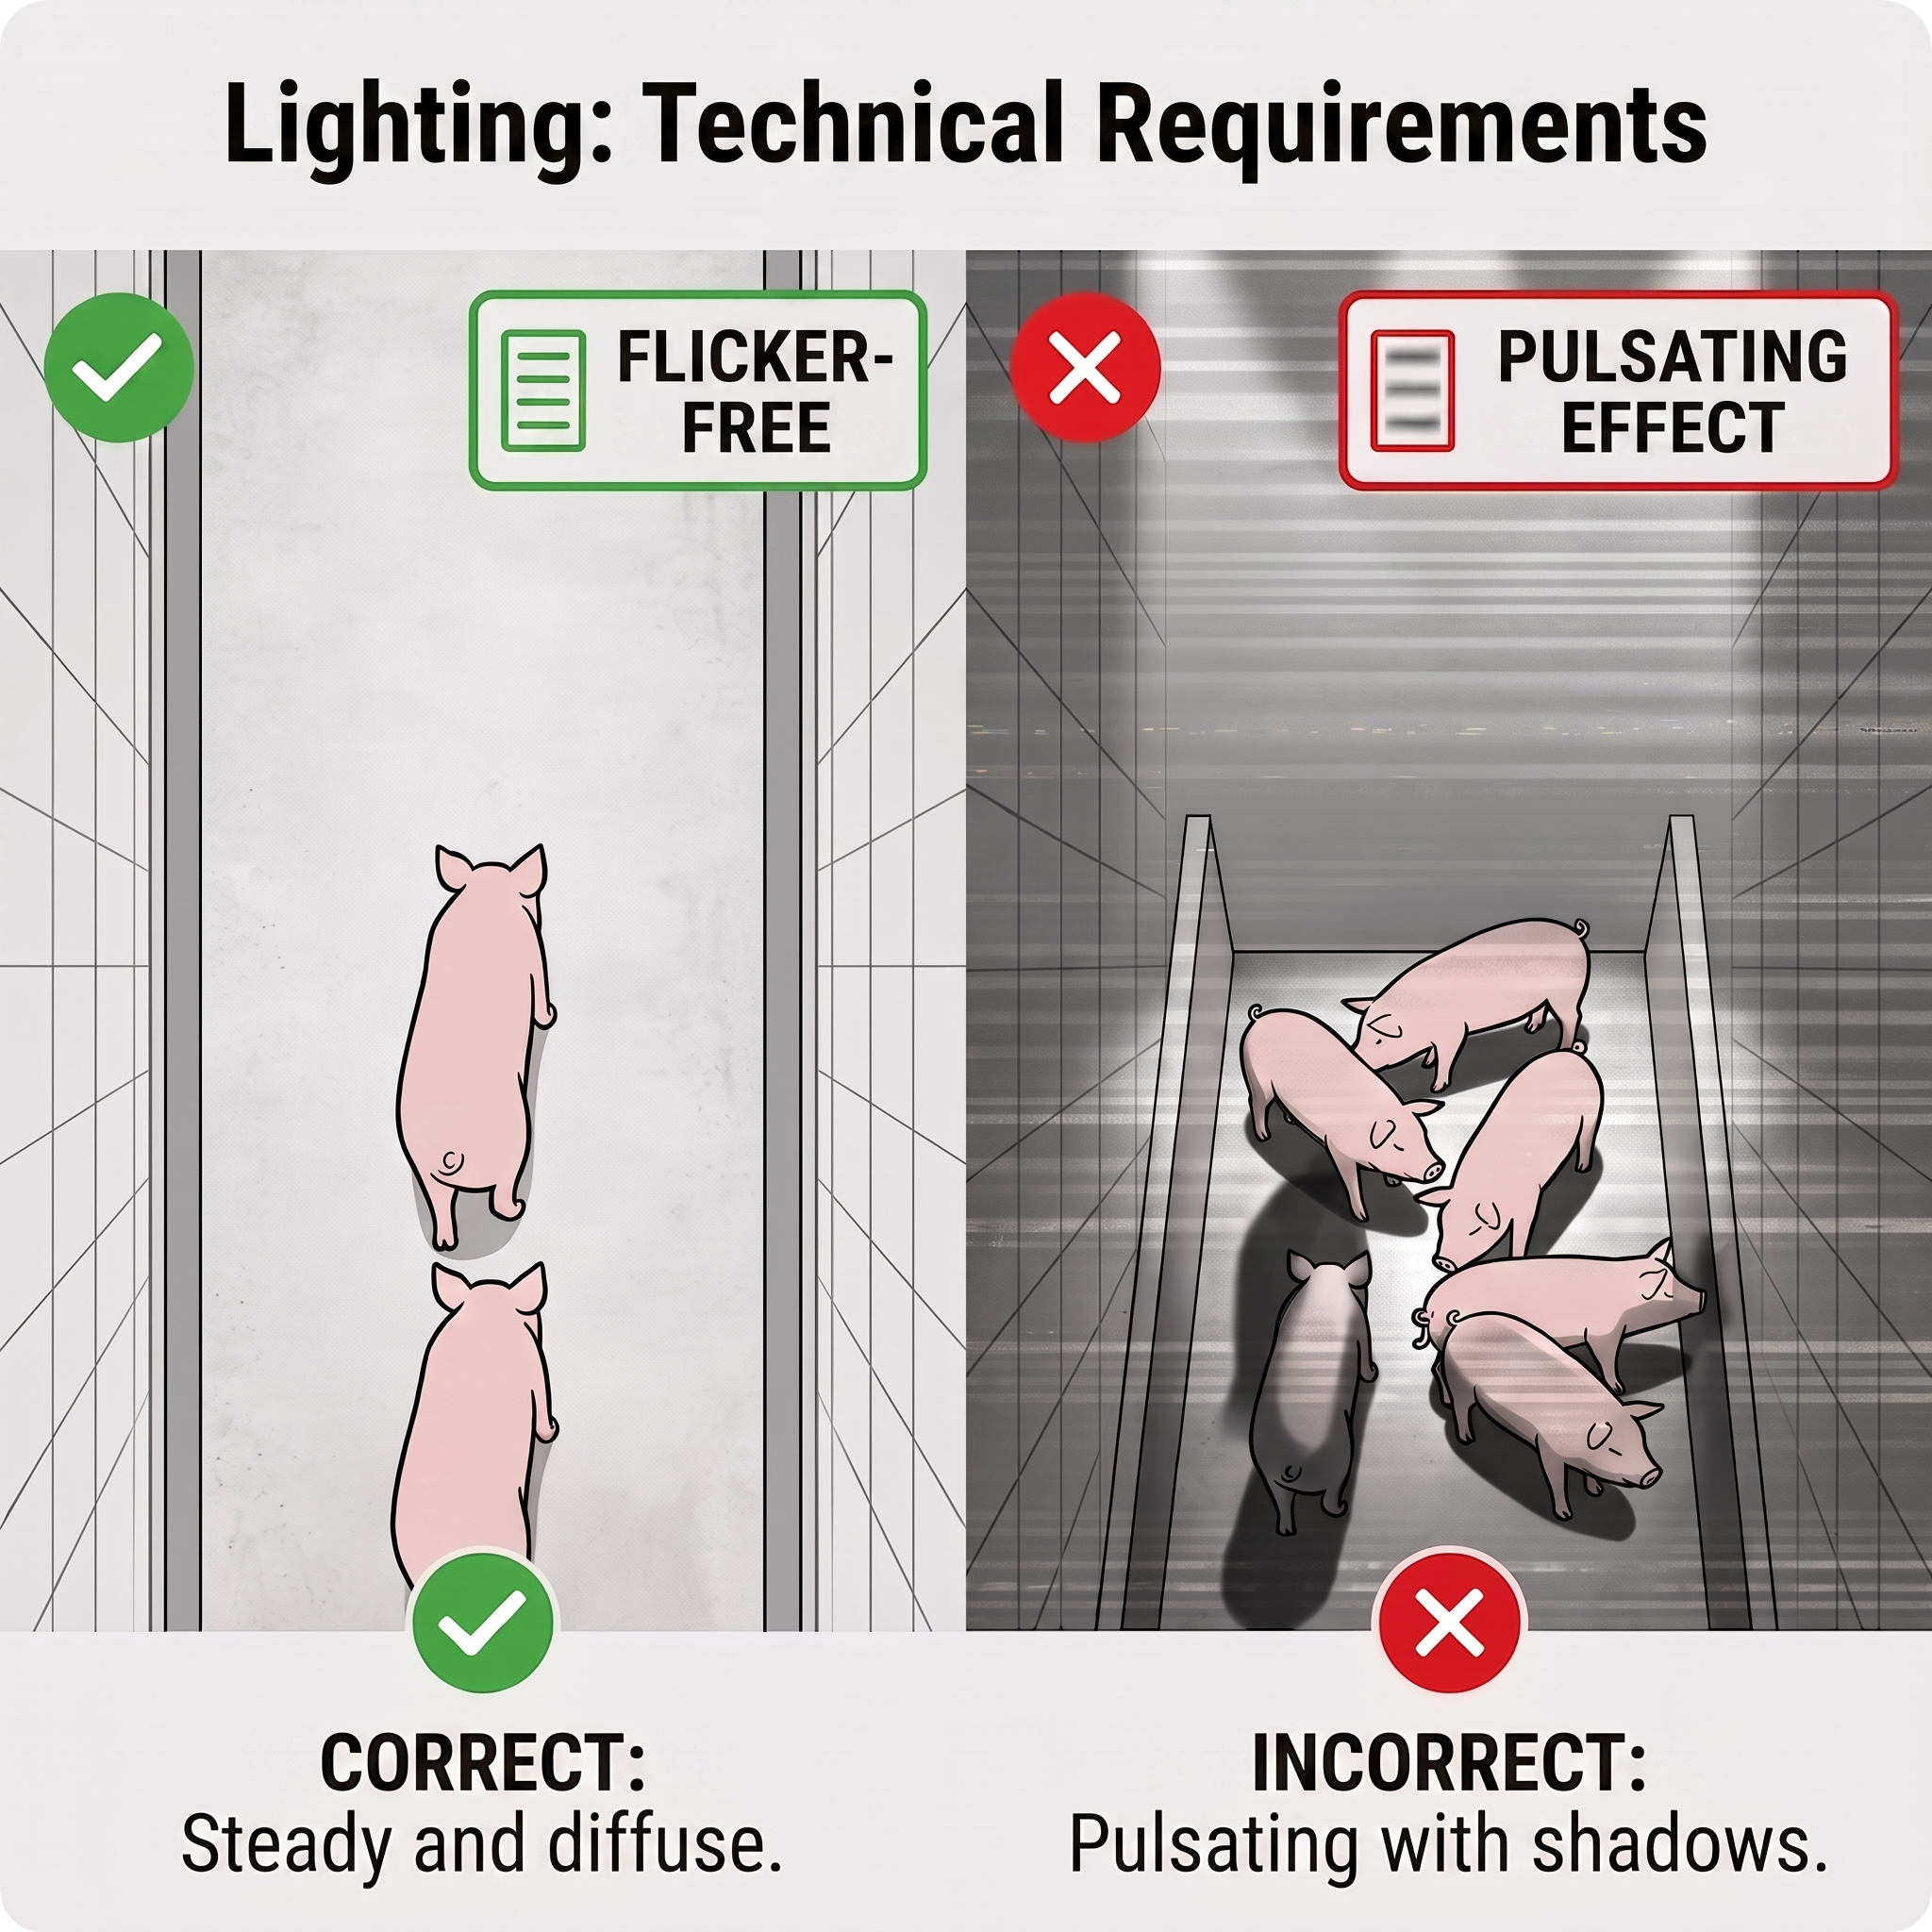
- No sharp shadows or glare: Avoid places where direct sunlight comes in through the windows. Sharp rays of light create deep shadows that the system may interpret as another animal.
- Light intensity and type: Ensure even, diffused artificial lighting (at least 150–200 lux). If you are installing a dedicated LED illuminator for the camera, mount it as close to the camera as possible (or use a camera with a built-in IR illuminator) so that the shadow cast by the pig is directly beneath it, rather than beside it.
- Frequency: Use “flicker-free” LED lights to ensure a smooth video image.
4. Mounting and Wiring in Pig Barn Conditions
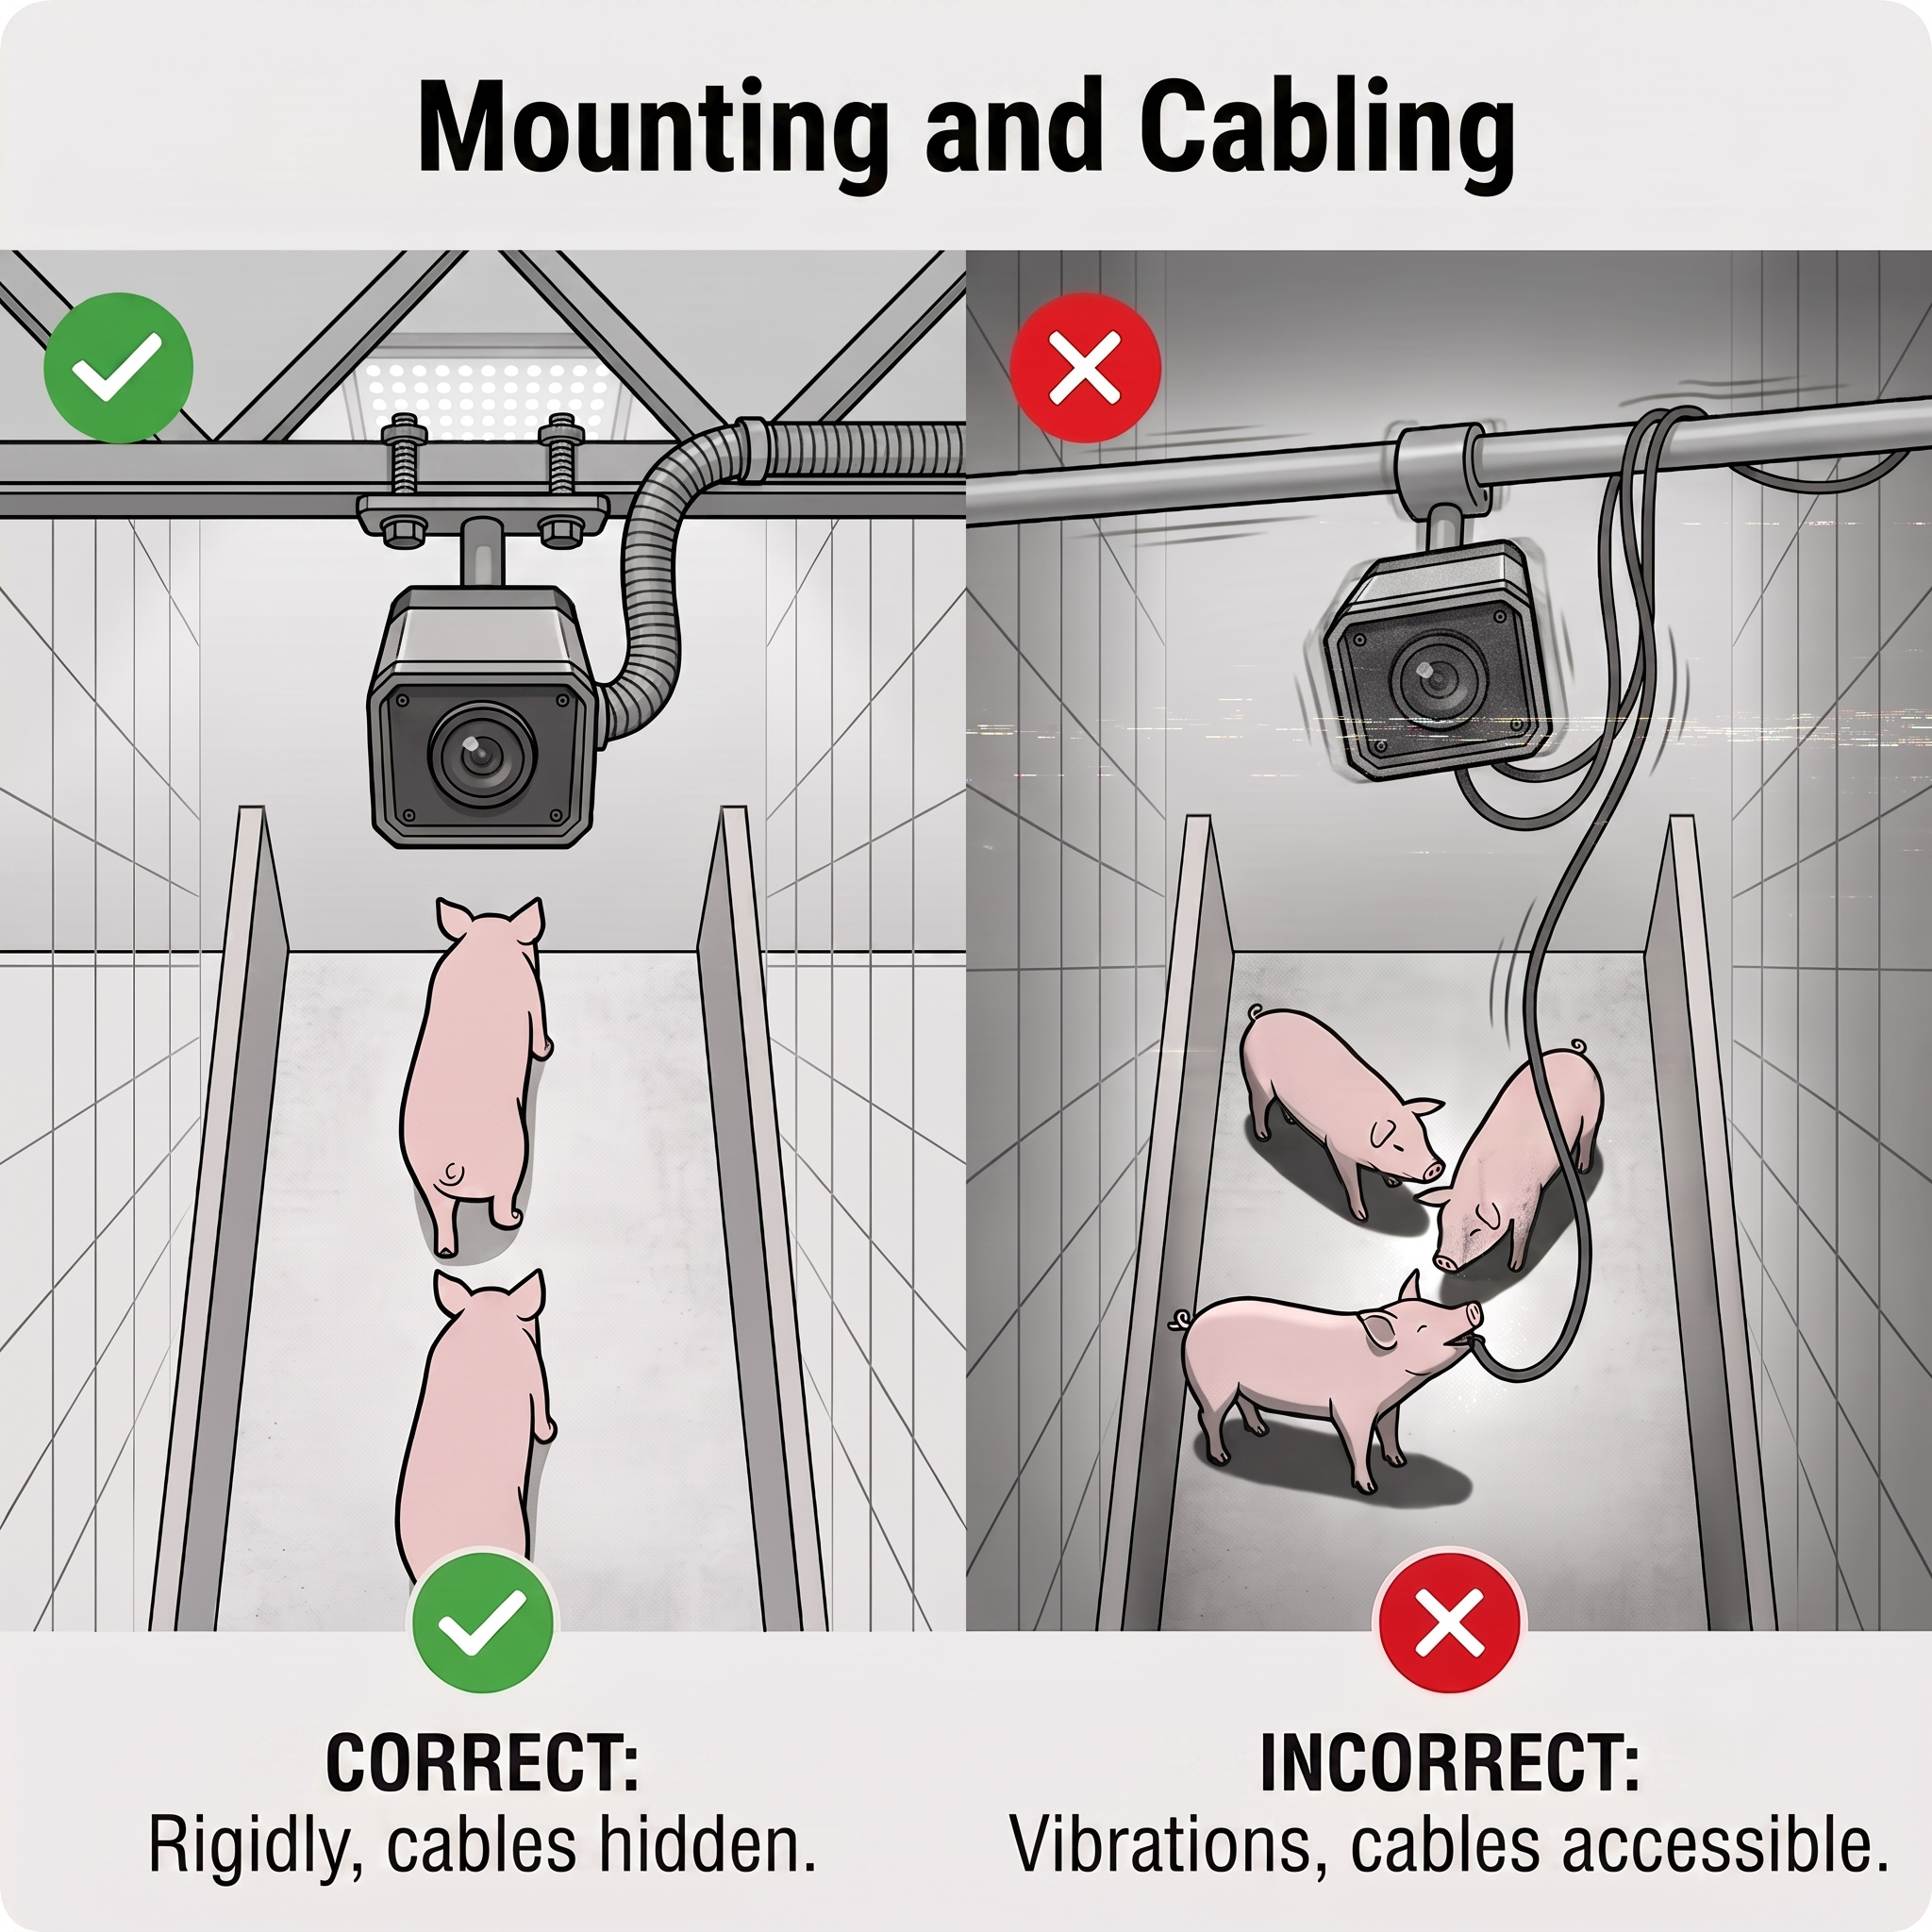
- Stability: Mount the camera to rigid structural elements of the building (e.g., concrete slab, thick beams). Do not mount the camera on ventilation ducts or loose frames—vibrations cause motion blur, which prevents accurate counting.
- Cable Protection: All signal and power cables (e.g., PoE twisted-pair cables) must be routed through airtight PVC conduit (so-called “Peszel” conduit). This will protect them from moisture, ammonia, and rodents. The cables must be kept completely out of reach of animals.
- Waterproofing: Make sure the cable glands on the camera housing are tightened securely.
Connecting the Cables to the Device
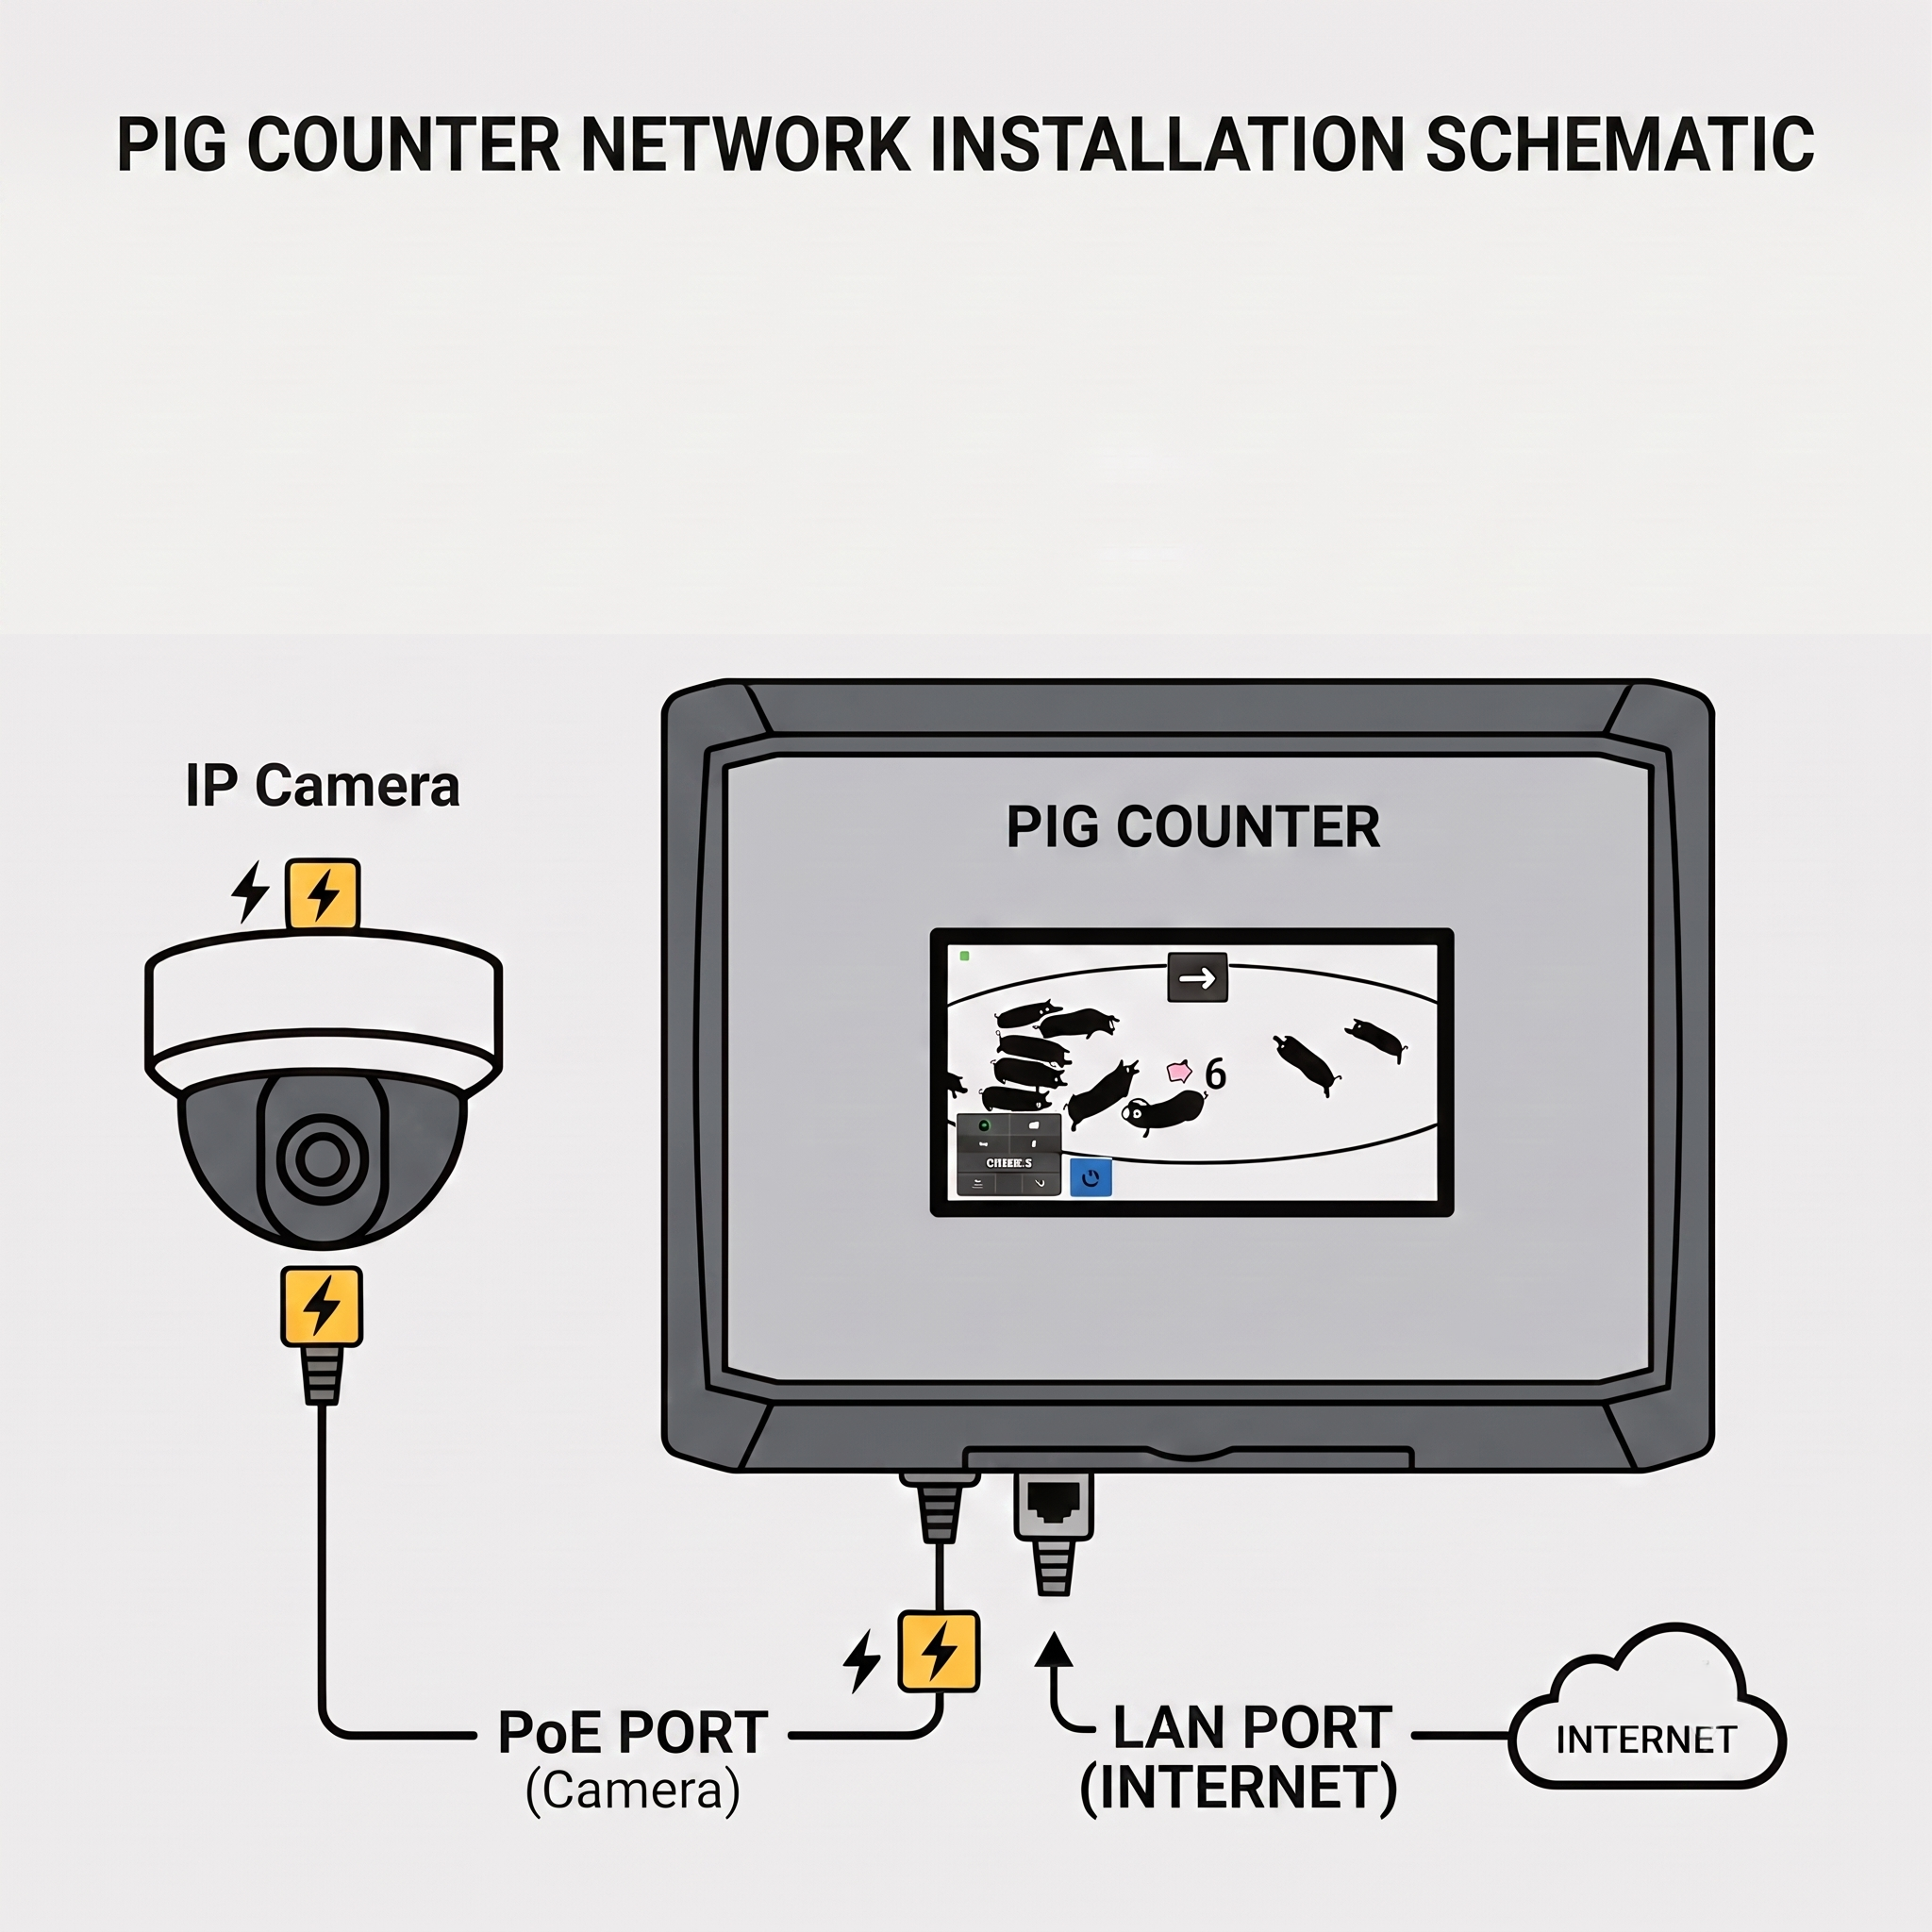
Connecting the camera to the device
- Open the device enclosure to access the communication panel.

- Route the Ethernet cable from the camera into the Pig Counter enclosure through the cable glands.
- Plug the cable into the port on the switch labeled PoE (Power over Ethernet) (The far right RJ45 port).
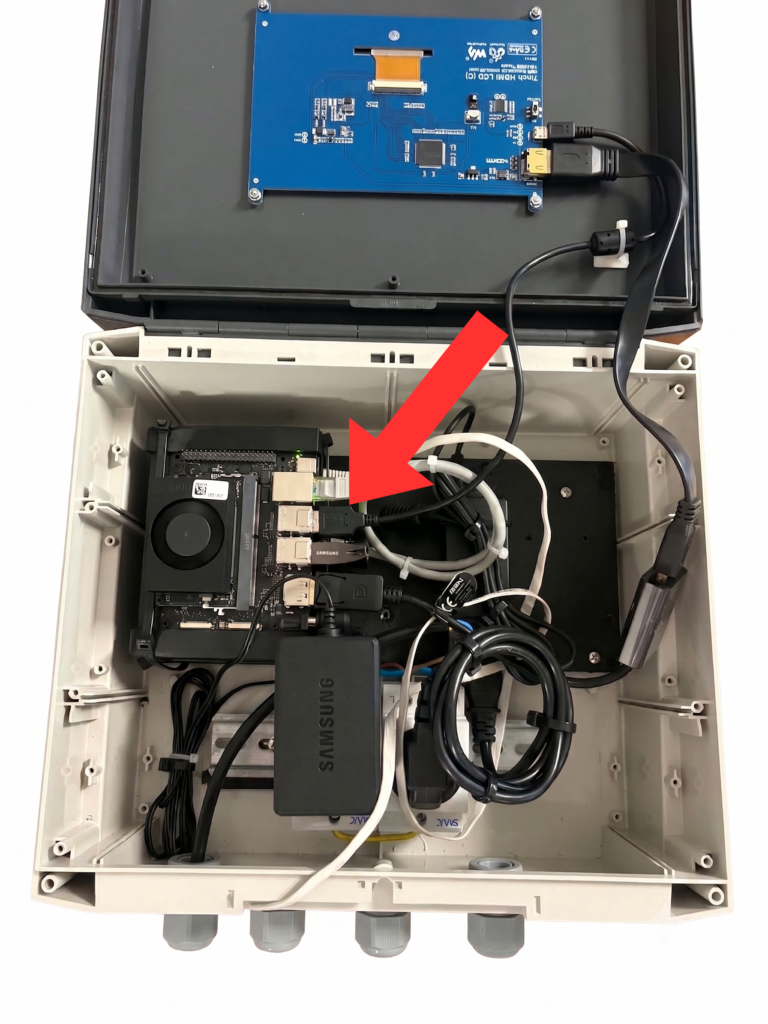
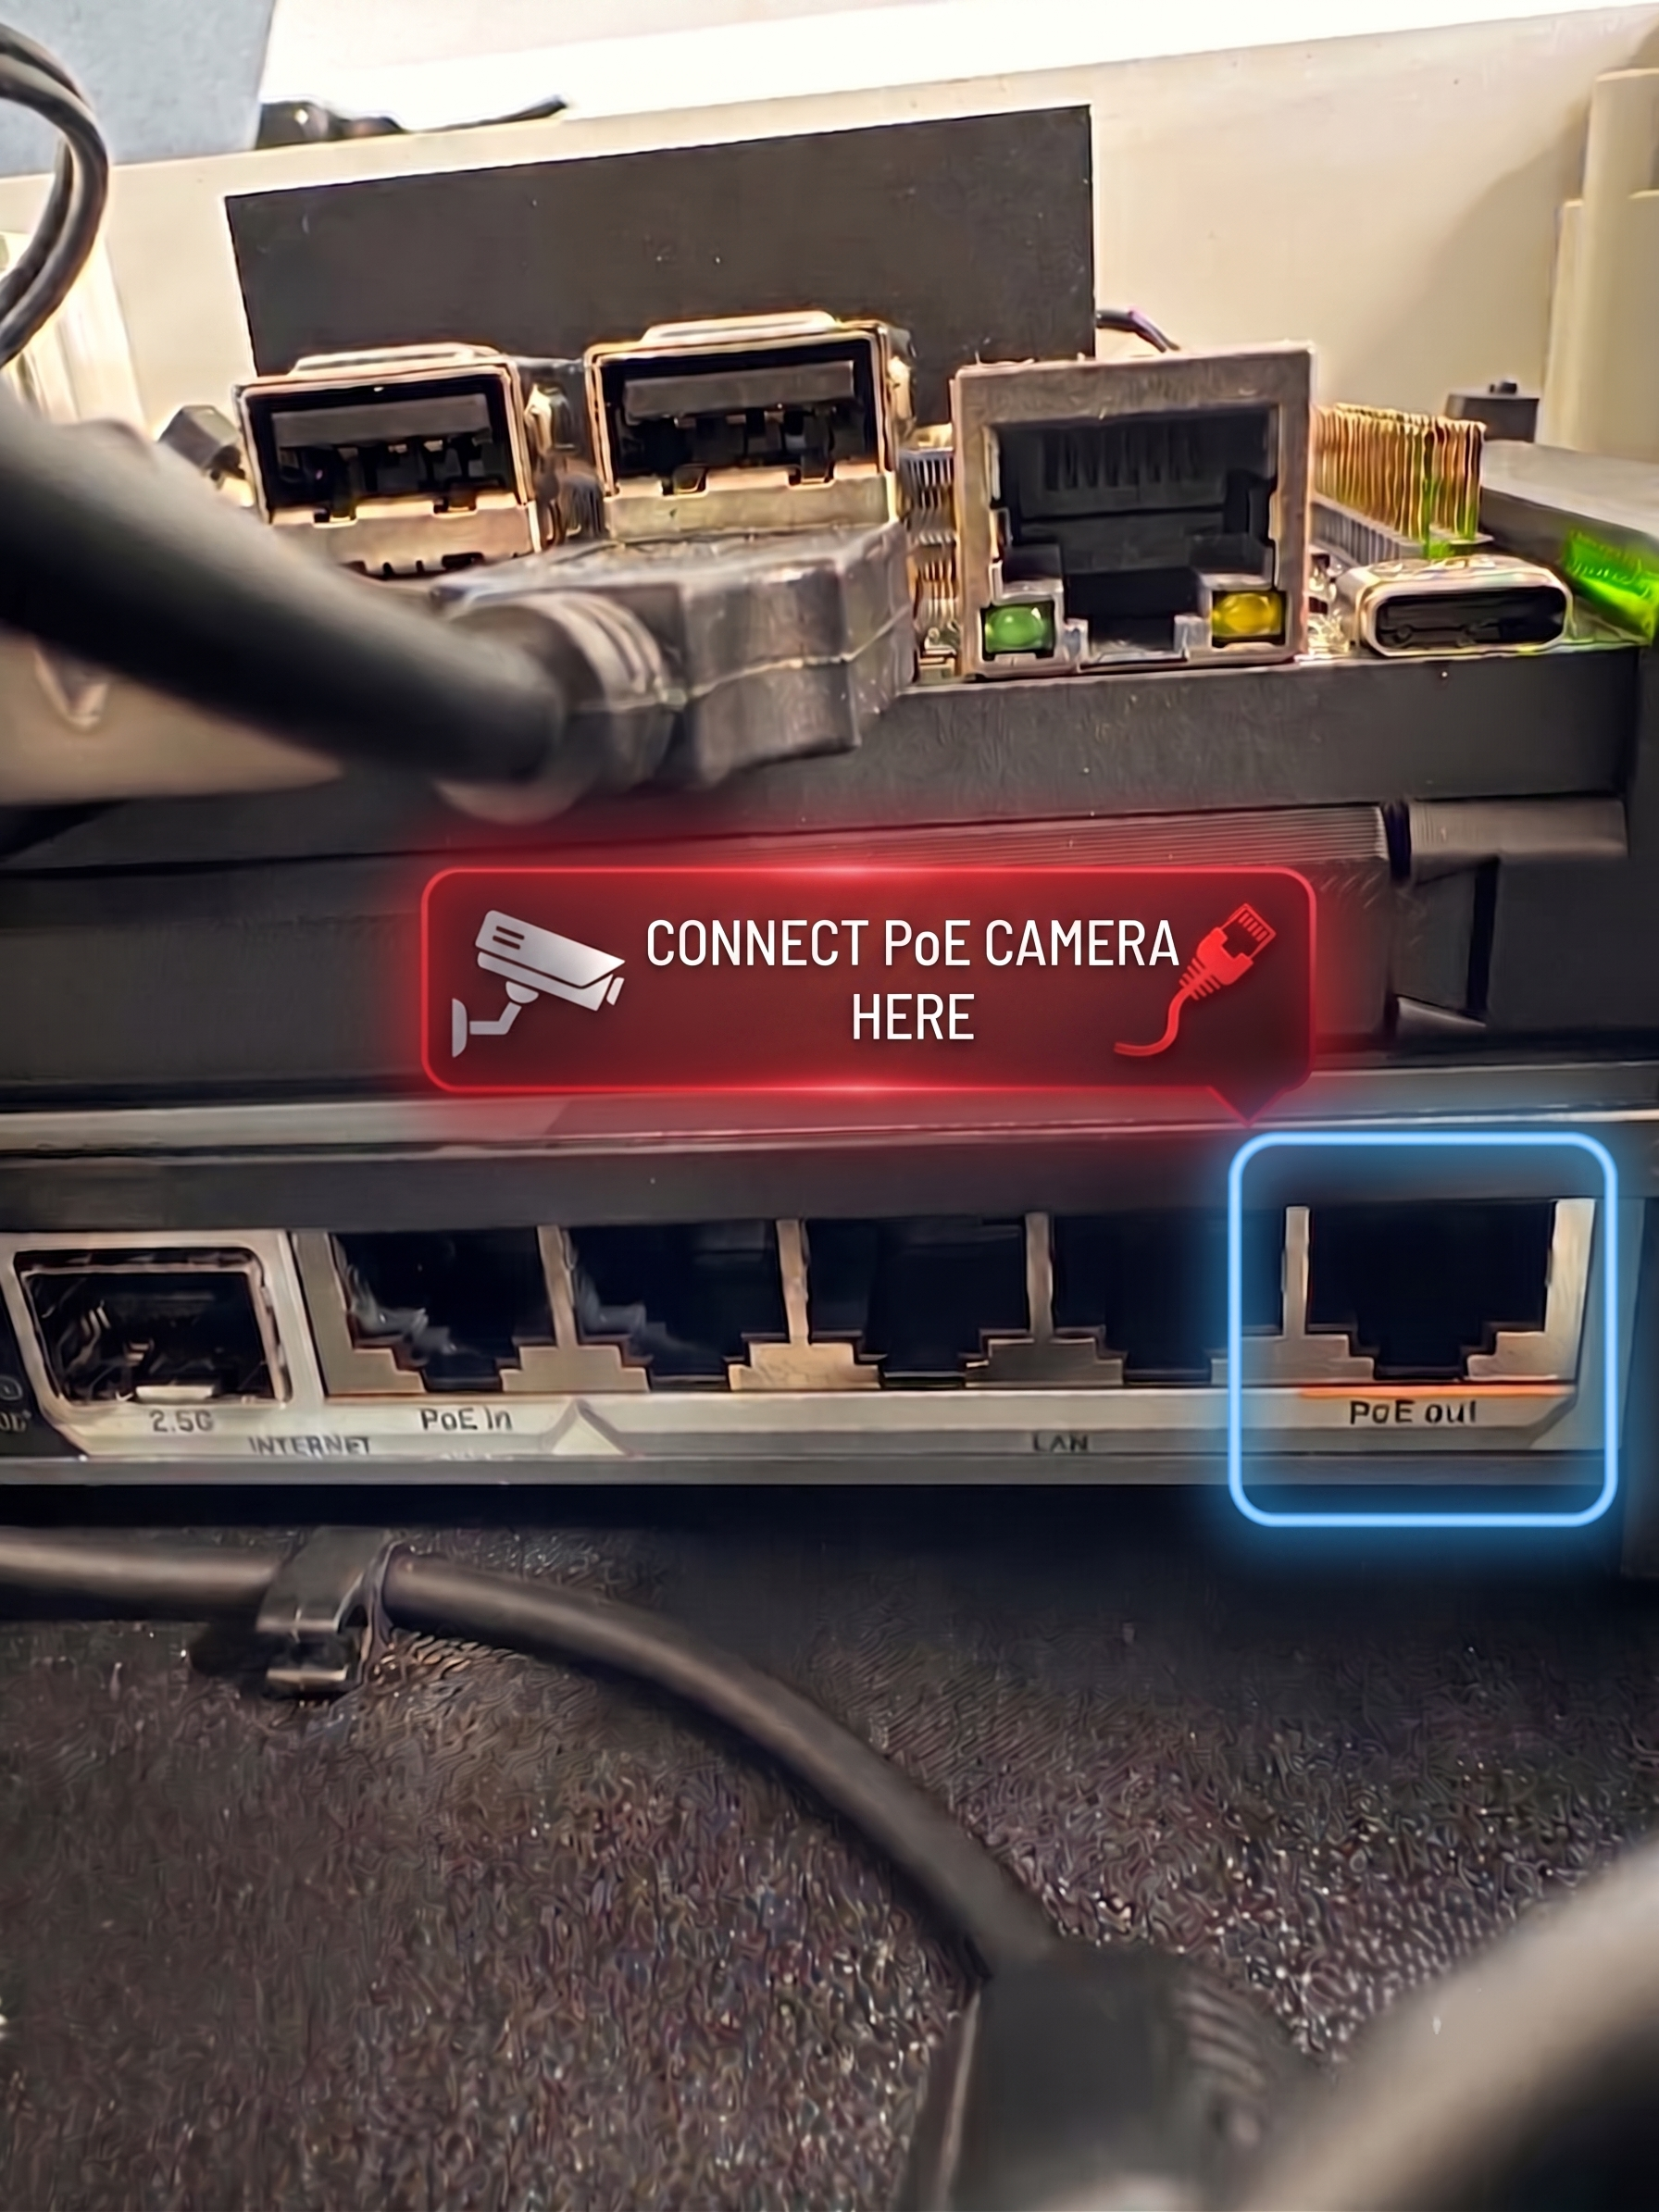
- Make sure the plug is firmly seated in the socket (you’ll hear a distinct “click”).
Internet Connection
This step is required only if you intend to upload data from the device to Fetura Cloud. If you plan to run Pig Counter locally only, you can skip this step.
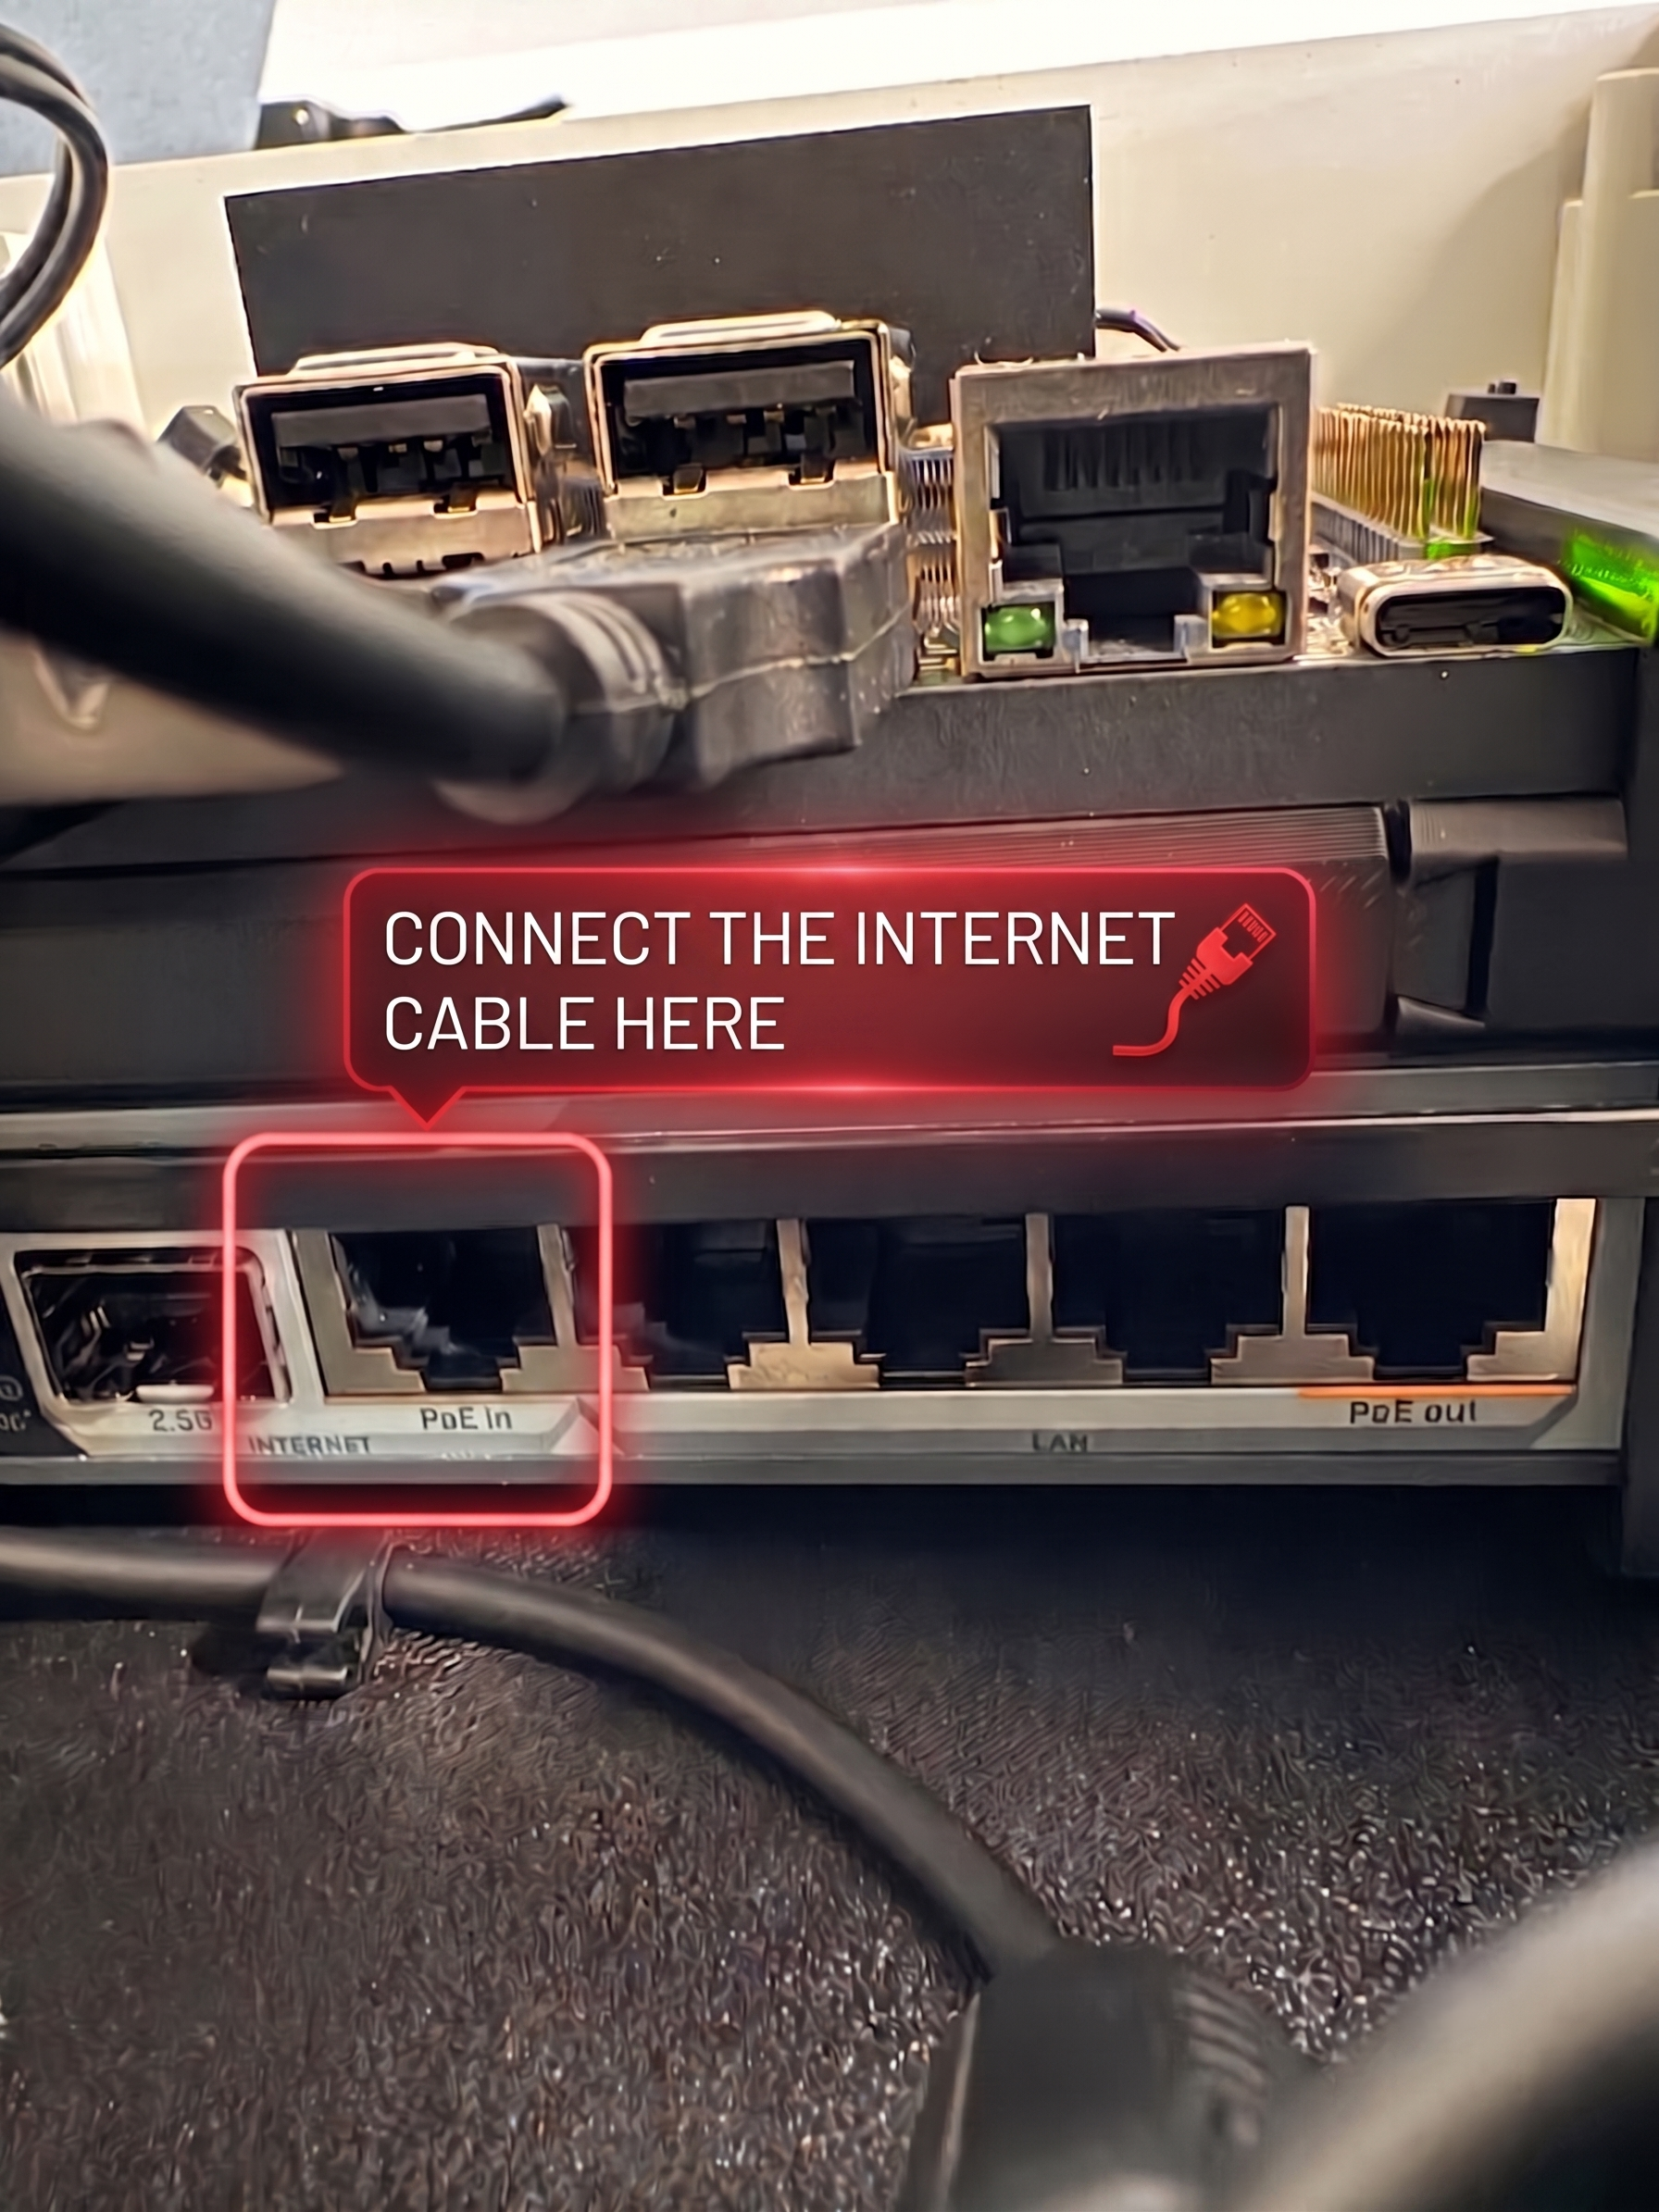
- Run the Ethernet cable with Internet access (LAN) into the case.
- Plug the connector into the leftmost RJ45 port on the switch.
Connecting the Power Supply
Do not turn on the power until you have made sure that the wires inside the device are properly connected.
- Check to make sure the cables connected in the previous steps are firmly connected.
- Plug the power cord into an outlet.
- The device will start up automatically.
Congratulations! Now that your device is up and running, you can proceed to the setup.


