
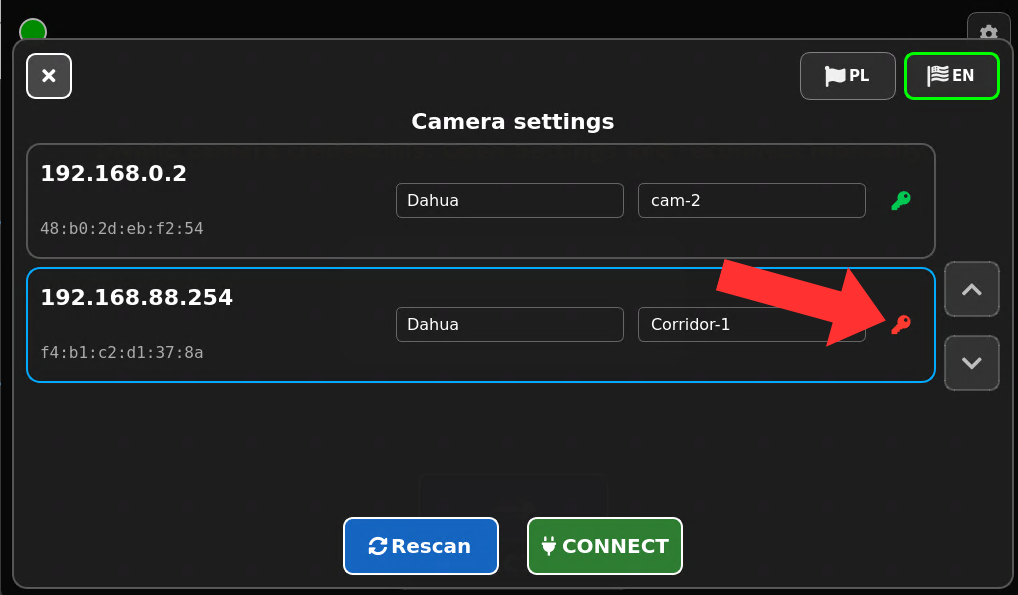
A red key icon may appear on the Camera Settings screen next to the selected camera.
What does the red key mean?
A red key indicates that access to the camera has been blocked and the device cannot connect to it.
What should you do?
To restore the connection, reconfigure the camera according to the manufacturer’s instructions.
1. Check the camera’s manufacturer and model
First, determine the brand and model of the camera connected to the device. You can find this information on the label affixed to the camera housing, on its packaging, or in the documentation provided at the time of purchase.
The manufacturer and model are required because the process for unlocking access and reconfiguring the camera may vary depending on the camera.
2. Open the camera’s user manual or the manufacturer’s support page
Once you have identified the manufacturer and model, you need to find the manual specifically for the camera you are using. You can use a printed manual, an electronic document, or the manufacturer’s technical support website.
In the manual, look for information about locked accounts, failed login attempts, changing your password, or restoring access to the camera.
3. Unlock access to the camera according to the manufacturer’s instructions
Follow the steps described in the manufacturer’s manual. Depending on the model, you may need to wait a certain amount of time, restart the camera, log in to its configuration panel, or change the password.
Do not repeatedly try to connect before access is unlocked. Subsequent failed attempts may extend the lockout period.
4. Reconfigure the camera’s login credentials
After unlocking access, make sure you know the current username and password for the camera. If the password was changed during the unlocking process, use the new password.
Enter your login information exactly as shown, paying attention to uppercase and lowercase letters, numbers, and special characters.
5. Return to the “Camera Settings” screen
Once you have finished configuring the camera, return to the device and open the Camera Settings screen.
Find the camera in the list that has a red wrench icon next to it.
6. Tap the red wrench icon
Click the red key icon next to the selected camera. This will open a window where you can re-enter the information needed to access the camera.
7. Enter your current username and password for the camera
Enter your current username and password in the appropriate fields. These should be the same credentials you use to log in directly to the camera.
Before submitting, please check that the information has been entered correctly and that there are no extra spaces at the beginning or end of your username or password.
8. Press the “CONNECT” button
After entering the data, press the CONNECT button. The device will try again to connect to the camera.
If the camera has been properly unlocked and configured, access will be restored, and the red key icon will no longer be displayed.
The red key is still displayed
If the red wrench icon is still visible after reconfiguring, check the following:
- Is the camera turned on and connected to the network,
- Was the correct username and password entered,
- Has camera access been unlocked,
- Are the device and the camera connected to the same network?


