This tutorial will describe how to configure the SK-3 and SK-4 climate controllers.
Moving to the configuration tab
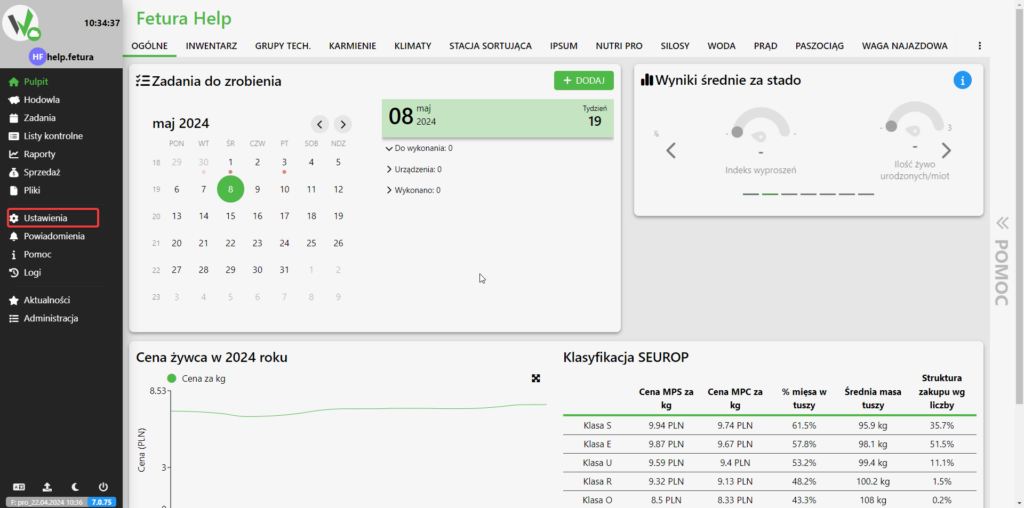
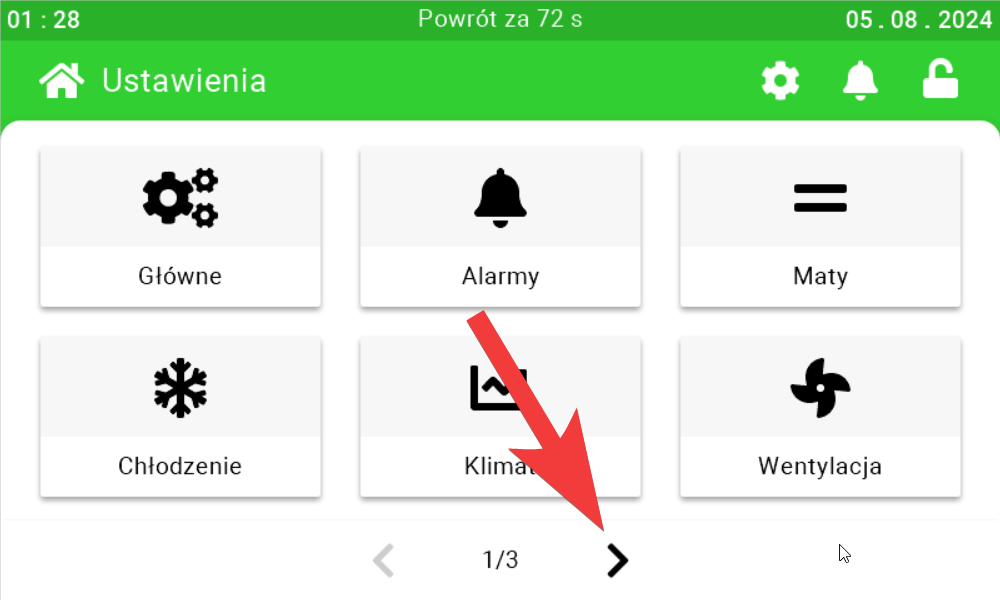
After logging in, go to the “Settings” tab.
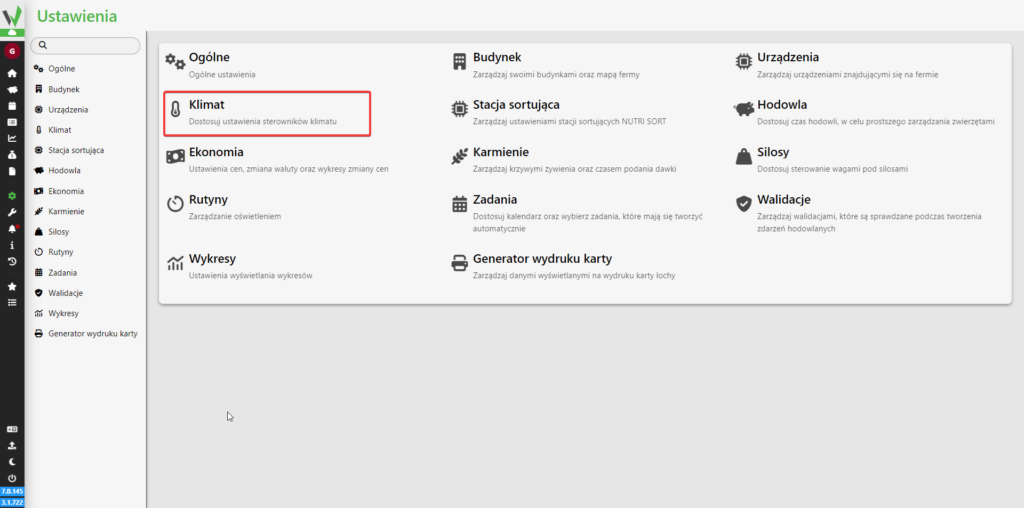
Then go to the “Climates” tab.
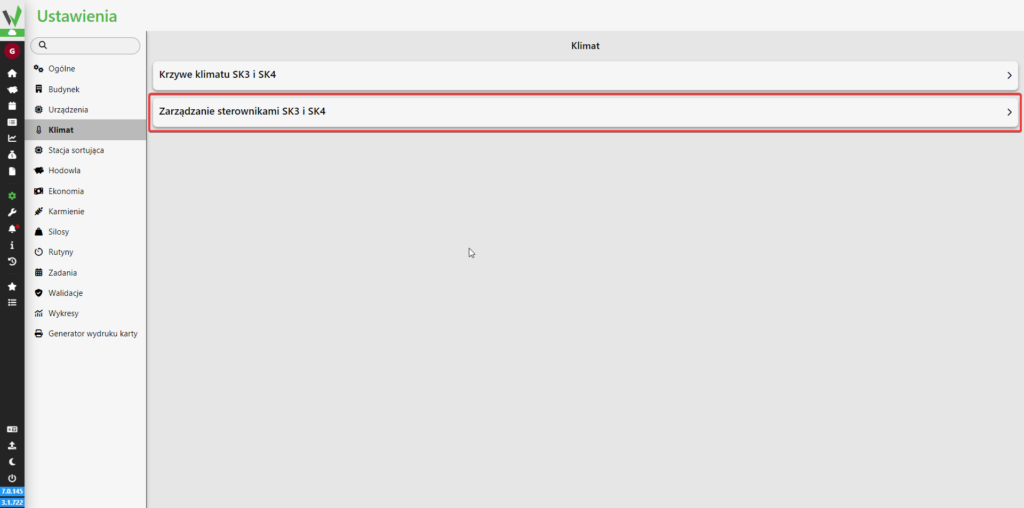
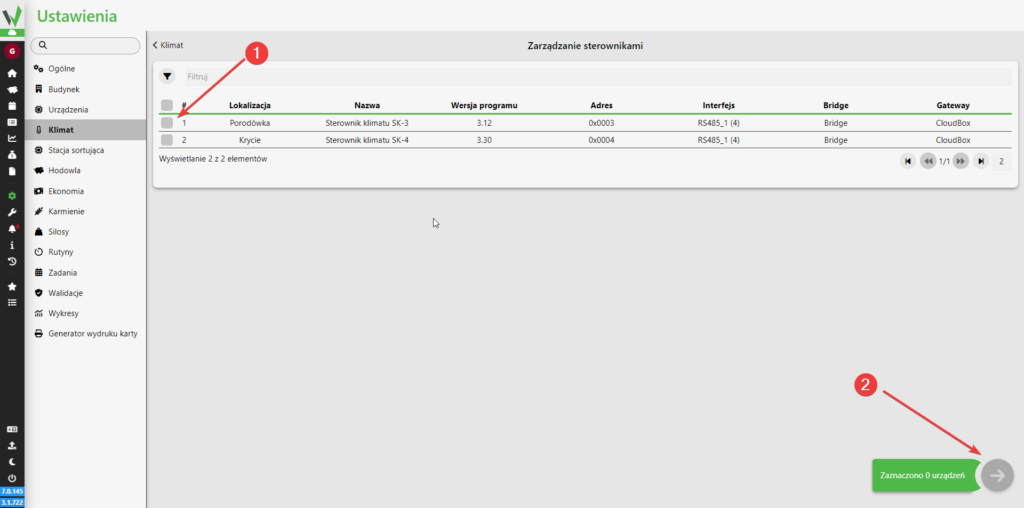
Then go to the “SK3 and SK4 driver management” tab.
In the next step, select which drivers you want to configure [1] and proceed [2].
You can only select controllers of the same type, SK-3 and SK-4 cannot be selected at the same time!
Configuration of the climate controller
After selecting the drivers, you will find yourself in a view with all the driver settings.
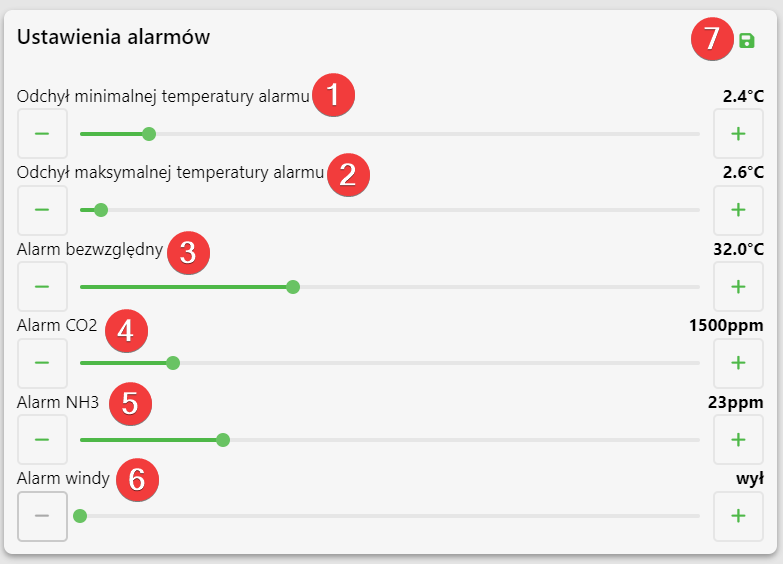
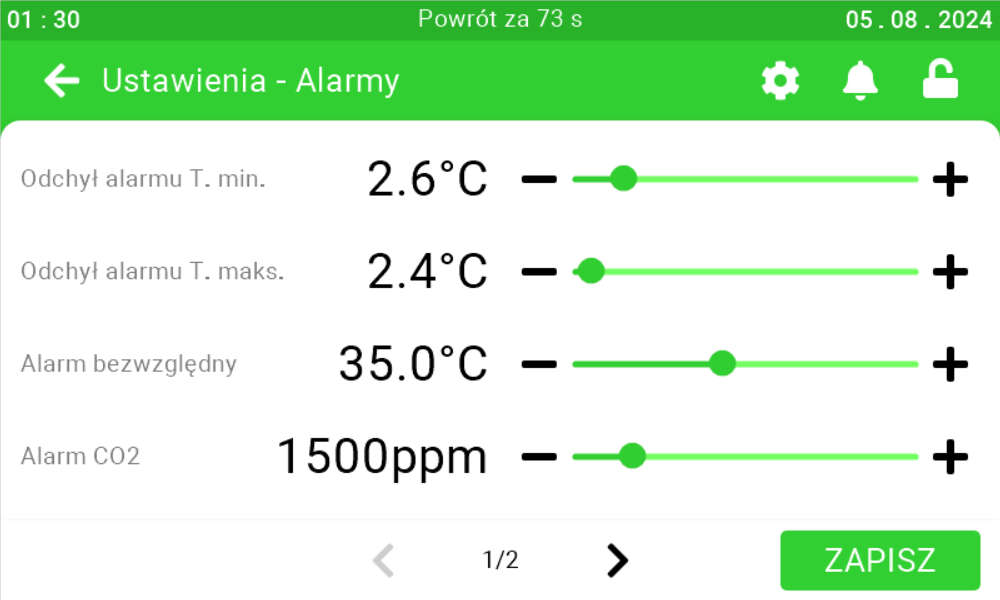
Alarm settings
On this panel it is possible to set when an alarm will be triggered in case of detecting a temperature lower than the desired temperature by a certain number of degrees [1], in case of detecting a temperature higher than the desired temperature by a certain number of degrees [2],
at which temperature an alarm is always to be reported [3], when detecting a concentration of carbon dioxide higher than a certain concentration of molecules per million [4],
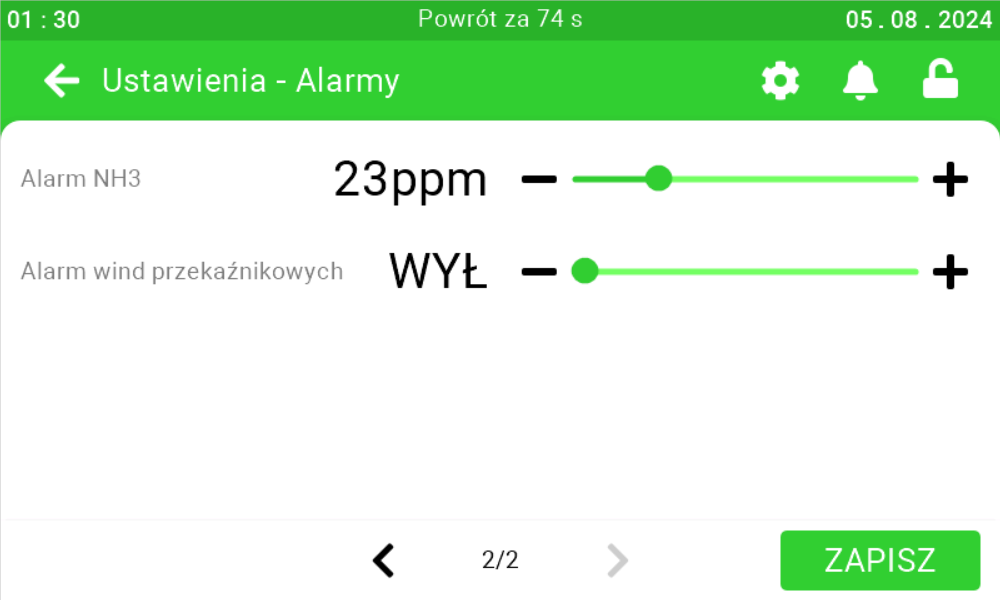
when detecting a concentration of ammonia higher than a certain concentration of molecules
per million [5]. In the case of SK-4, it is possible to set after what time of no change of elevator position an alarm will be reported [6]. After setting the parameters, click the save button [7].
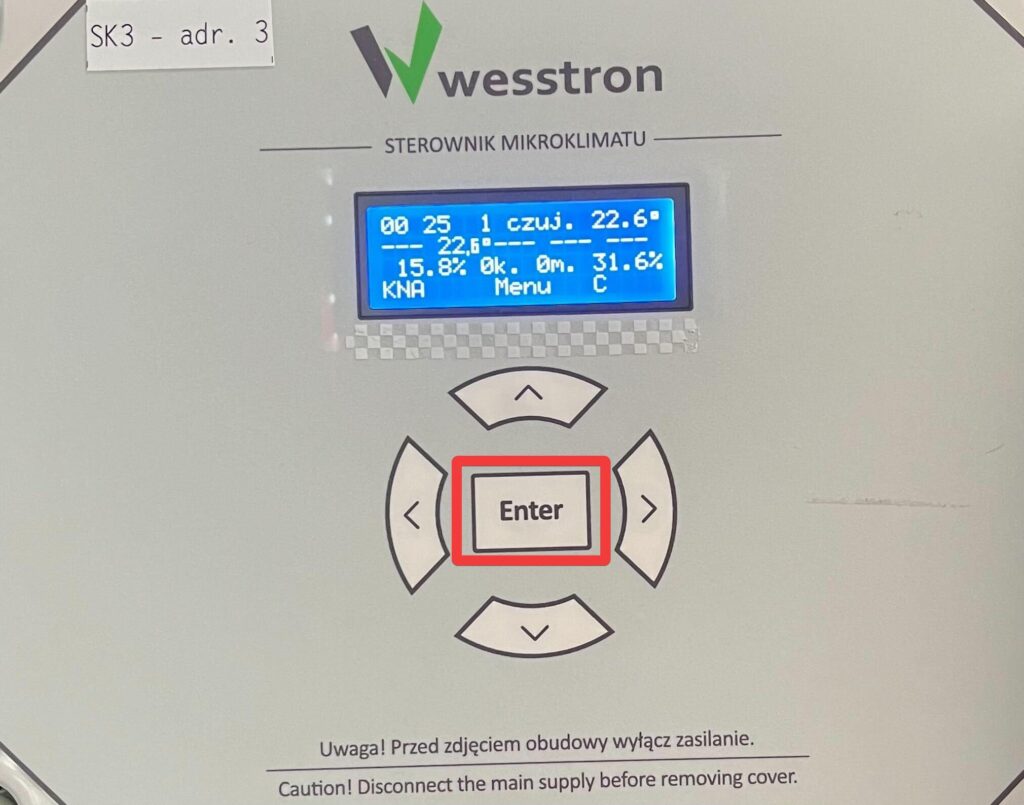
Alarm settings on the SK-3 controller
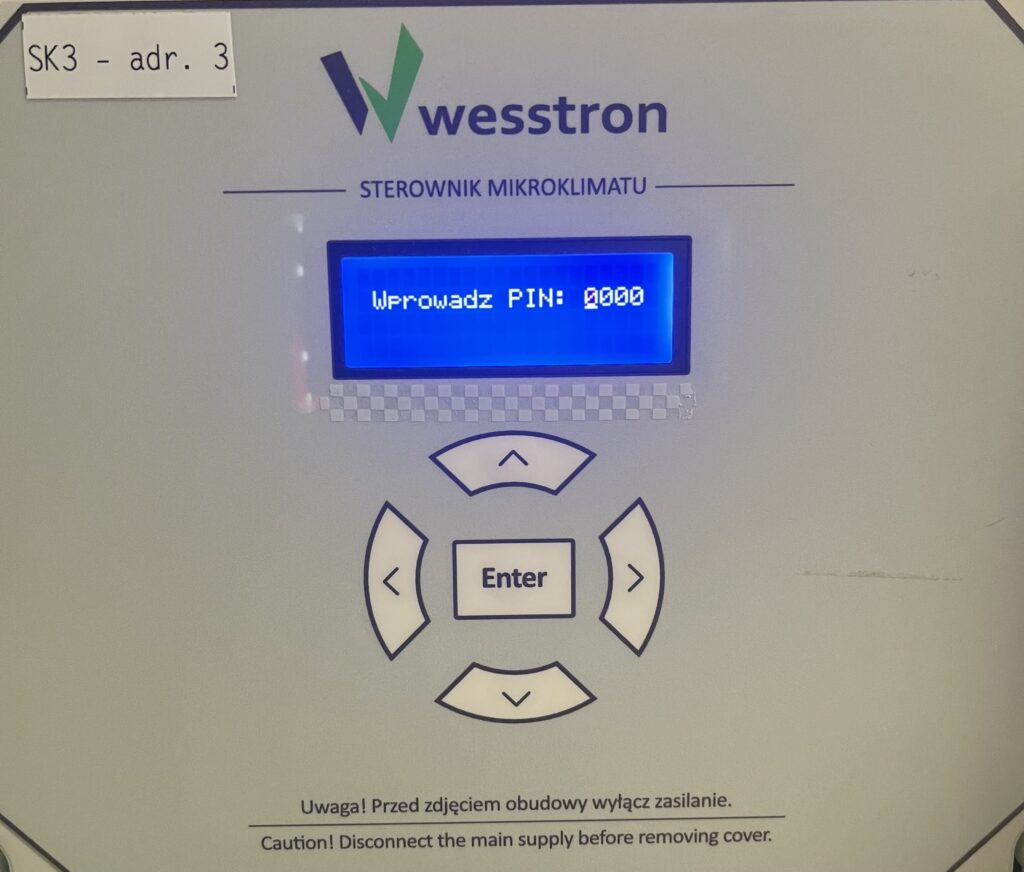
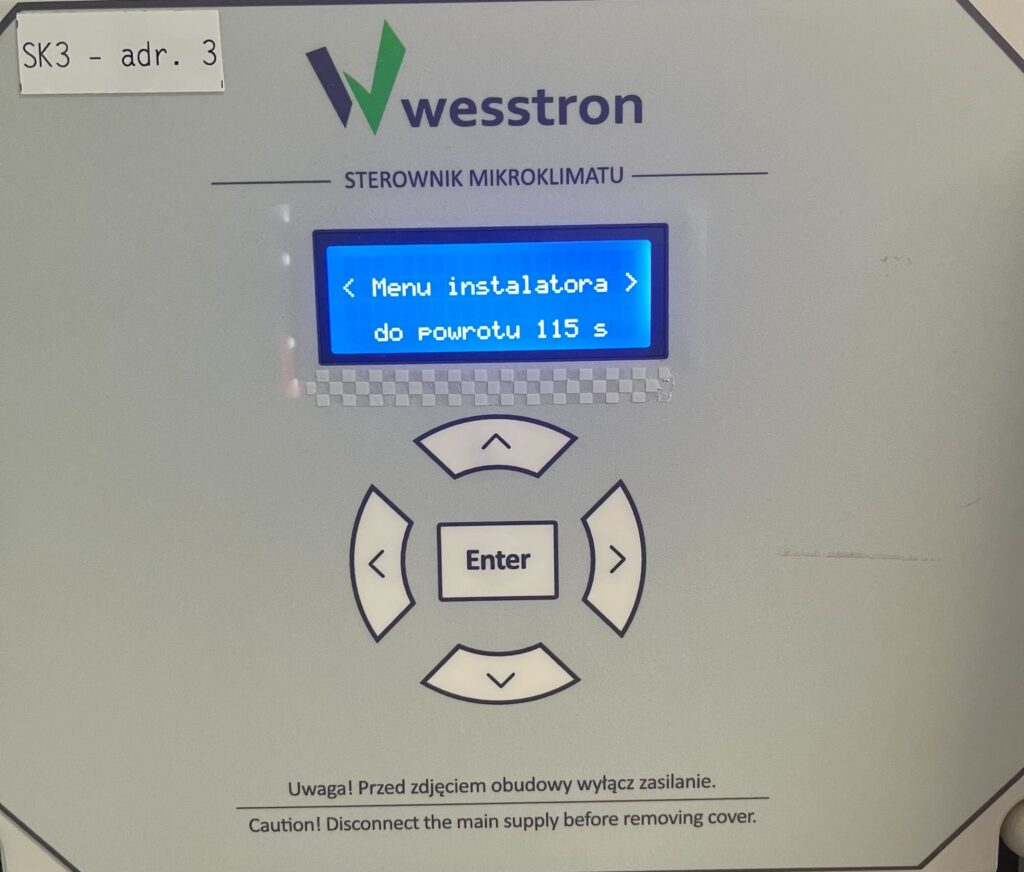
To directly set alarm settings on the controller, click the highlighted Enter button on the controller.
Then click the right arrow until the User Menu is visible.
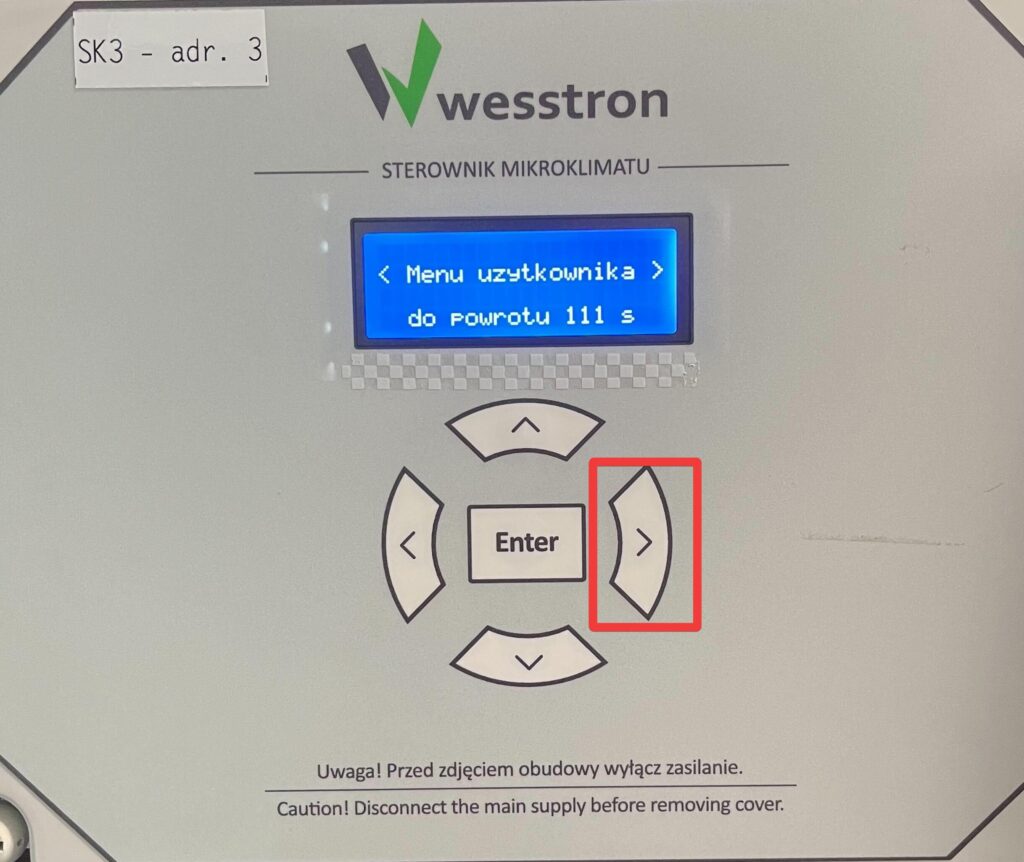
Click Enter again to enter the User Menu and use the left/right arrows to find the alarm parameters.
Minimum temperature alarm
Use the right arrow to find the min alarm deviation view .
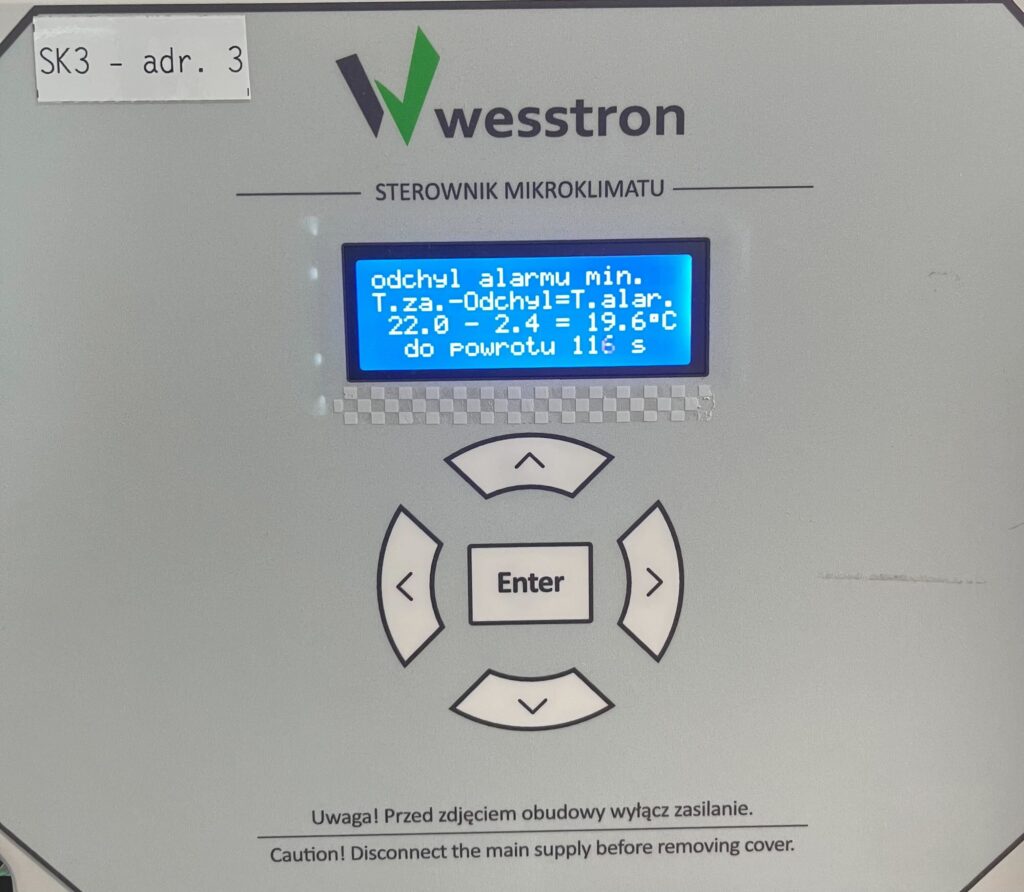
Use the down / up arrows to change the alarm notification threshold and click Enter to save it.

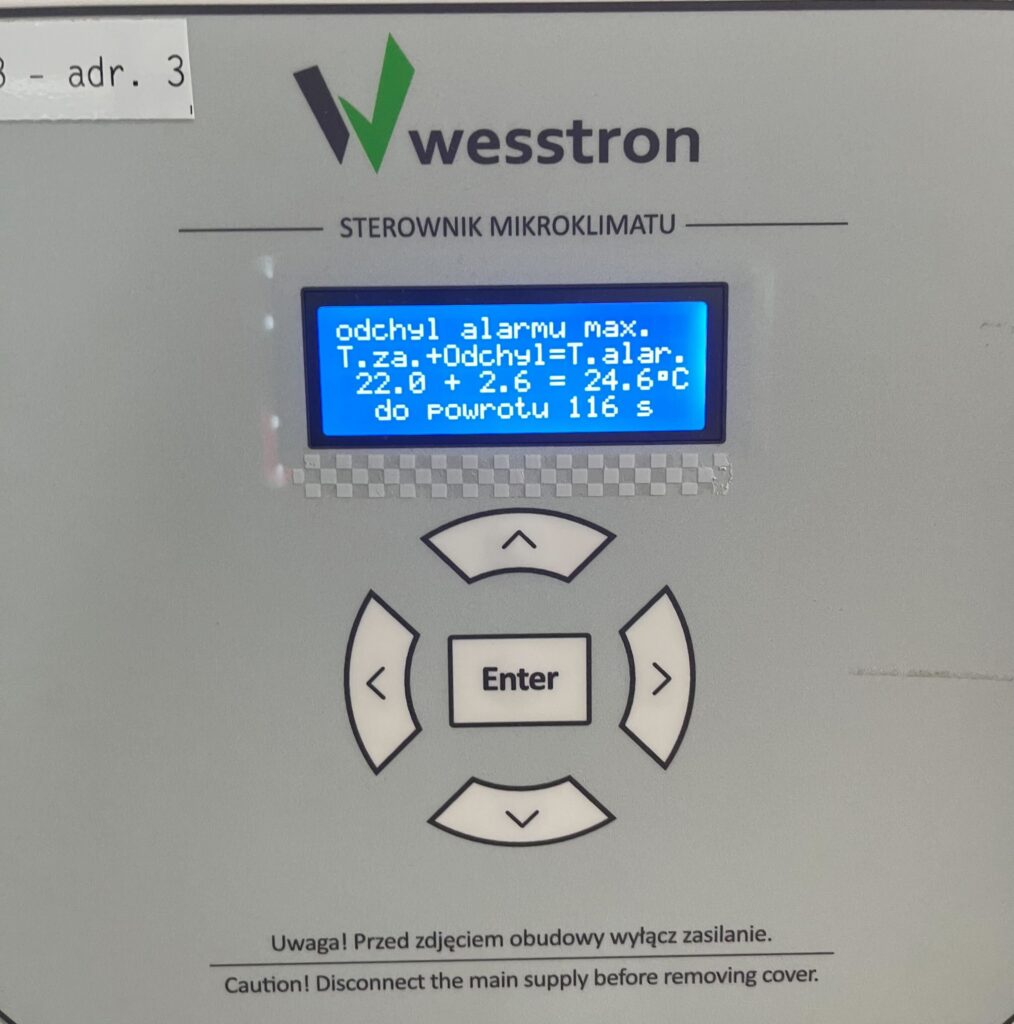
Maximum temperature alarm
Use the right arrow to find the max alarm deviation view and use the down / up arrows to change the alarm notification threshold. After making changes, click Enter.
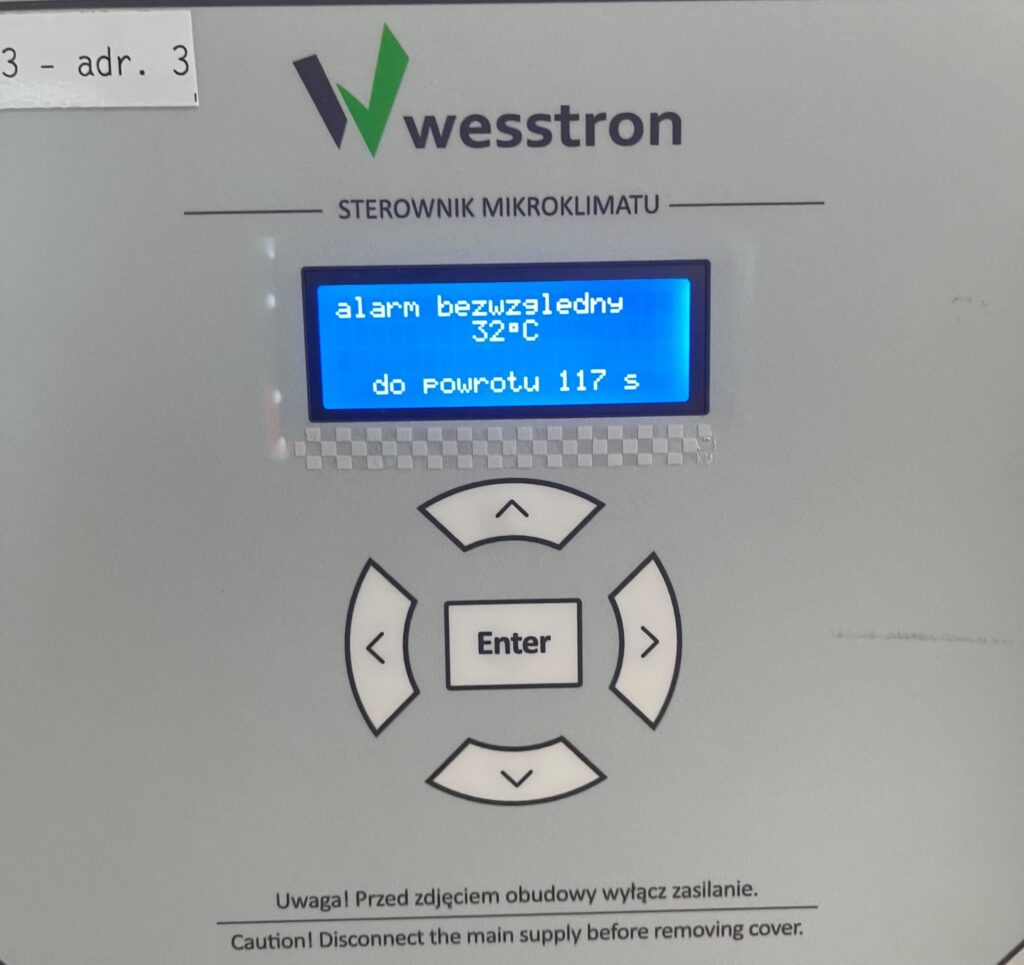
Absolute alert
Use the right arrow to find the absolute alarm view and use the down / up arrows to change the alarm notification threshold. After making changes, click Enter.
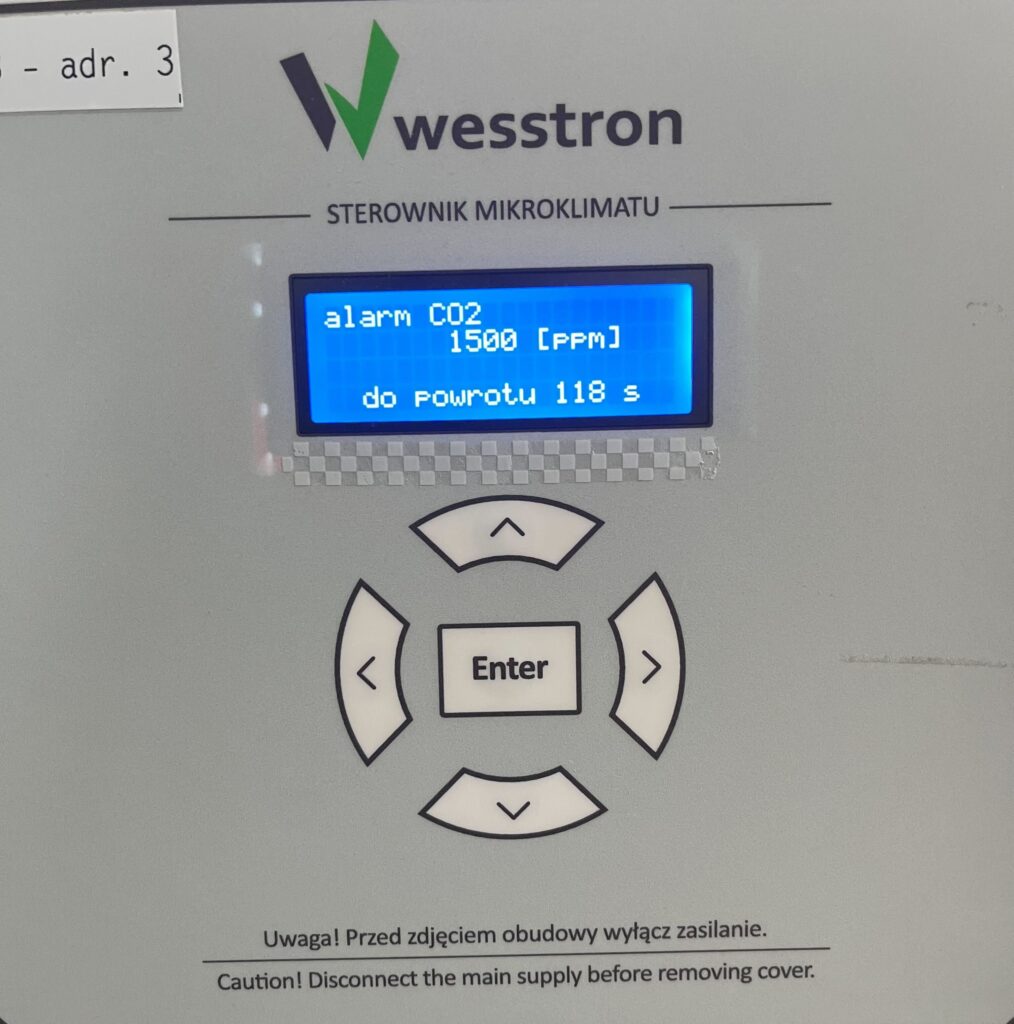
Too much carbon dioxide alarm
Use the right arrow to find the CO2 alarm view and use the down / up arrows to change the alarm notification threshold. After making changes, click Enter.
Exit menu
To exit the user menu after setting alarm thresholds, use the right arrow to find the Exit Menu view and click Enter, or click the left and right arrows at the same time.
Alarm settings on the SK-4 controller
In order to directly set alarms on the SK-4 controller, you need to log on the climate controller. To do this, click the highlighted item.
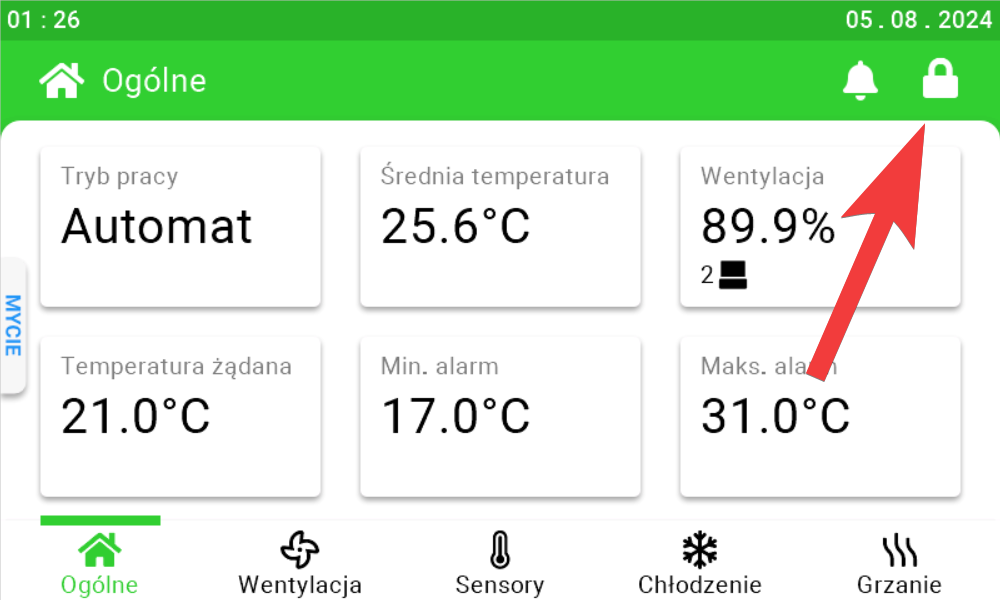
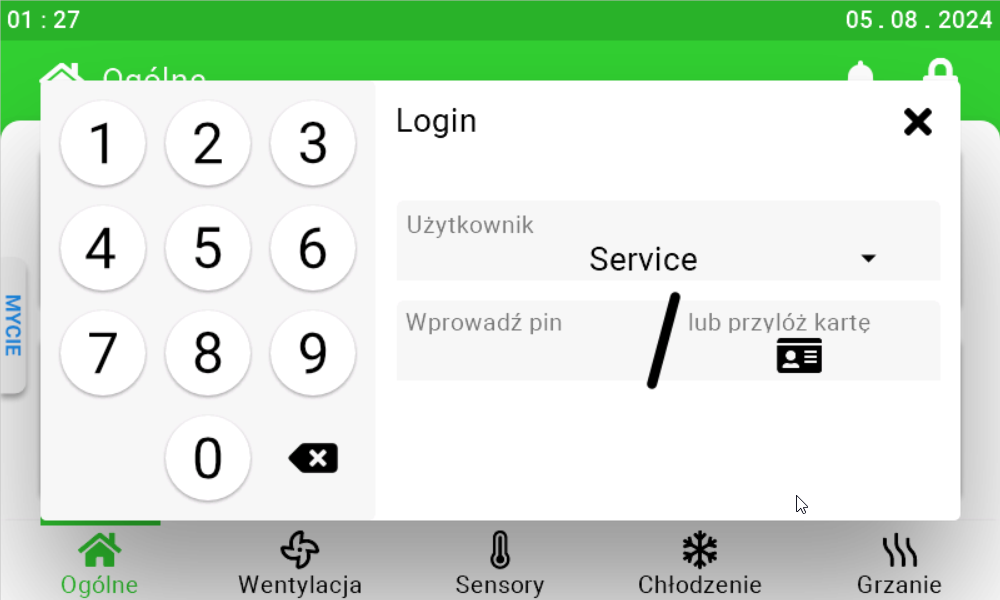
Enter the PIN you set, or swipe your card to log in.
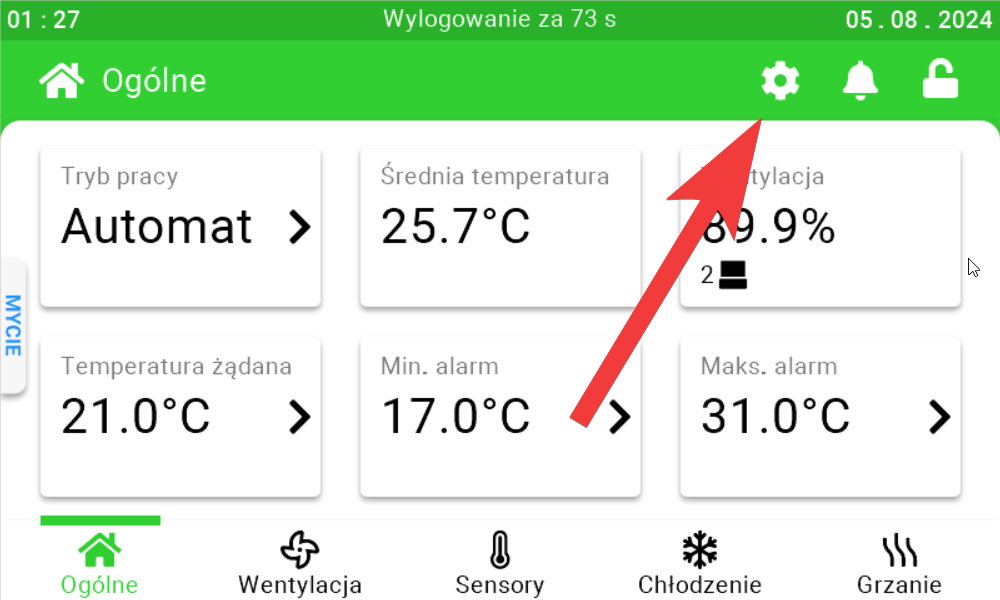
Once you have logged in correctly, a gear icon will appear. Click it to go to the climate controller settings.
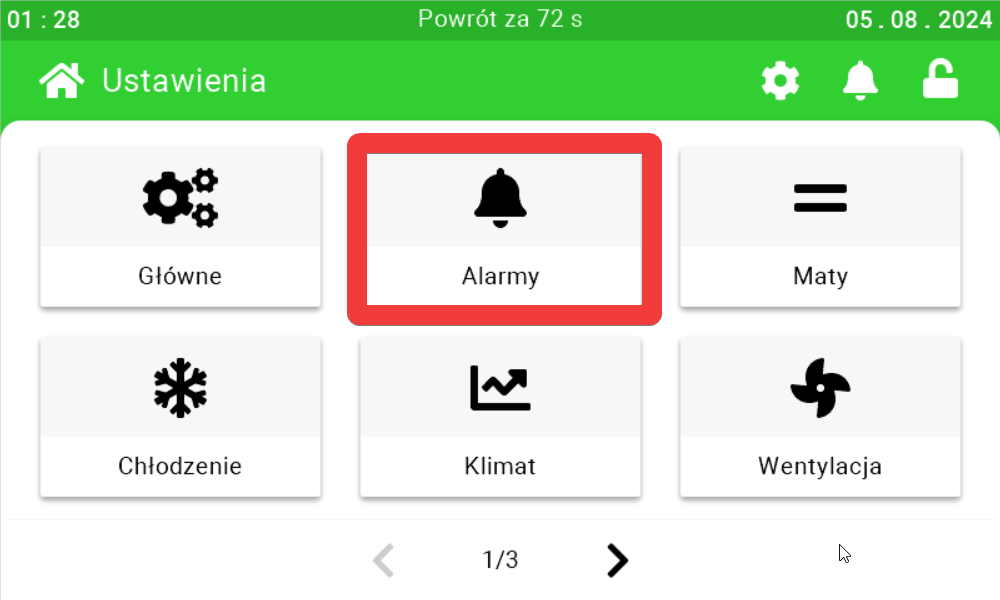
In the new view, go to the Alarms tab.
Use the sliders and the buttons arranged on their sides to set the appropriate alarm thresholds.
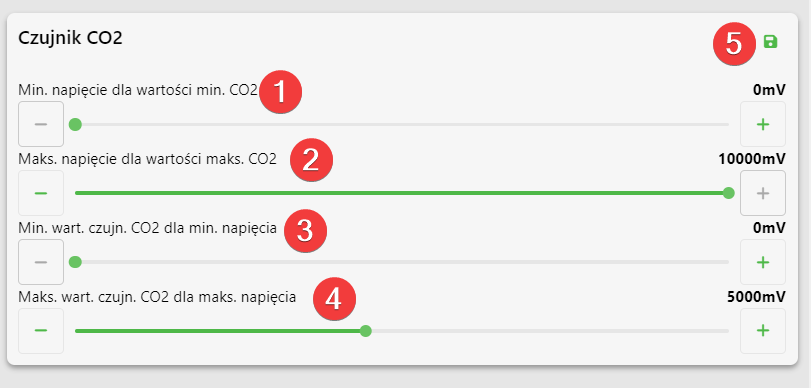
CO2 sensor settings
On this panel you can set what is the minimum voltage for the minimum value of the sensor [1], what is the maximum voltage for the maximum value of the sensor [2],
what is the minimum value of the sensor for the minimum voltage [3], what is the maximum value of the sensor for the maximum voltage [4]. After setting the parameters, click the save button [5].
CO2 sensor settings on the SK-3 climate controller
To directly set the CO2 sensor settings on the controller, click the highlighted Enter button on the controller.
Use the right arrow to go to the Installer Menu and click Enter.
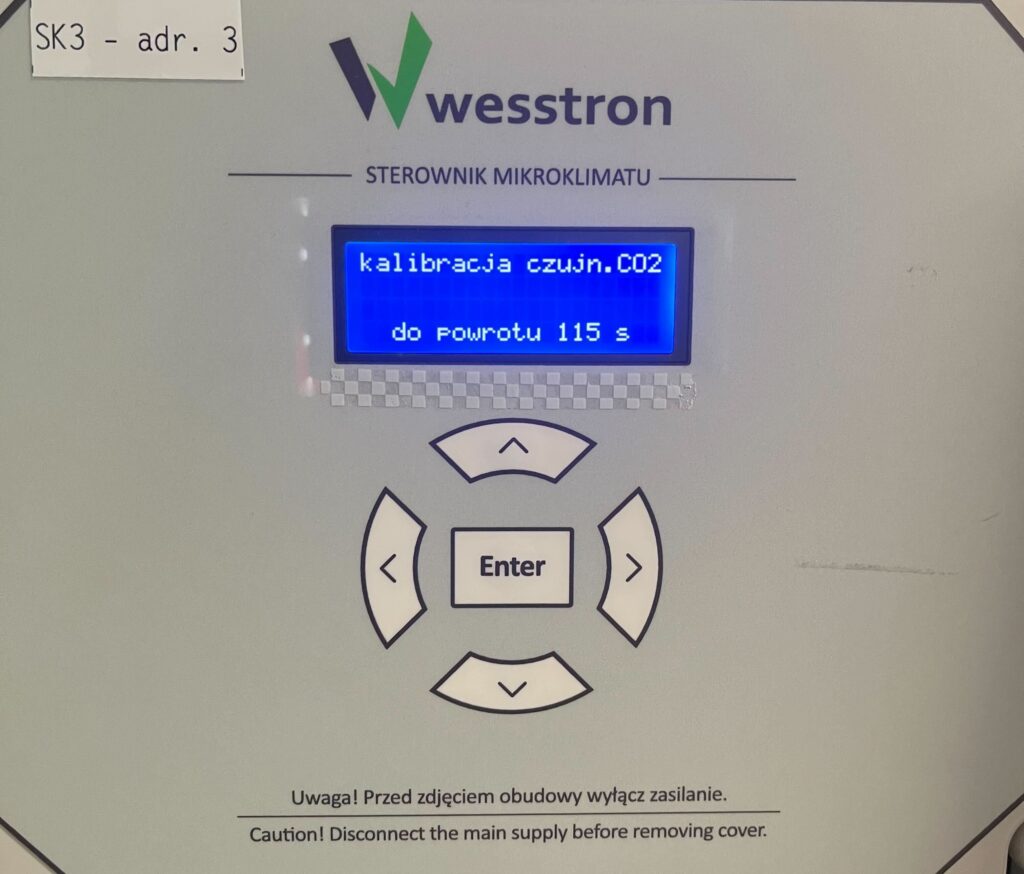
Again, use the right arrow to find the menu Calibration vigilance. CO2 and click Enter.
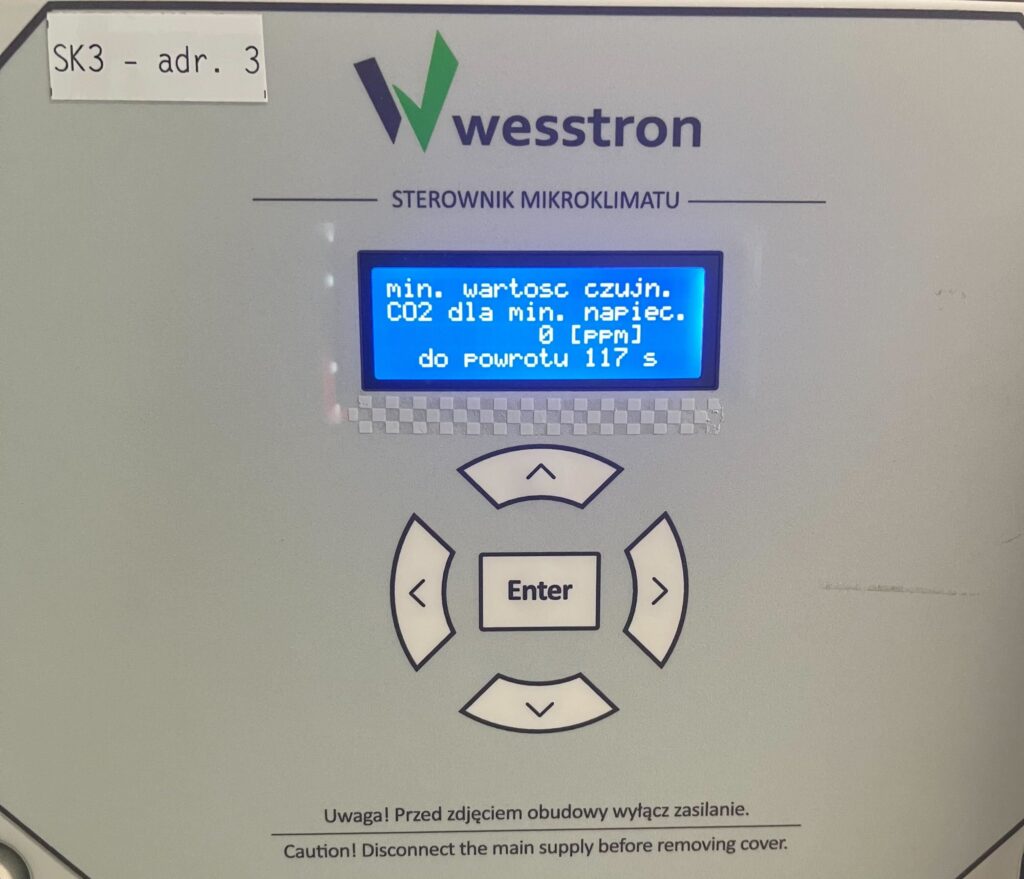
Minimum CO2 sensor value for minimum voltage
Use the down / up arrows to change the value of this parameter and click Enter to save the changes.
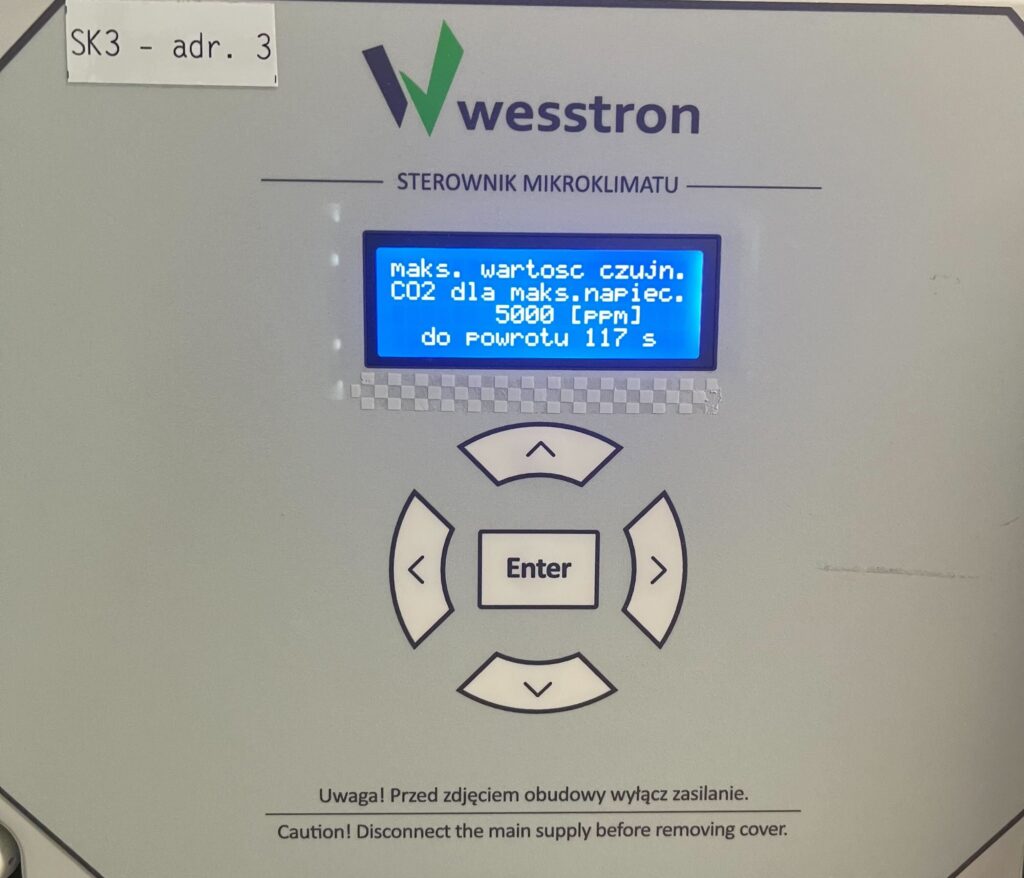
Maximum value of CO2 sensor for maximum voltage
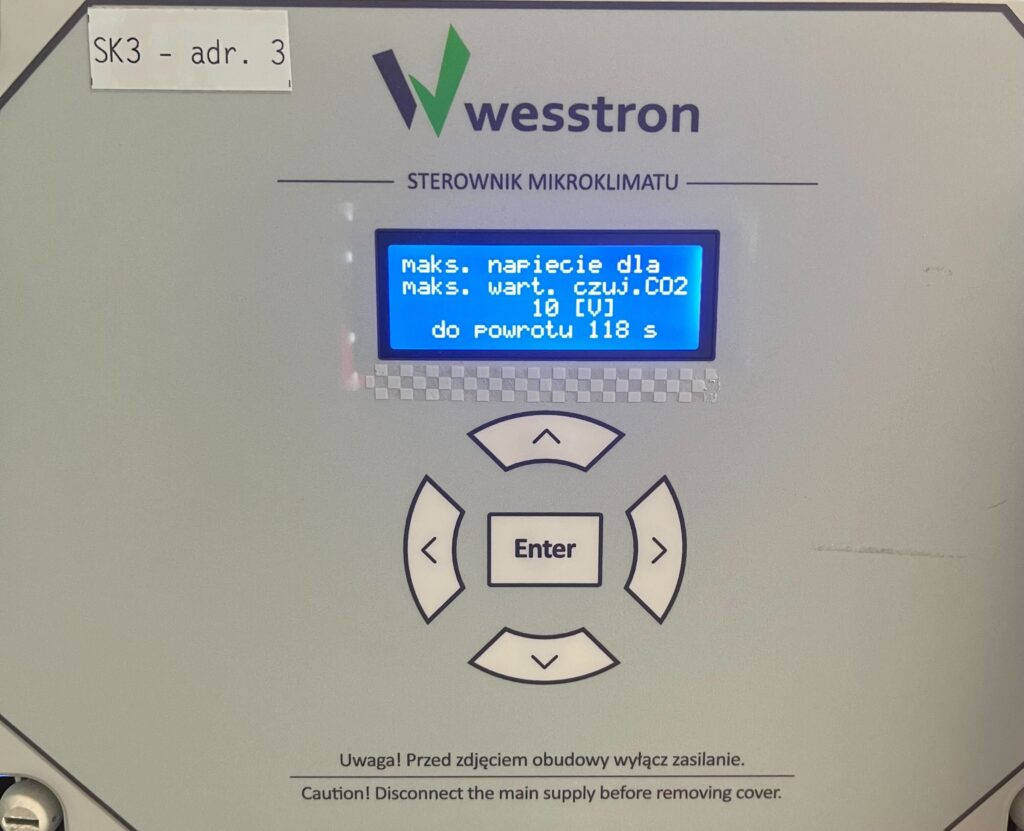
Use the right arrow to find the menu max. sensing value. CO2 for max. voltages. Then use the down / up arrows to change the value of this parameter and click Enter to save the changes.
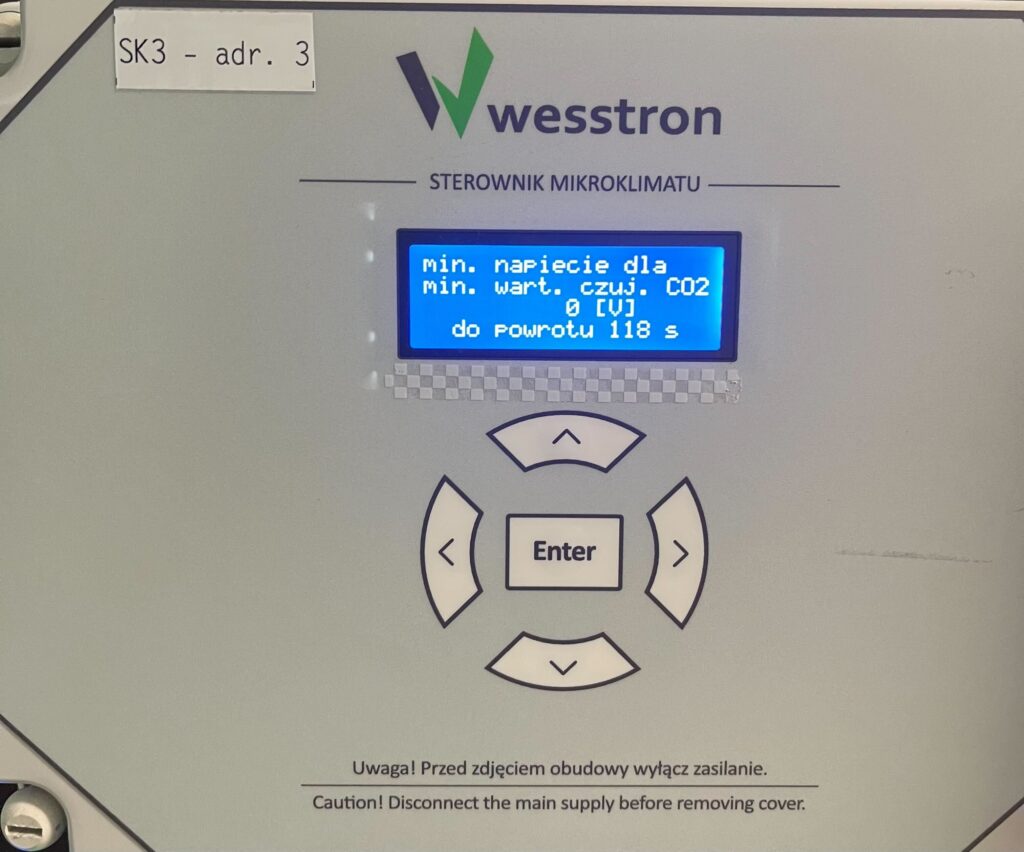
Minimum voltage for minimum CO2 sensor value
Use the right arrow to find the menu Min. voltage for min. sensor value. CO2. Then use the down / up arrows to change the value of this parameter and click Enter to save the changes.
Maximum voltage for the maximum value of the CO2 sensor
Use the right arrow to find the menu Max. voltage for max. sensor value. CO2. Then use the down / up arrows to change the value of this parameter and click Enter to save the changes.
Settings of theCO2 sensor on the SK-4 controller
To directly set the settings of theCO2 sensor On the SK-4 controller you need to log on the climate controller. To do this, click the highlighted item.
Enter the PIN you set, or swipe your card to log in.
Once you have logged in correctly, a gear icon will appear. Click it to go to the climate controller settings.
In the new view, click the right arrow to move to the next page.
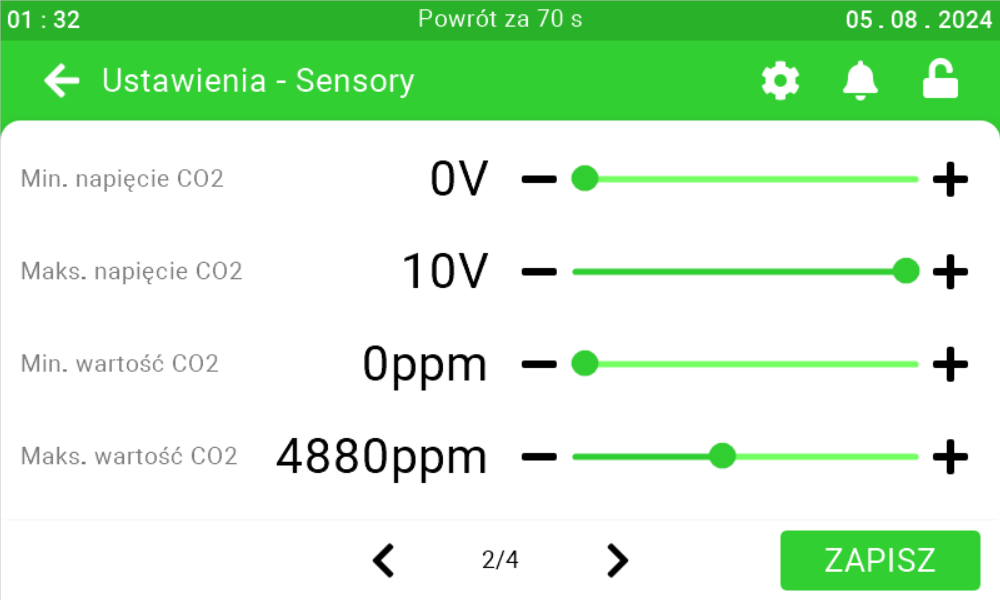
Enter the Sensors tab and go to the second page.

Use the sliders and buttons on their sides to configure the CO2 sensor.
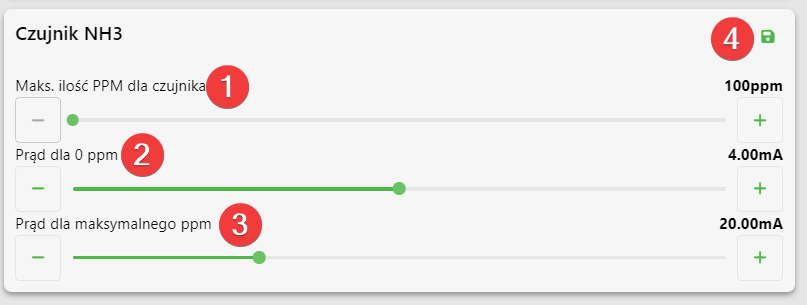
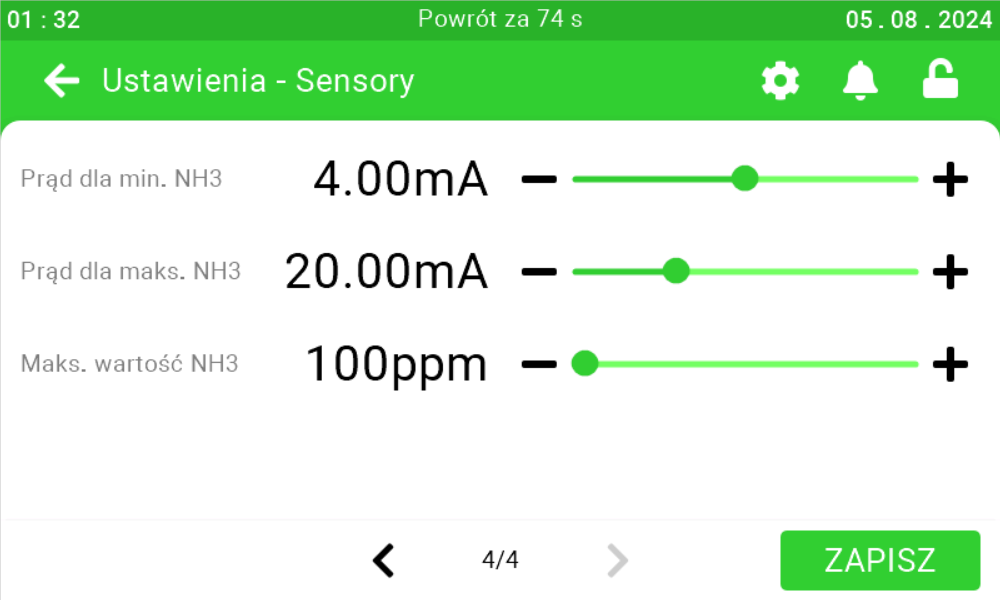
NH3 sensor settings
On this panel you can set what is the maximum number of particles per million
for the sensor [1], what is the current intensity for 0 ppm [2], what is the intensity
for the maximum number of ppm [3]. After setting the parameters, click the save button.
NH3 sensor settings on SK-4 controller
To directly adjust the settings of the NH3 sensor On the SK-4 controller you need to log on the climate controller. To do this, click the highlighted item.
Enter the PIN you set, or swipe your card to log in.
Once you have logged in correctly, a gear icon will appear. Click it to go to the climate controller settings.
In the new view, click the right arrow to move to the next page.
Go to the Sensors tab and turn to the last page.
Use the sliders and buttons on their sides to configure the NH3 sensor.
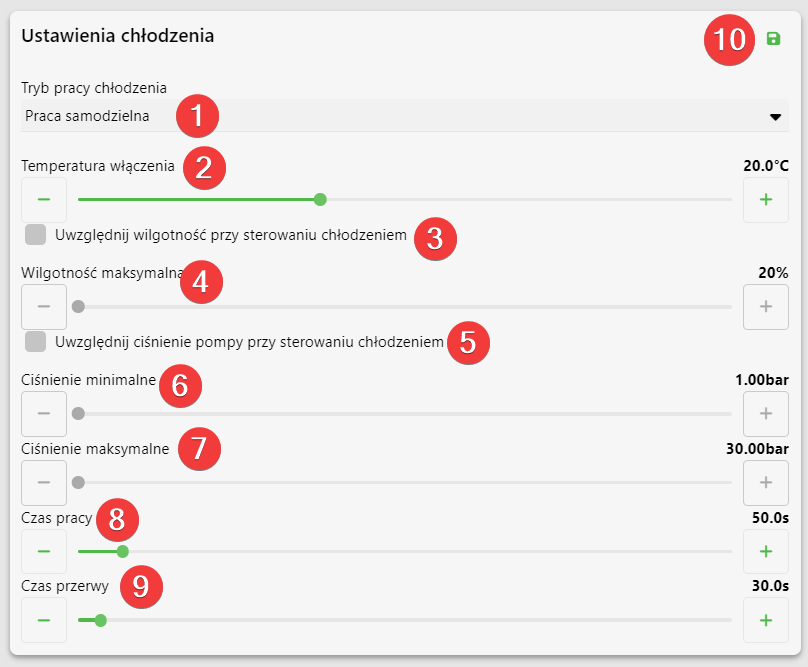
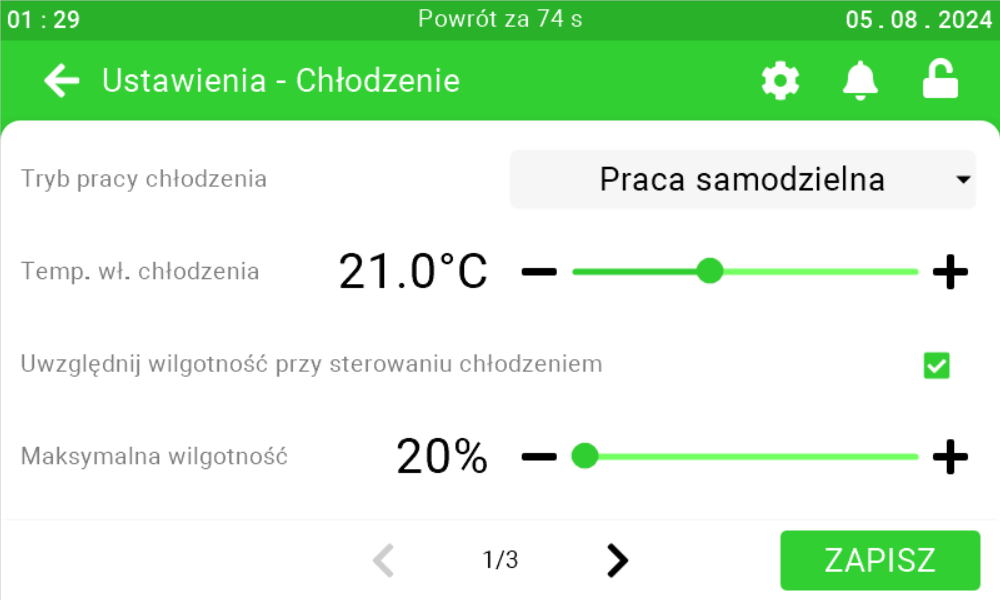
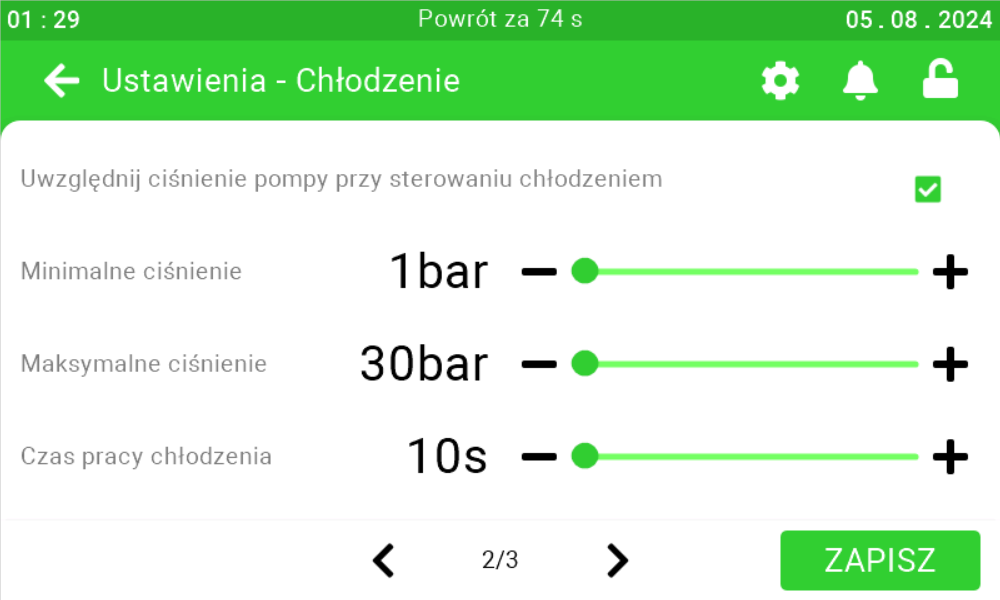
Cooling settings
On this panel, you can set what mode you want the cooling to operate [1], at what temperature you want the controller to start cooling [2], whether humidity is to be taken into account for cooling control [3] and up to what maximum humidity the cooling can operate [4], whether pump pressure is to be taken into account for cooling control [5]
and in what pressure range the cooling will be fired [6][7], what is the operating time of the cooling [8] and how long will be the interval between cooling activation [9].
After setting the parameters, click the save button [10].
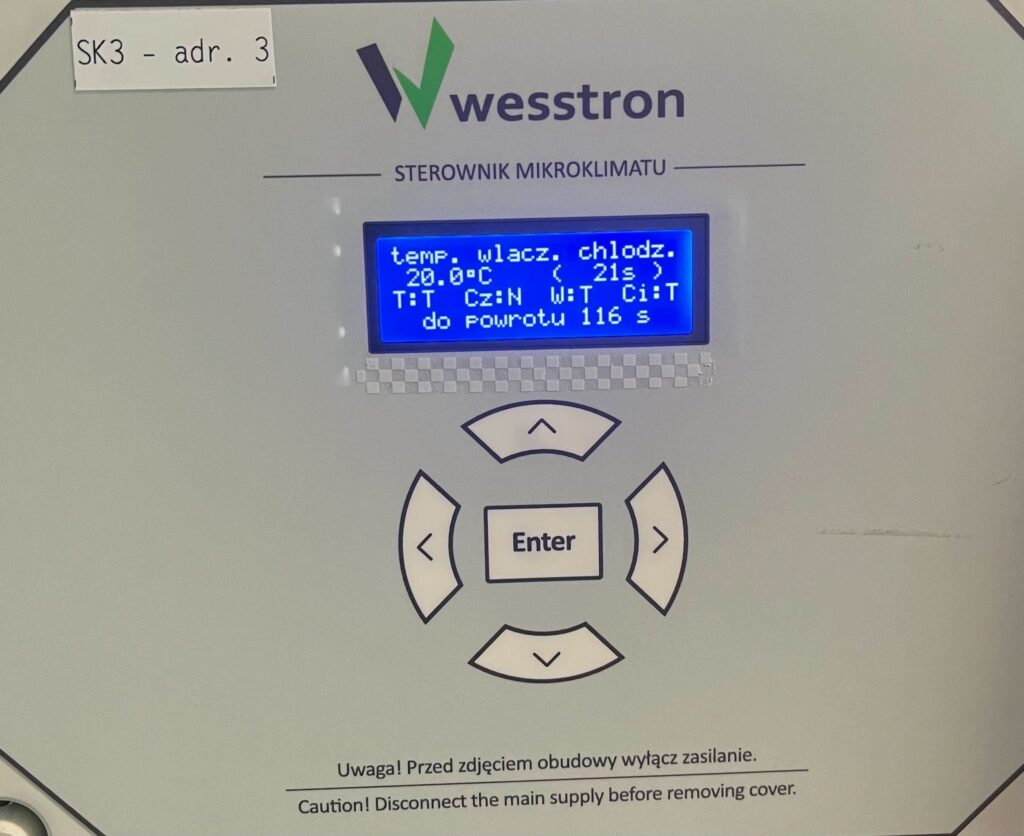
Cooling settings on the SK-3 controller
To directly set the cooling settings on the controller, click the highlighted Enter button on the controller.
Use the right arrow to go to the User Menu and click Enter.
Cooling switch-on temperature
Use the right arrow to go to the menu cooling on temp. and use the down / up arrows to change the parameter. Click Enter to save your changes.
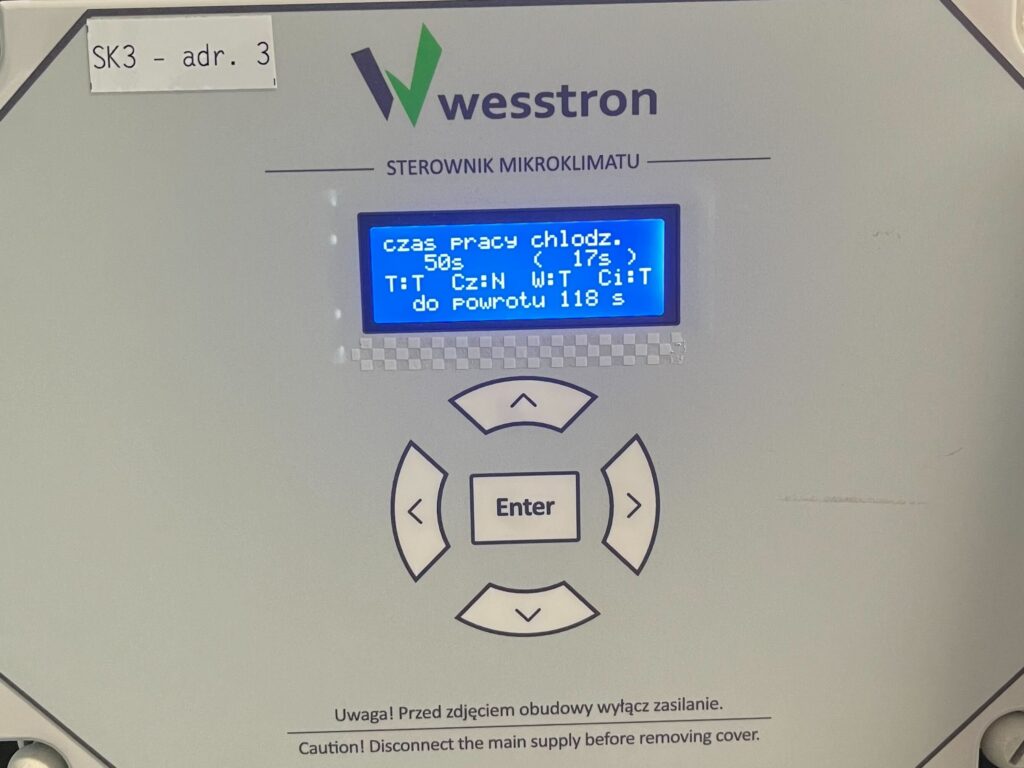
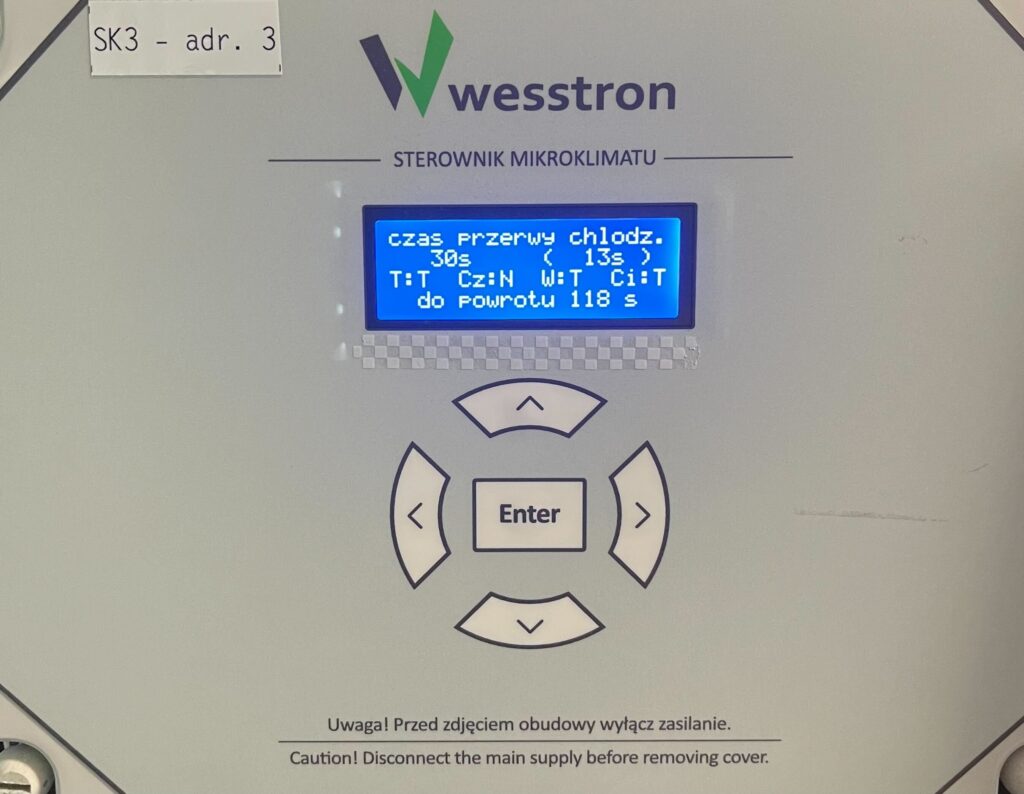
Cooling operating time
Use the right arrow to go to the chill time menu and use the down / up arrows to change the parameter . Click Enter to save the changes.
Cooling interval time
Use the right arrow to go to the chill interval time menu and use the down / up arrows to change the parameter . Click Enter to save the changes.
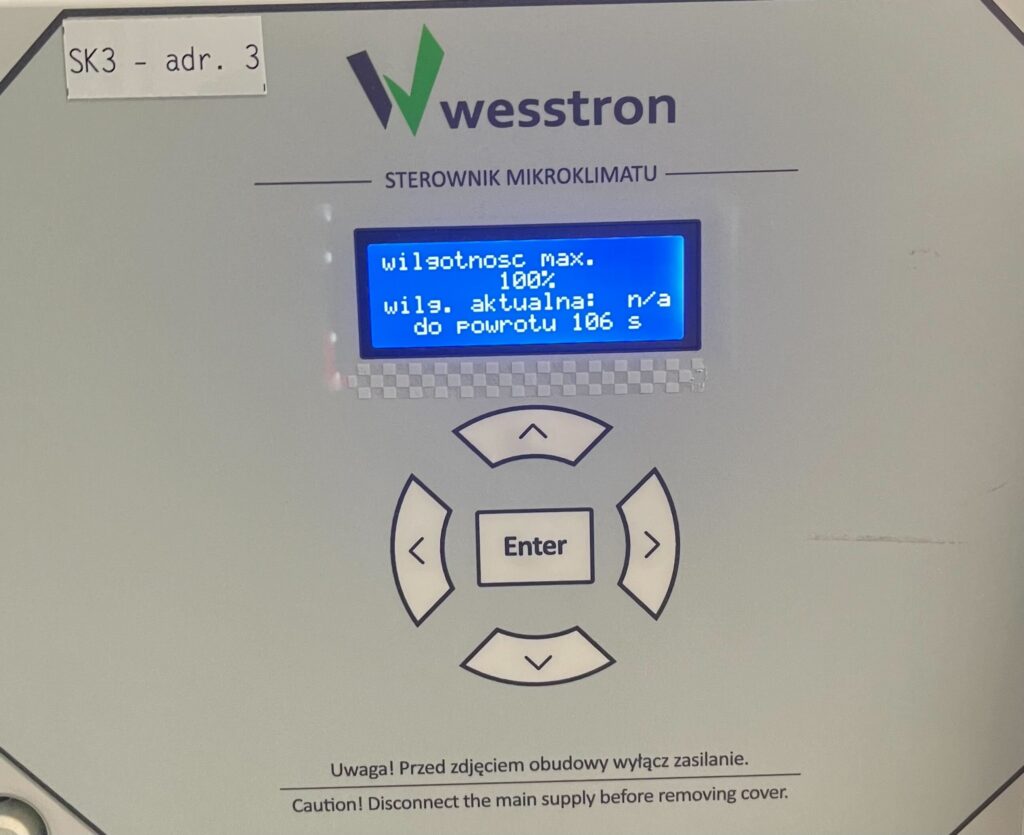
Maximum humidity
Use the right arrow to go to the humidity max. menu and use the down / up arrows to change the parameter. Set the value to 100% if humidity is not to be taken into account during cooling. Click Enter to save the changes.
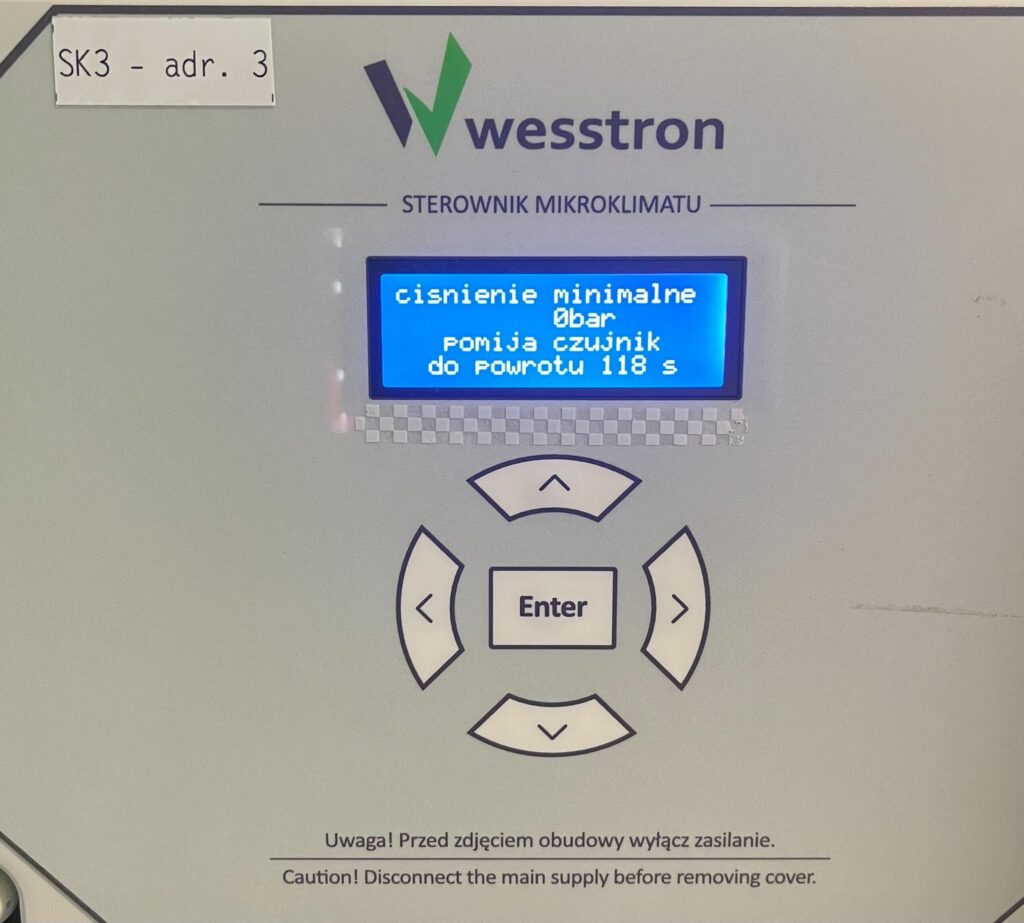
Minimum pressure
Use the right arrow to go to the minimum pressure menu and use the down / up arrows to change the parameter. Set the value to 0 bar if the pressure is not to be taken into account during cooling. Click Enter to save the changes.

Maximum pressure
Use the right arrow to go to the maximum pressure menu and use the down / up arrows to change the parameter. Click Enter to save the changes.
Cooling settings on the SK-4 controller
To directly set the cooling settings On the SK-4 controller you need to log on the climate controller. To do this, click the highlighted item.
Enter the PIN you set, or swipe your card to log in.
Once you have logged in correctly, a gear icon will appear. Click it to go to the climate controller settings.
In the new view, go to the cooling tab .
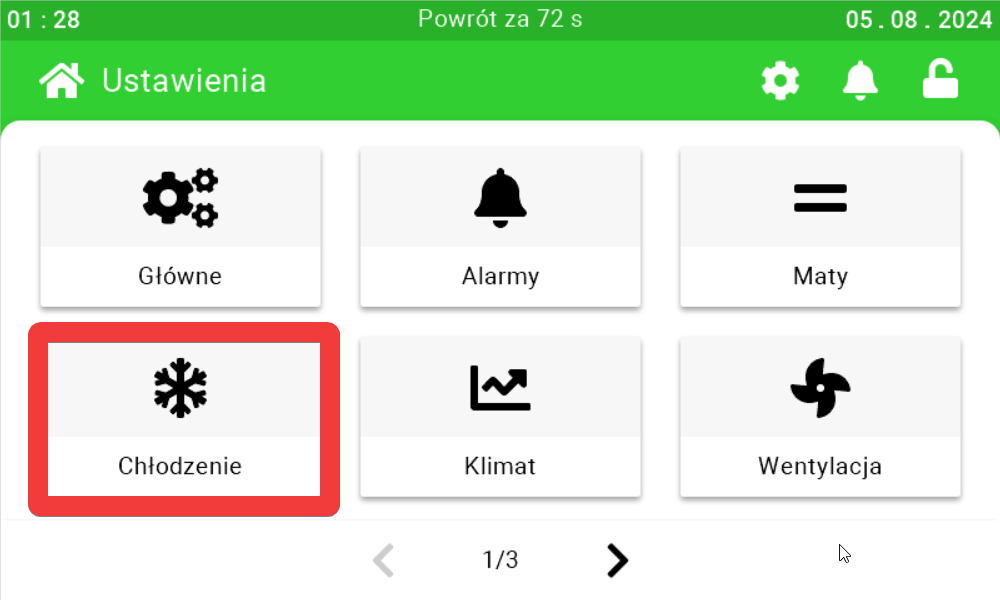
Use the sliders and buttons on their sides to configure cooling settings.

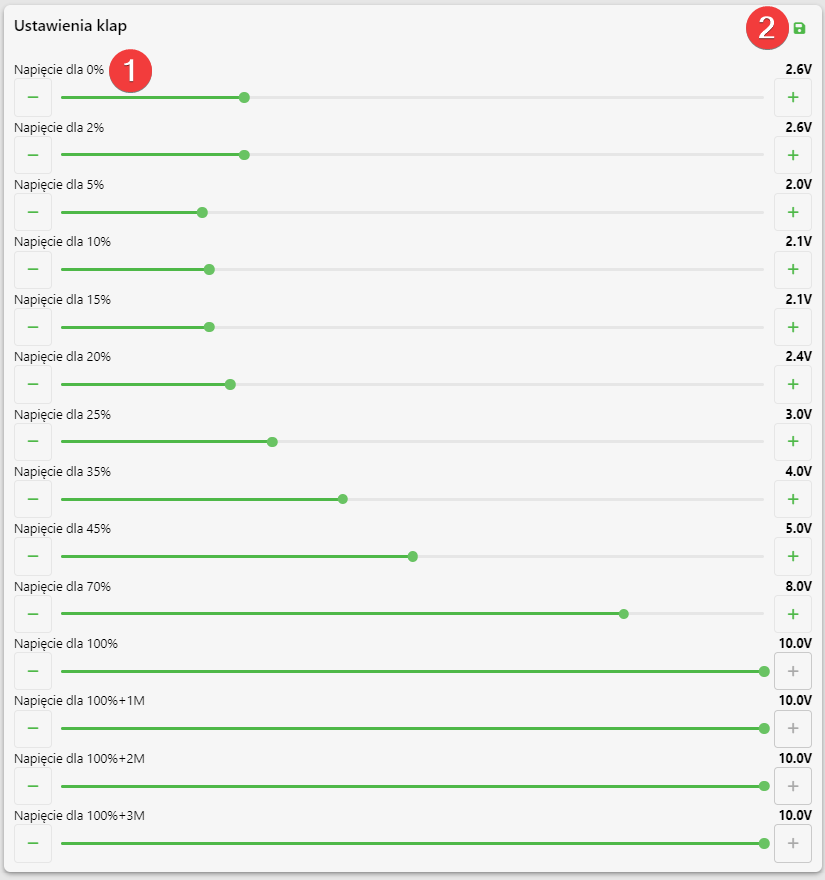
Flap settings
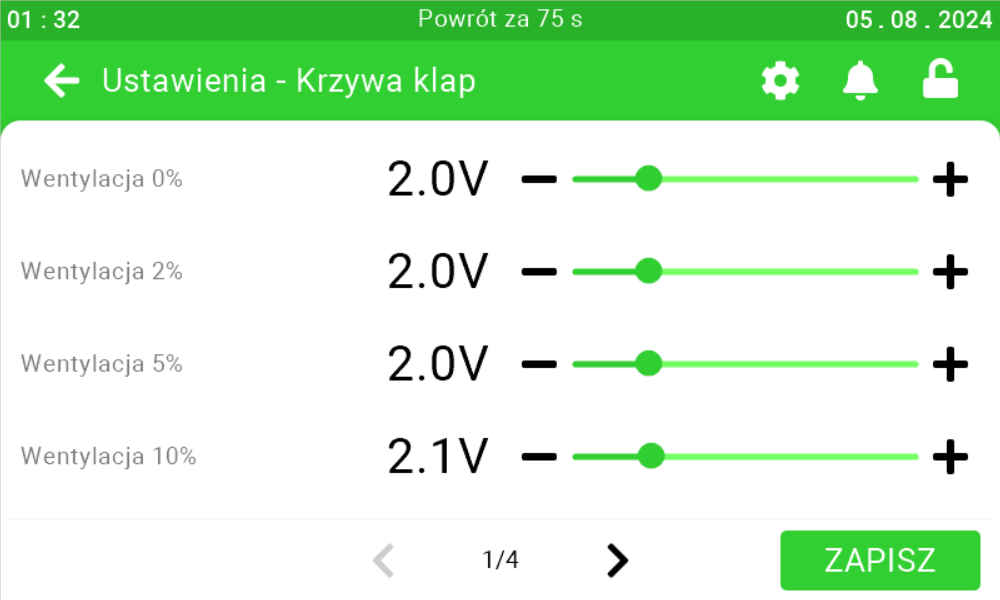
On this panel, set what voltage will be driven for the corresponding current ventilation [1]. After setting the parameters, click the save button [2].
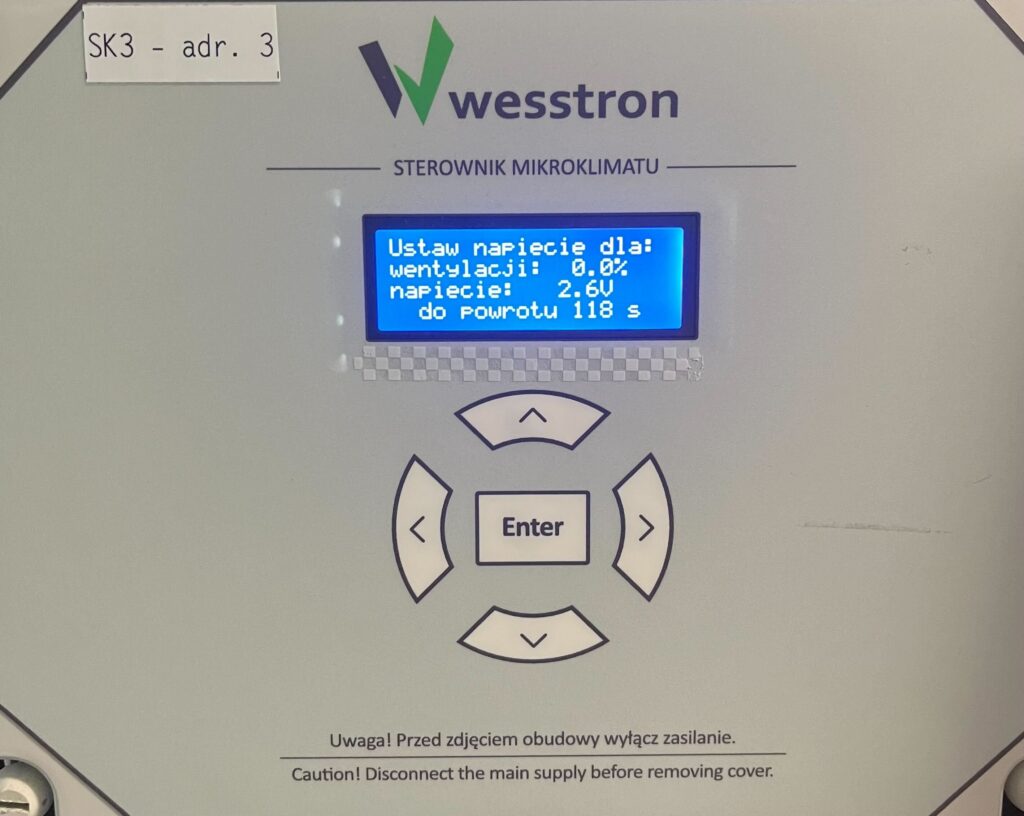
Flap settings on the SK-3 controller
To directly set the flap settings on the controller, click the highlighted Enter button on the controller.
Use the right arrow to go to the Installer Menu and click Enter.
Use the right arrow to go to the Flap Curve menu and click Enter.
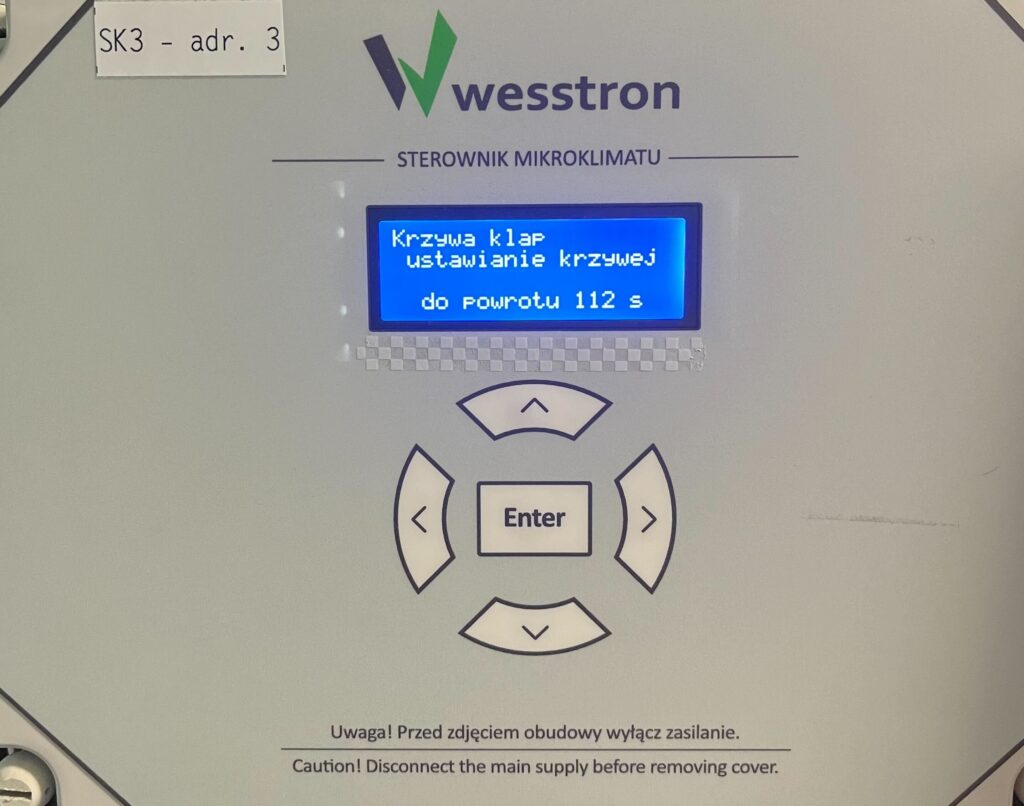
Set the voltage for the corresponding % flap opening with the down / up arrows, use the right arrow to move to the next % flap opening. Click Enter to save your changes .
Flap settings on the SK-4 controller
In order to directly set the flap settings on the SK-4 controller, you need to log on the climate controller. To do this, click the highlighted item.
Enter the PIN you set, or swipe your card to log in.
Once you have logged in correctly, a gear icon will appear. Click it to go to the climate controller settings.
In the new view, go to the second page and enter the Flaps tab .
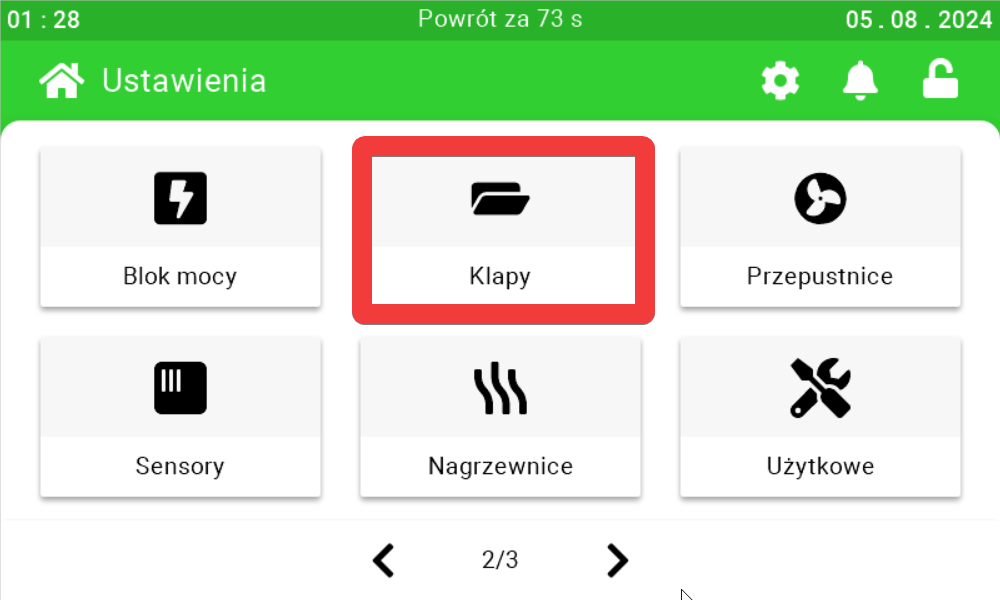
Use the sliders and buttons on their sides to configure the flap settings.
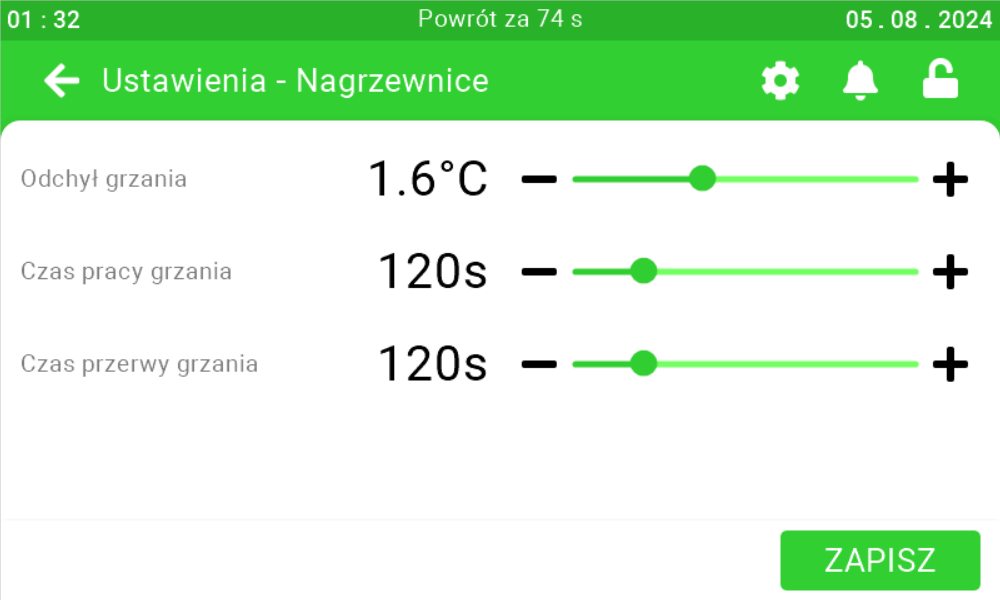
Heater settings
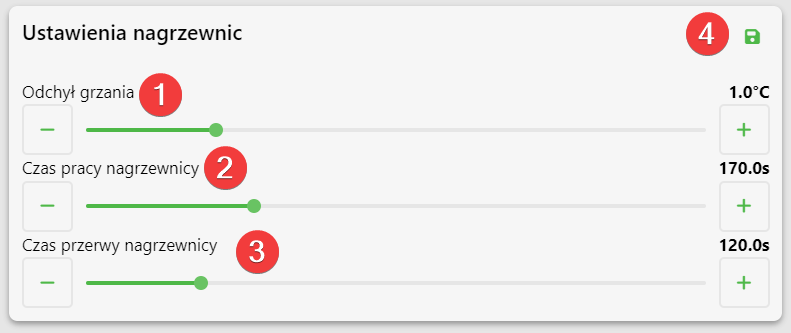
On this panel, you can set how many degrees below the desired temperature the temperature must fall for the heater to turn on [1], what is the operating time of the heater [2], how long should be the interval between turning on the heater [3]. After setting the parameters, click the save button [4].
Heater settings on the SK-3 controller
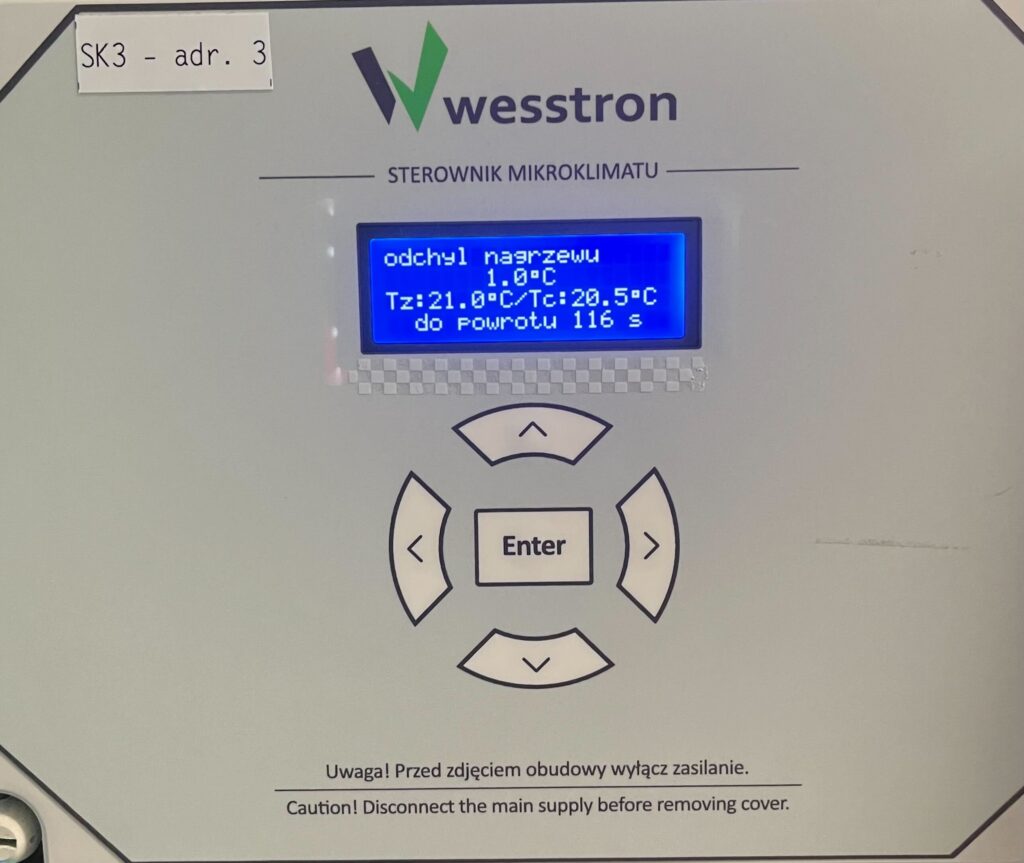
Heating deviation
To directly set the heat deflection on the controller, click the highlighted Enter button on the controller.
Use the right arrow to go to the User Menu and click Enter.
Use the right arrow to go to the heat deviation menu and use the down / up arrows to change the parameter value. Click Enter to save the changes .
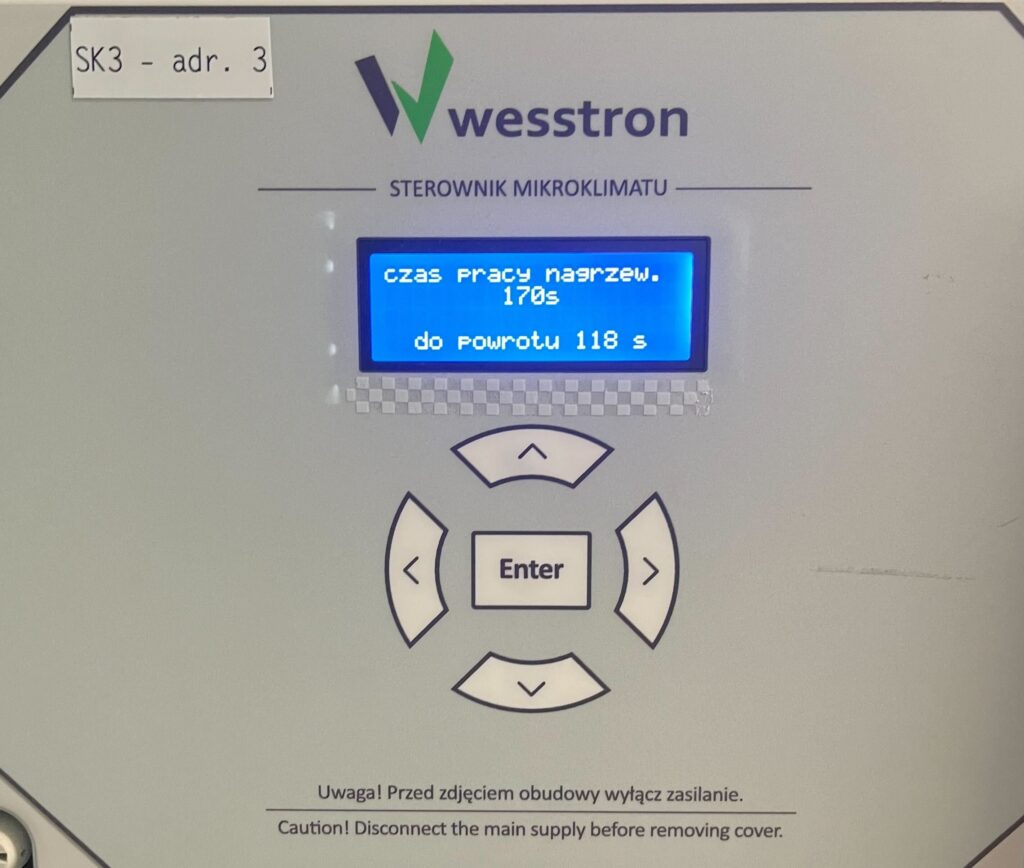
Rewarm operating time and breaks
To directly set the operating time and heating interval on the controller, click the highlighted Enter button on the controller.
Use the right arrow to go to the Installer Menu and click Enter.
Use the right arrow to go to the reheat time menu and use the down / up arrows to change the parameter. After making changes, click the Enter button .
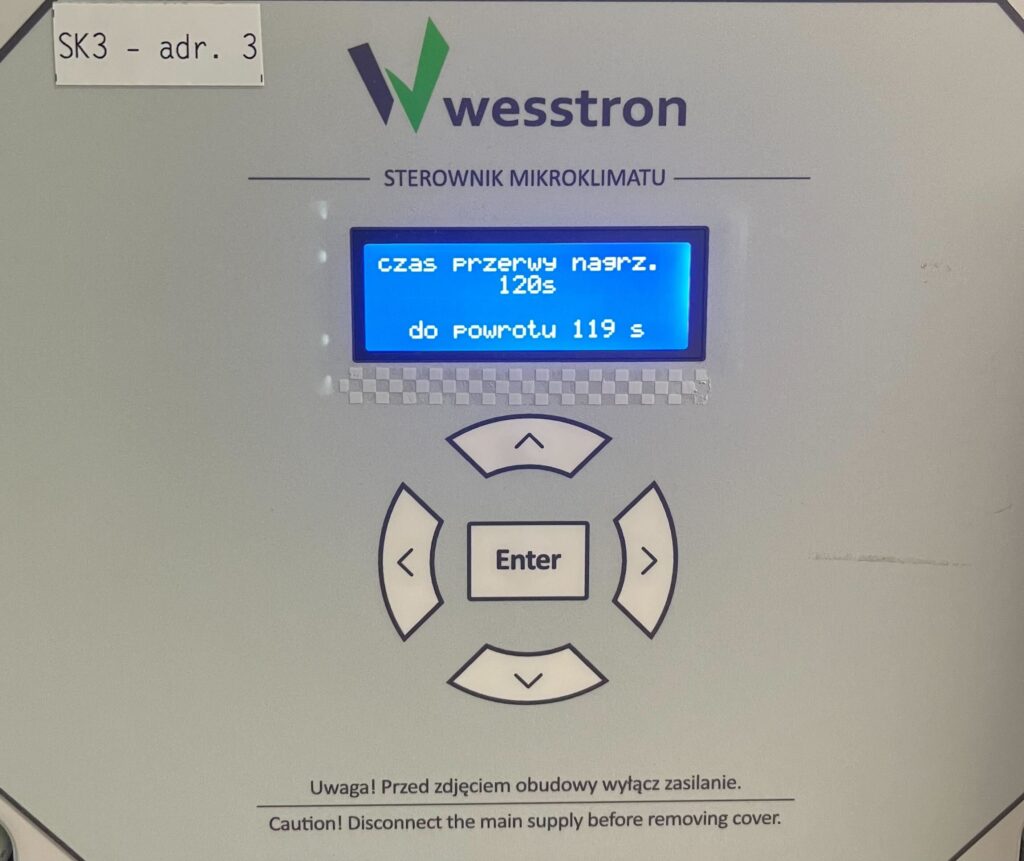
Use the right arrow to go to the heat interval time menu and use the down / up arrows to change the parameter. After making changes, click the Enter button .
Heater settings on the SK-4 controller
In order to directly set the heater settings on the SK-4 controller, you need to log on the climate controller. To do this, click the highlighted item.
Enter the PIN you set, or swipe your card to log in.
Once you have logged in correctly, a gear icon will appear. Click it to go to the climate controller settings.
In the new view, go to the second page and enter the Heaters tab .

Use the sliders and buttons on their sides to configure the heater settings.
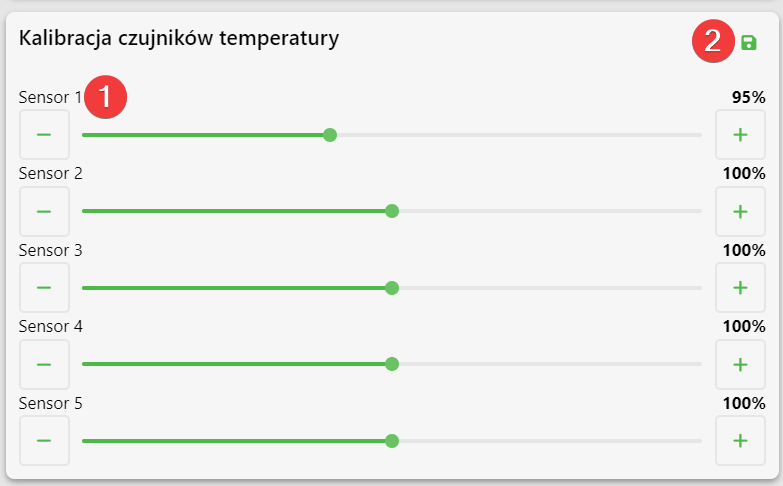
Calibration of temperature sensors
On this panel you can change the percentage of the value returned by the temperature sensors [1]. After setting the parameters, click the save button [2].
Example
Sensor 1 is calibrated at 95%, and the sensor has detected a temperature of 20°C. In this case, the climate controller will show a value of 19°C.
Calibration of temperature sensors on SK-3 controller
To directly set the calibration of temperature sensors on the controller, click on the marked Enter button on the controller.
Use the right arrow to go to the Installer Menu and click Enter.
Click Enter to proceed to calibrate the temperature sensors.
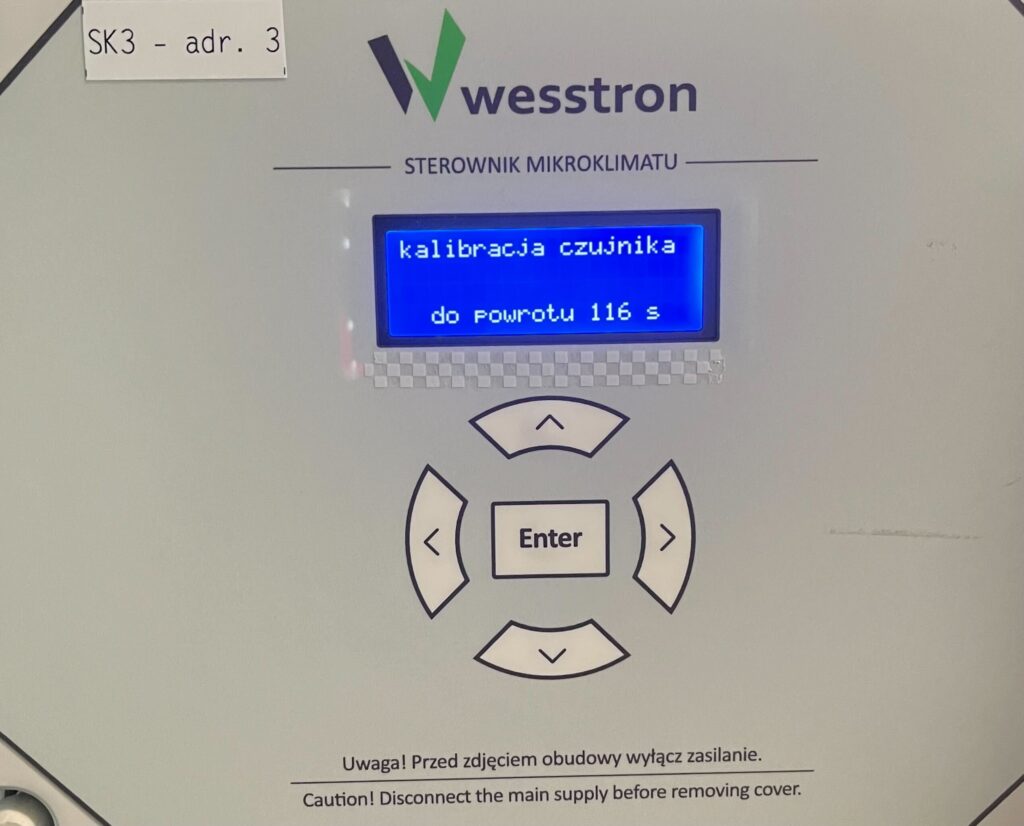
Use the down / up arrows to change the value for the sensor. Click Enter to save your changes. Use the right arrow to move to the next sensor.

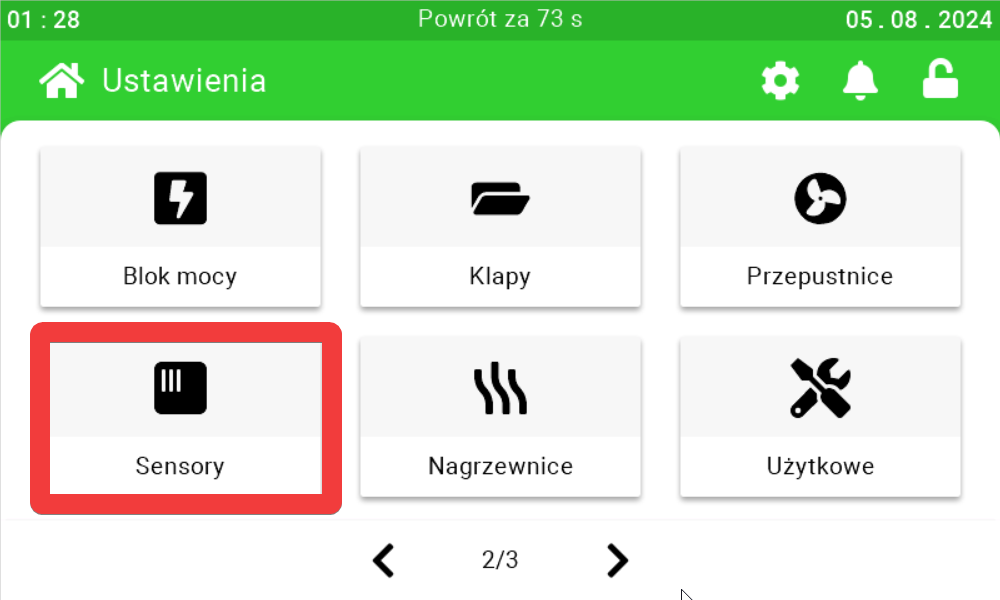
Temperature sensor calibration settings on SK-4 controller
In order to directly set the heater settings on the SK-4 controller, you need to log on the climate controller. To do this, click the highlighted item.
Enter the PIN you set, or swipe your card to log in.
Once you have logged in correctly, a gear icon will appear. Click it to go to the climate controller settings.
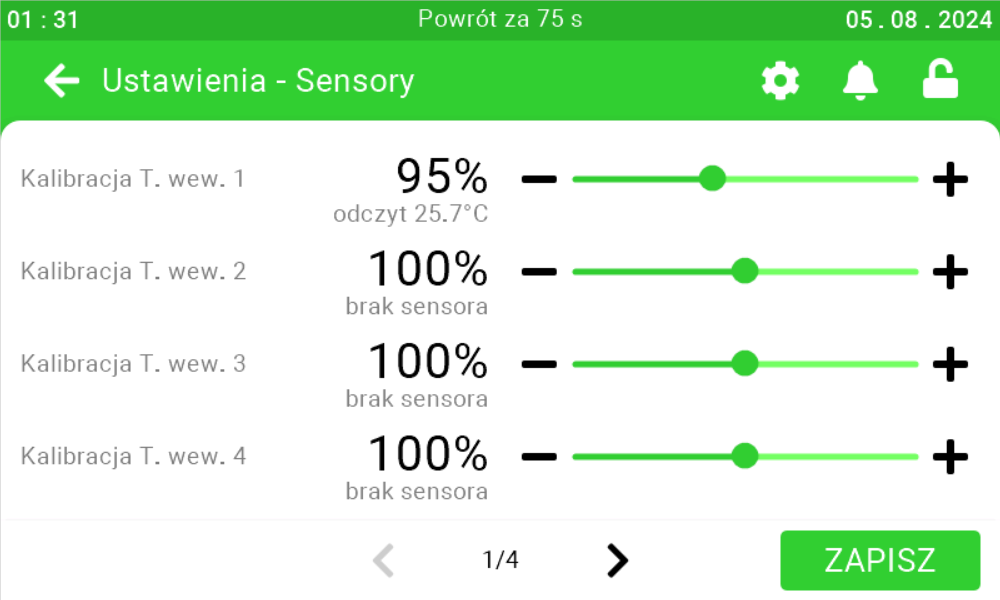
In the new view, go to the second page and enter the Sensors tab .
On the first page , use the sliders and buttons on their sides to calibrate the sensors.
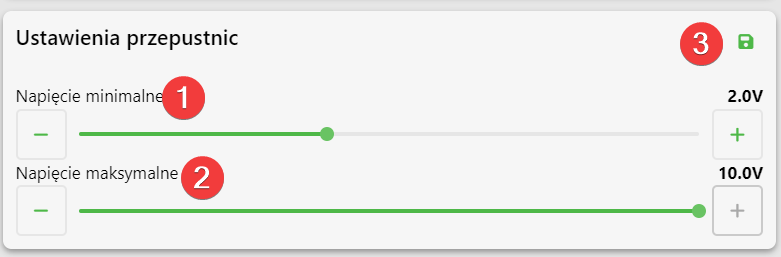
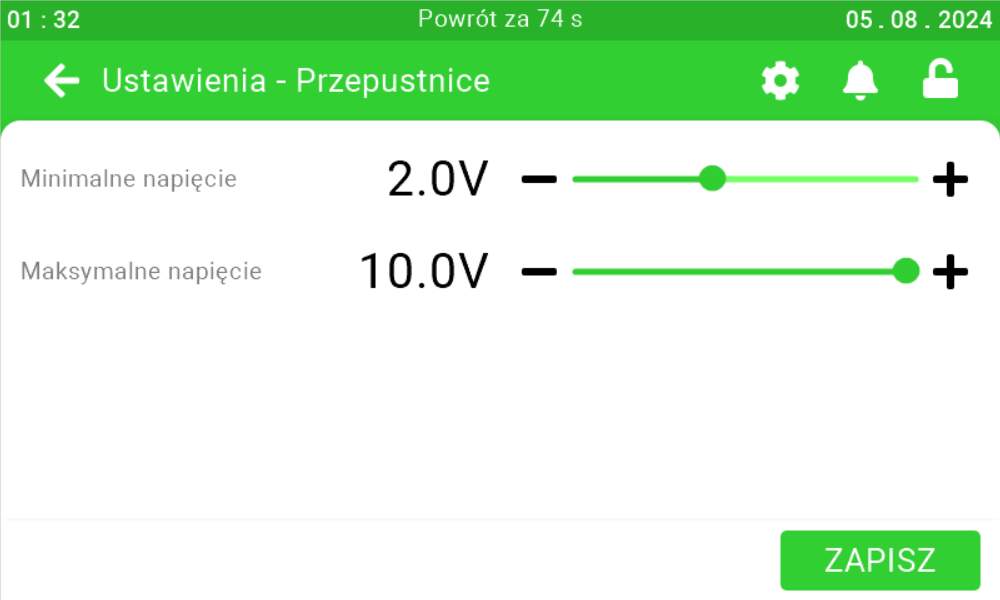
Throttle settings
On this panel you can set what is the voltage at which the actuator will completely close the damper in the chimney [1], what is the voltage at which the actuator will completely open the damper in the chimney [2]. After setting the parameters, click the save button [3].
Calibration of dampers on SK-3 controller
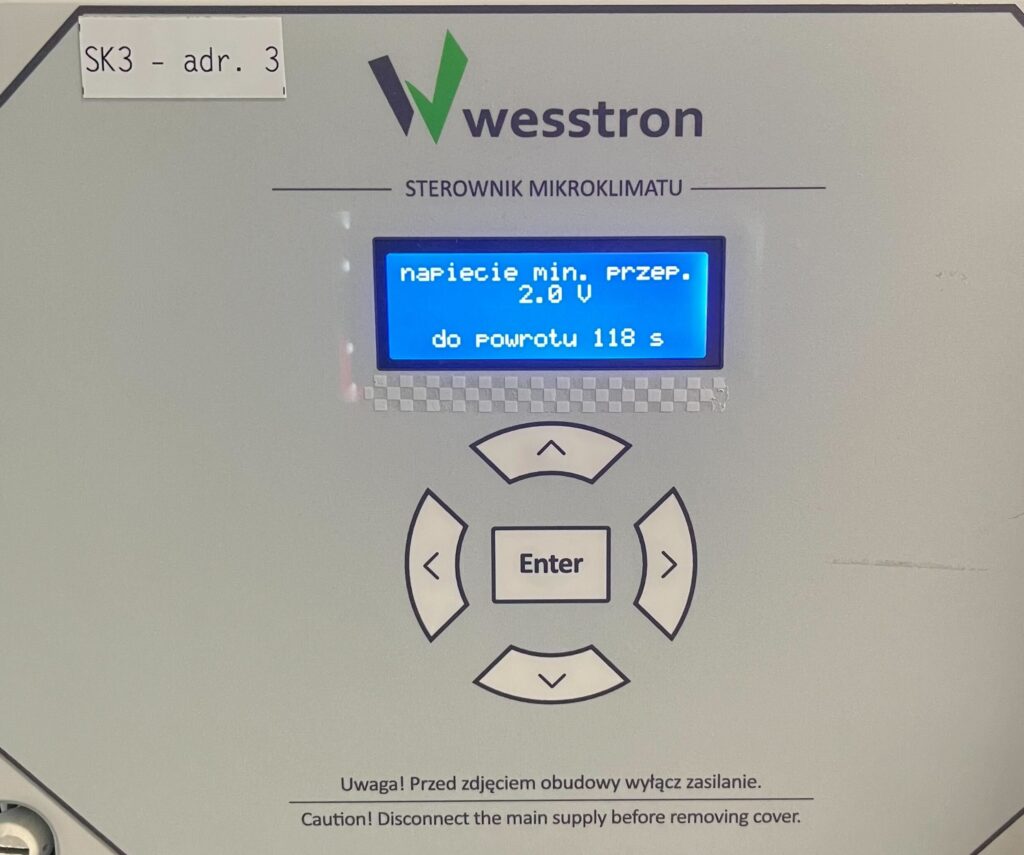
To directly set the throttle settings on the controller, click the highlighted Enter button on the controller.
Use the right arrow to go to the Installer Menu and click Enter.
Minimum throttle voltage
Use the down / up arrows to change the value of the parameter. Click Enter to save your changes.
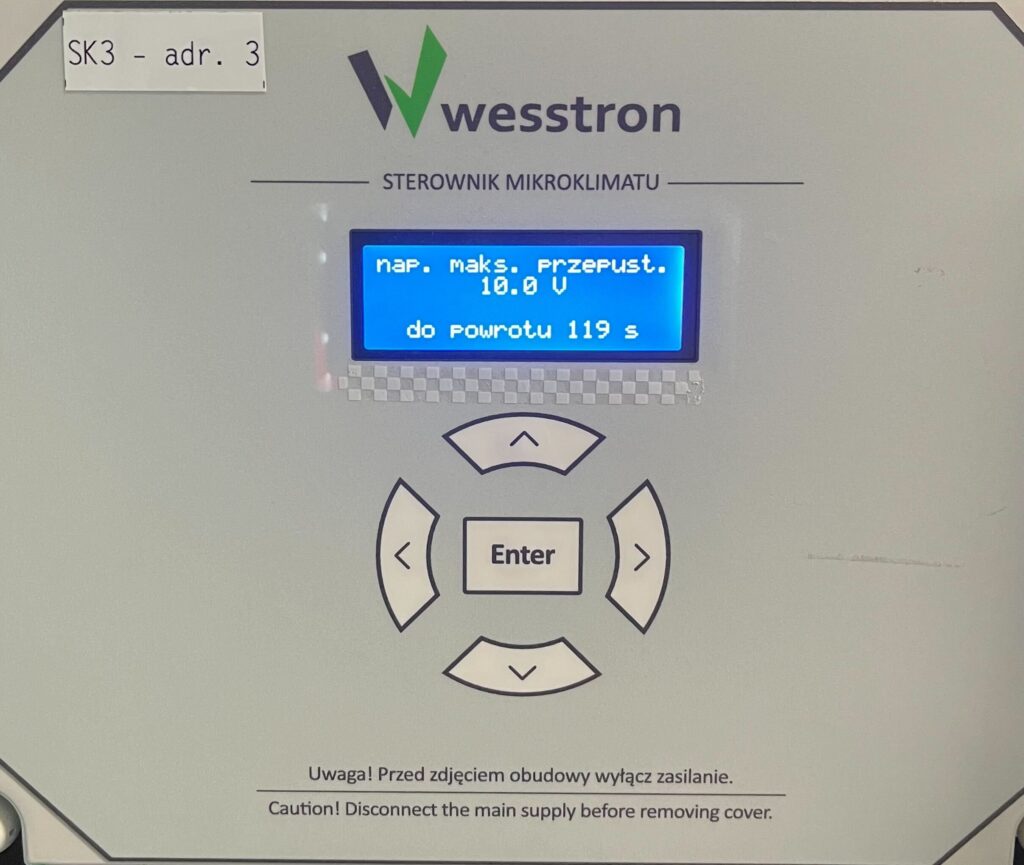
Maximum throttle voltage
Use the down / up arrows to change the value of the parameter. Click Enter to save your changes.
Throttle calibration settings on SK-4 controller
In order to directly set damper settings on the SK-4 controller, you need to log on to the climate controller. To do this, click the highlighted item.
Enter the PIN you set, or swipe your card to log in.
Once you have logged in correctly, a gear icon will appear. Click it to go to the climate controller settings.
In the new view, go to the second page and enter the Dampers tab .
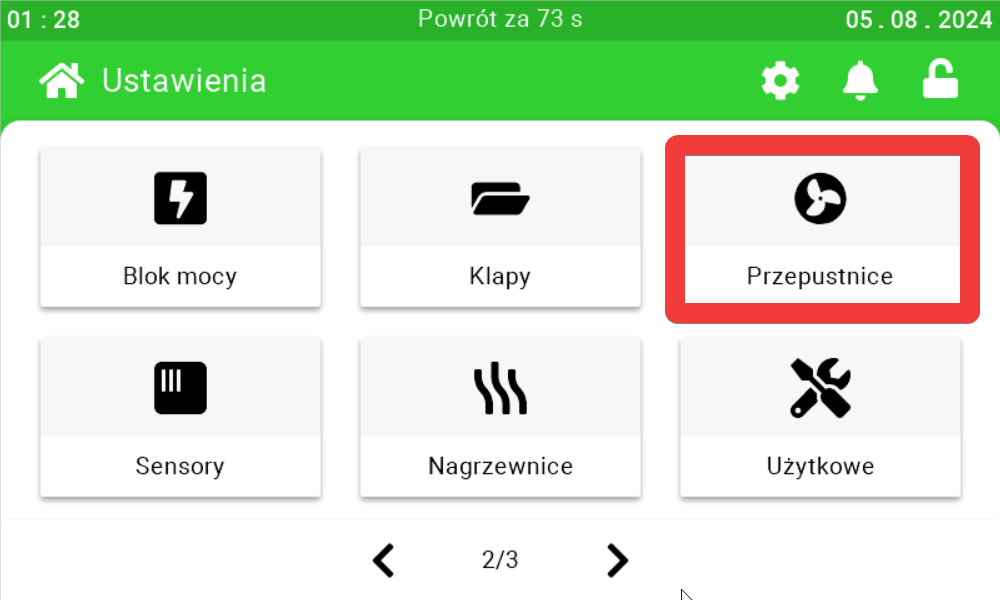
On the first page , use the sliders and buttons on their sides to calibrate the dampers.
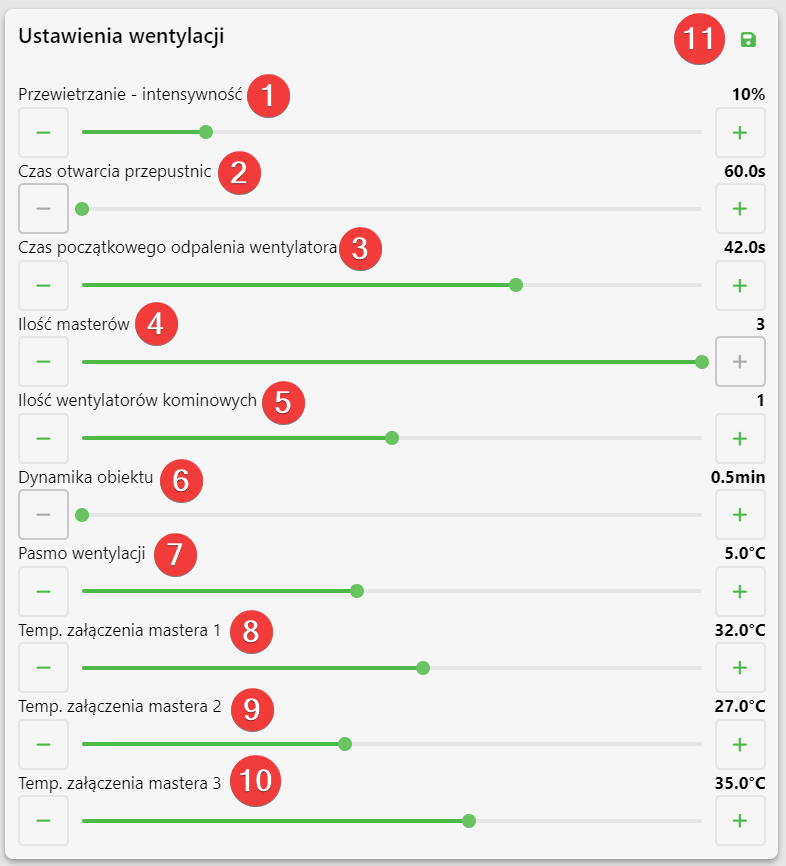
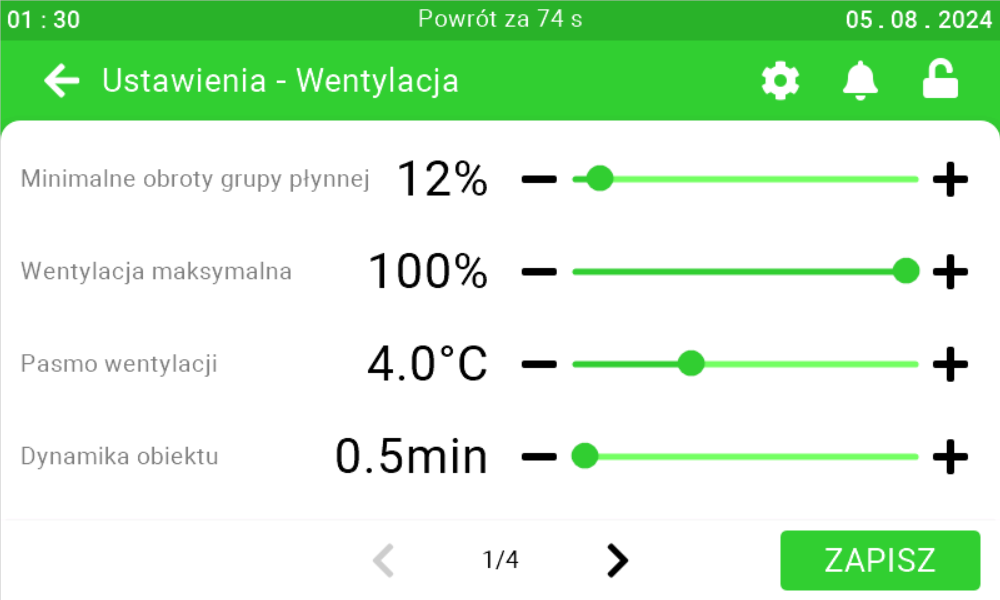
Ventilation settings
On this panel it is possible to set the fan speed during ventilation [1], for how long the dampers are to open during ventilation [2], after what time from the opening of electrically controlled dampers the fans are to turn on [3], how many masters are connected to the controller [4], how many chimney fans are connected
[5], after what time the climate in the room is stabilized after a sudden change of at least one parameter [6], at how many degrees higher than the desired temperature the controller is to achieve maximum ventilation [7], at what temperatures the appropriate masters are to turn on [8][9][10].
Ventilation settings on the SK-3 controller
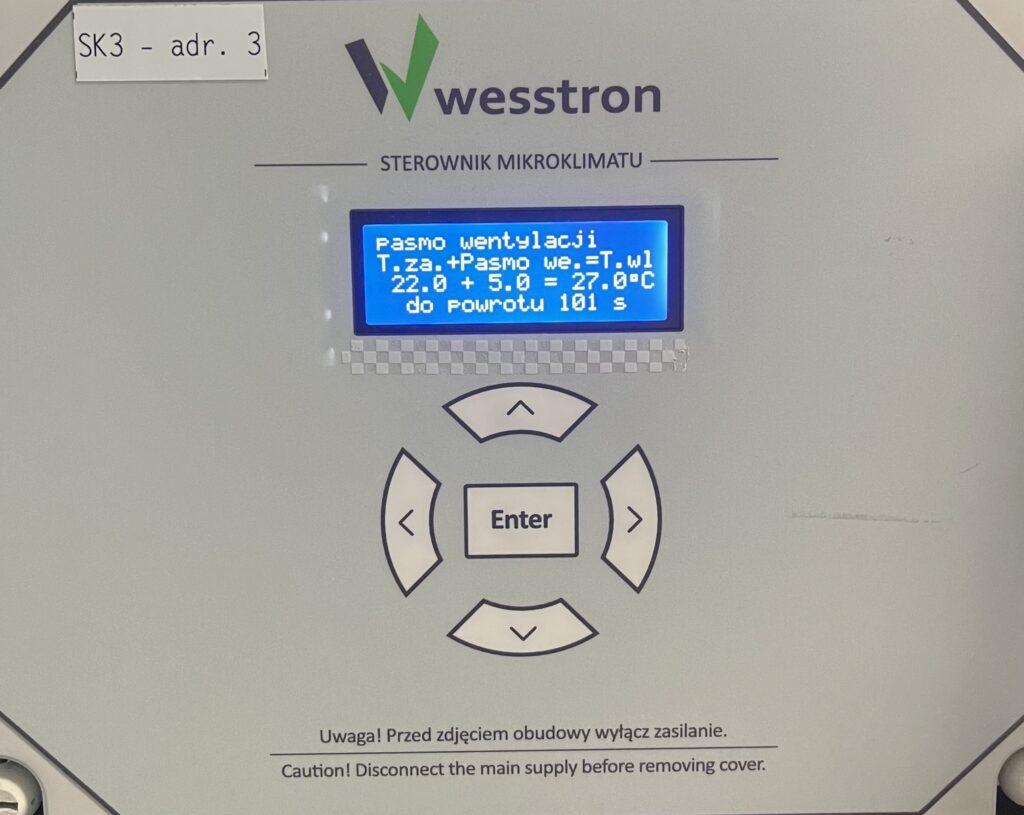
Ventilation band and master switch-on temperature
In order to directly set the ventilation band and master switch-on temperature on the controller, click the marked Enter button on the controller.
Use the right arrow to go to the User Menu and click Enter.
Use the right arrow to go to the Ventilation Band menu. Use the down / up arrows to set the ventilation band. Click Enter to save your changes .
Use the right arrow to go to the menu temp. master on and click Enter.
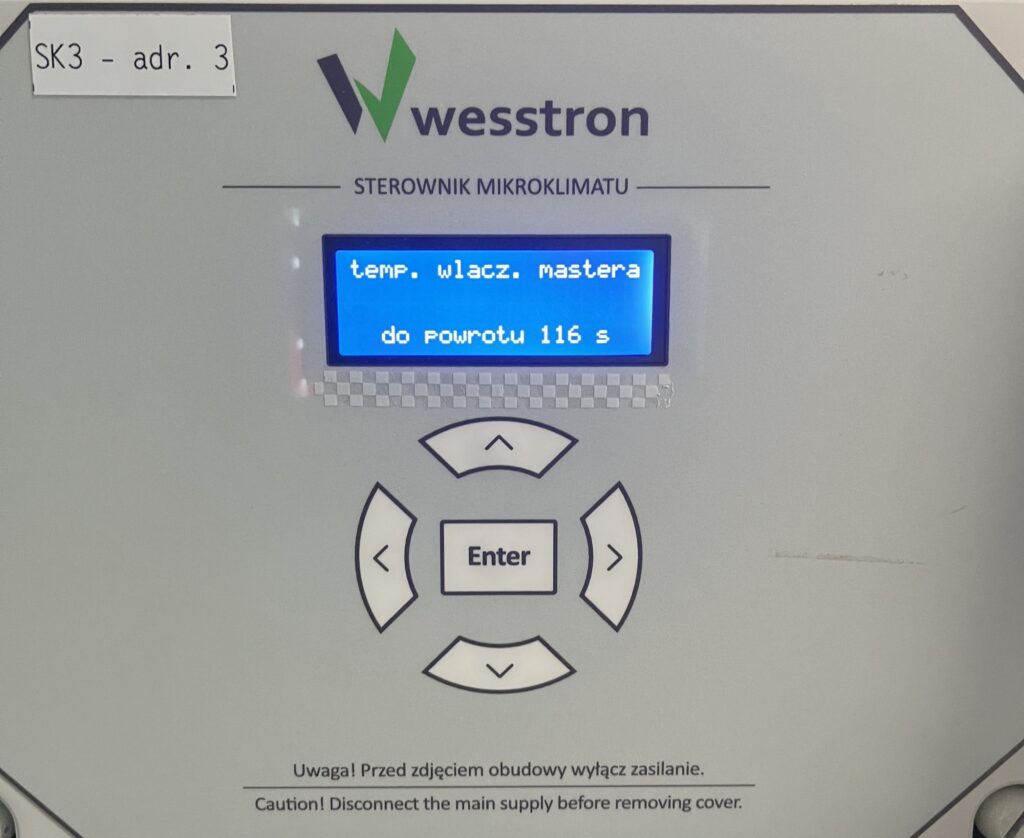
For each master, set the parameter using the down / up arrows, to move between masters use the left / right arrows. To save the changes , click Enter.
Number of masters, chimney fans and initial fan on time
To set the parameters on the controller directly, click the highlighted Enter button on the controller.
Use the right arrow to go to the Installer Menu and click Enter.
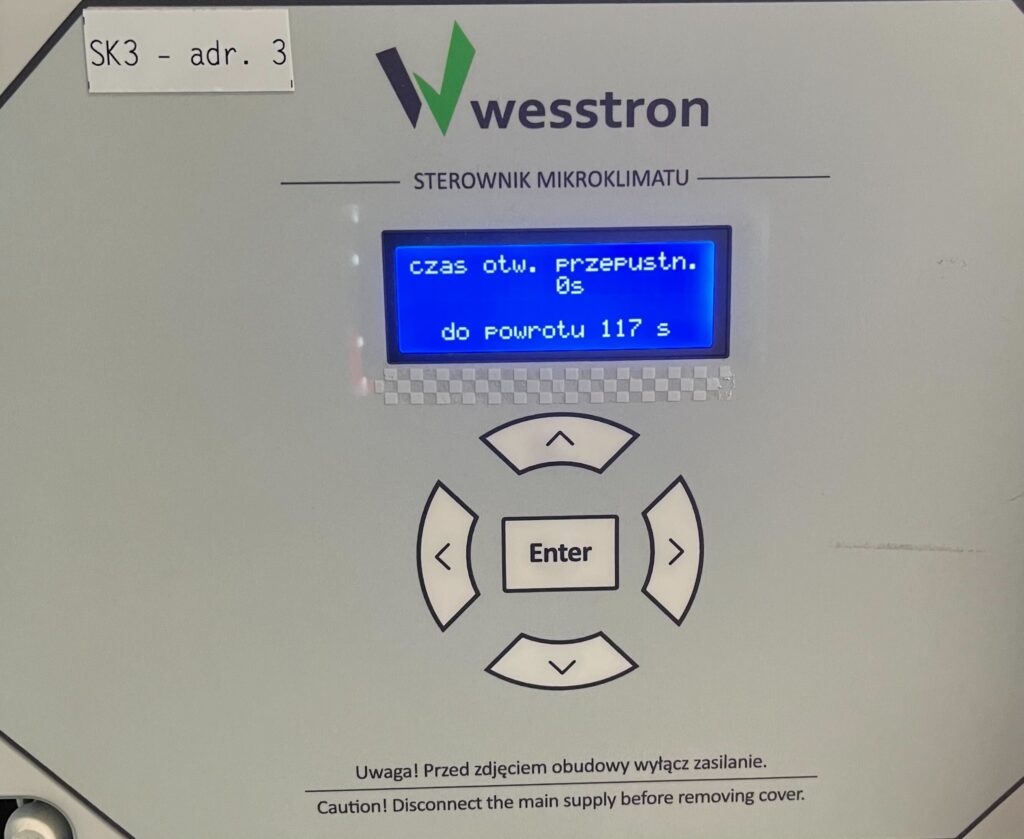
Use the right arrow to go to the throttle opening time menu, then use the down / up arrows to change the value of the parameter. Click the Enter button to save the changes.
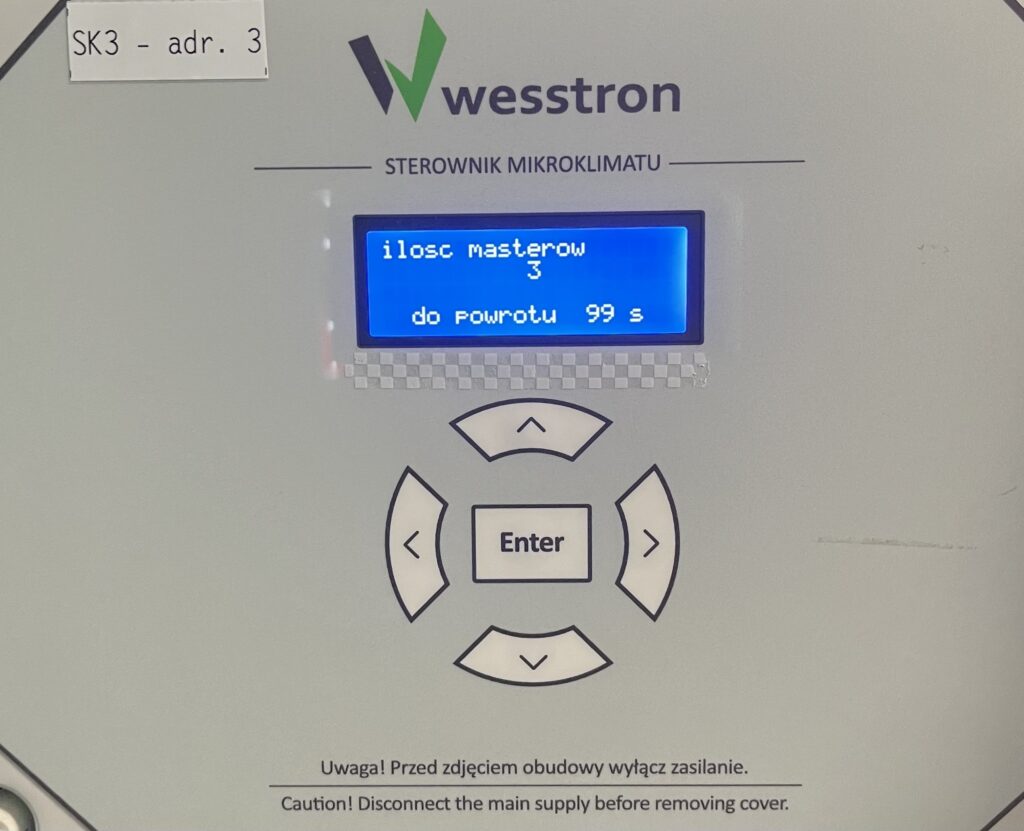
Use the right arrow to go to the number of masters menu, then use the down / up arrows to change the number of masters. Click the Enter button to save your changes.
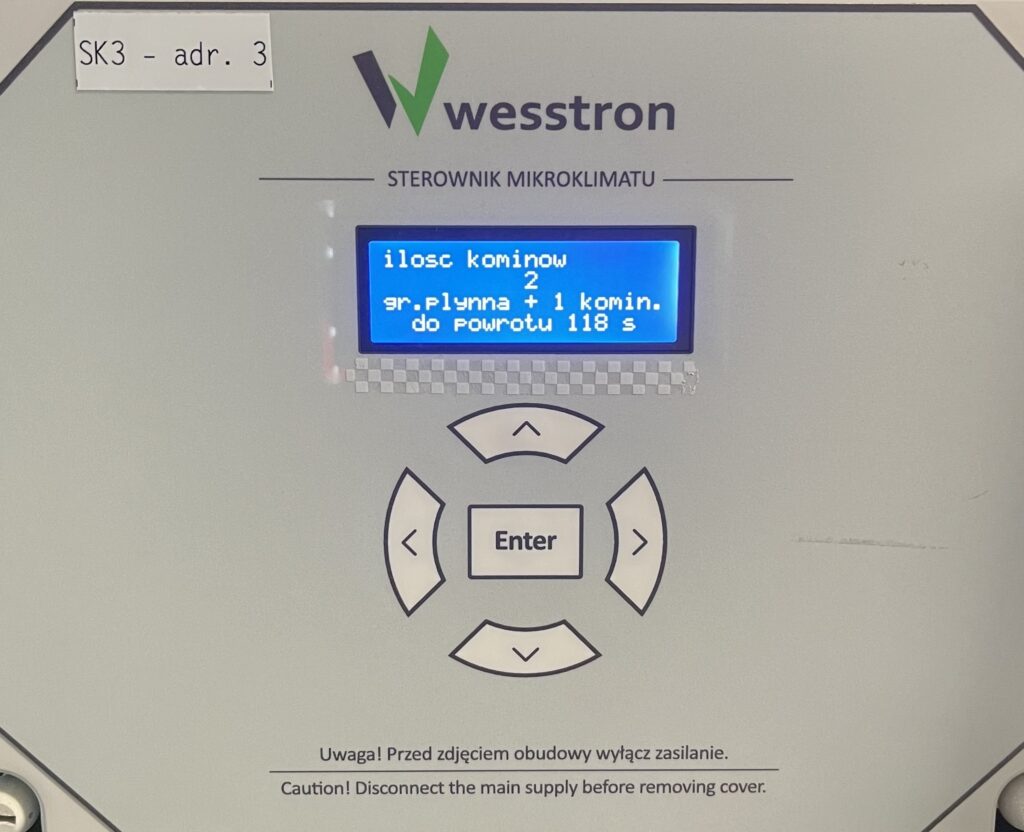
Use the right arrow to go to the number of chimneys menu, then use the down / up arrows to change the number of chimneys. Click the Enter button to save your changes.
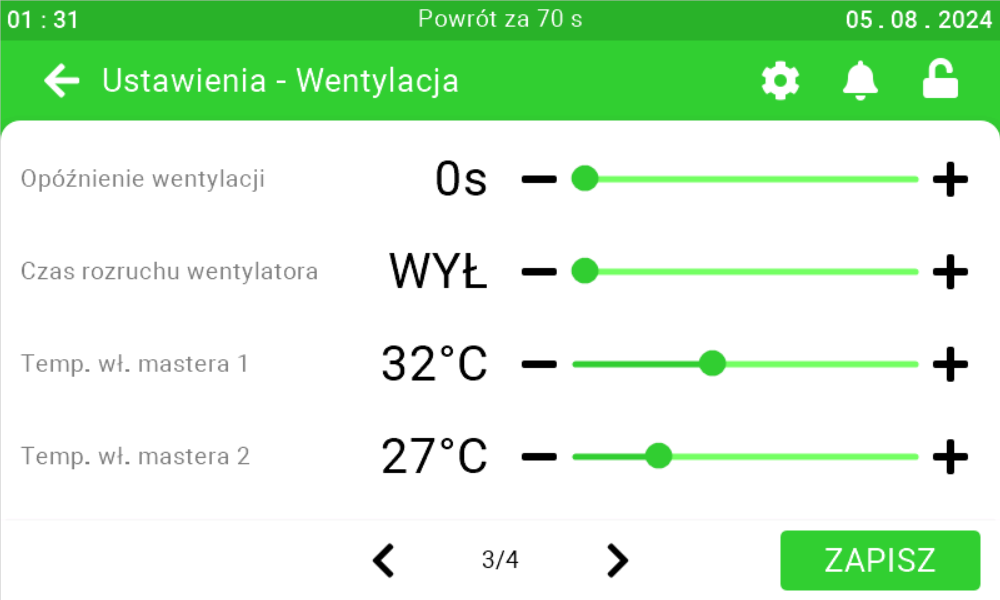
Ventilation settings on the SK-4 controller
In order to directly set ventilation settings on the SK-4 controller, you need to log on the climate controller. To do this, click the highlighted item.
Enter the PIN you set, or swipe your card to log in.
Once you have logged in correctly, a gear icon will appear. Click it to go to the climate controller settings.
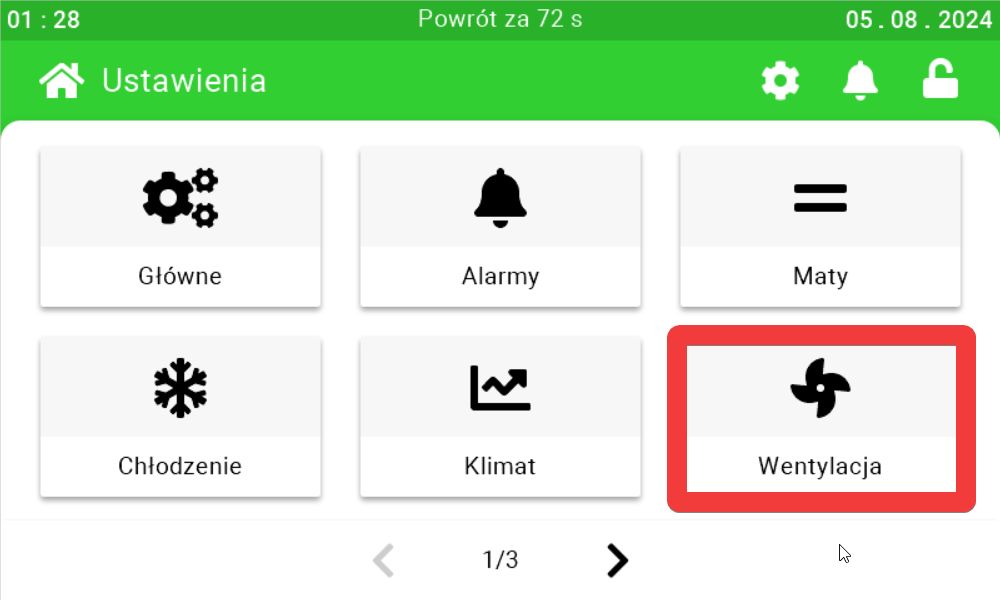
In the new view, go to the Ventilation tab .
Use the sliders and buttons on their sides to configure the ventilation.
Go to the third and fourth pages to configure the masters, ventilation delay and fan start-up time.
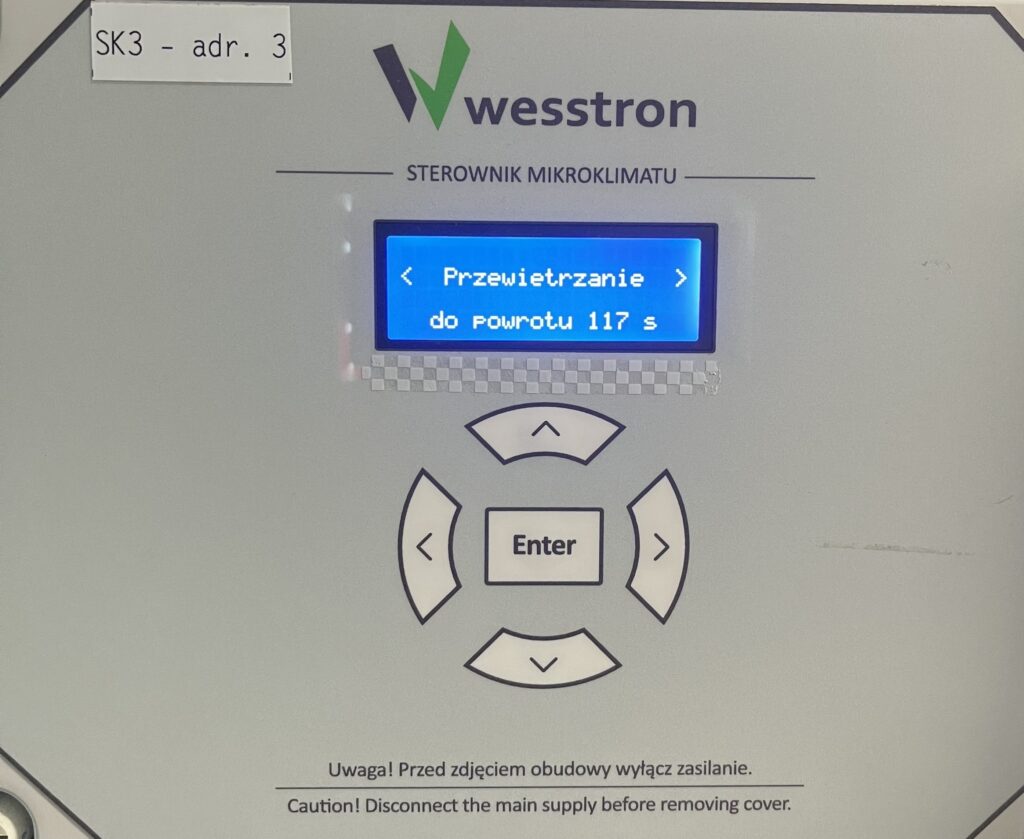
Venting
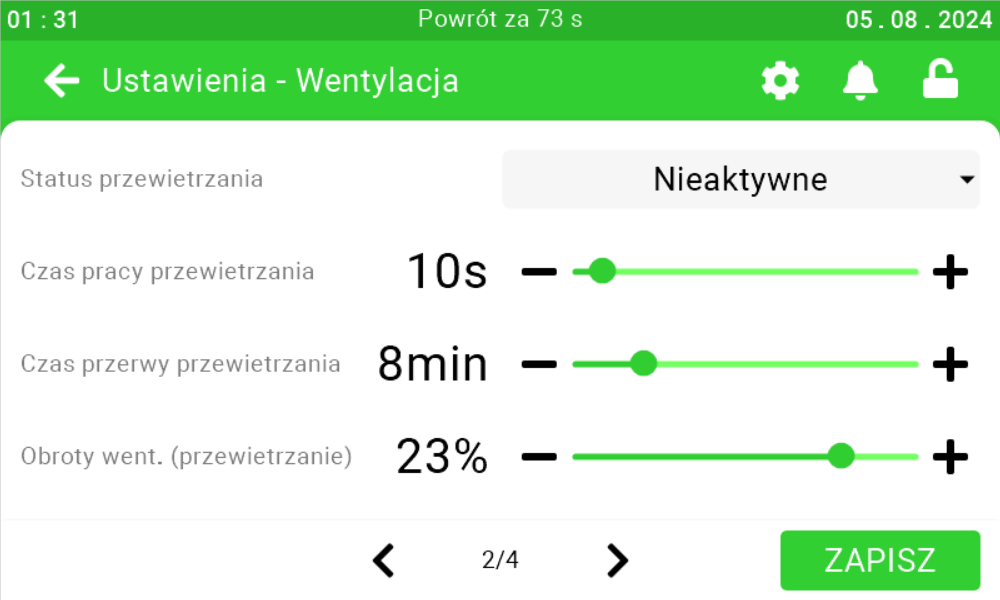
On this panel, you can set whether the controller is to enter the ventilation mode [1],
what is the duration of ventilation operation [2], how long is the interval between ventilation activations [3], with what power the fans are to operate in ventilation mode [4]. After setting the parameters, click the save button [5].
Special case
If the operating time is set to 0s, the controller will not exit the ventilation mode until the temperature stabilizes.

Ventilation settings
To set the parameters on the controller directly, click the highlighted Enter button on the controller.
Use the right arrow to go to Venting menu and click Enter.
Ventilation operating time
Use the down / up arrows to change the ventilation operating time. Click Enter to save the changes.
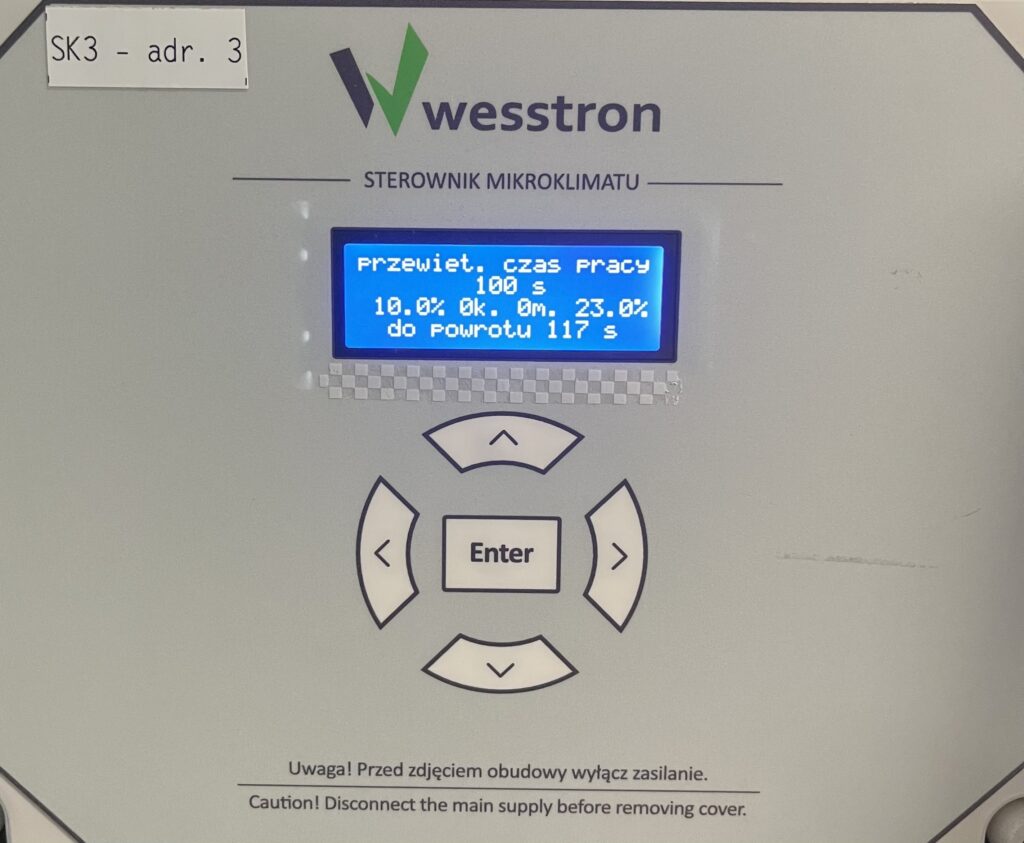
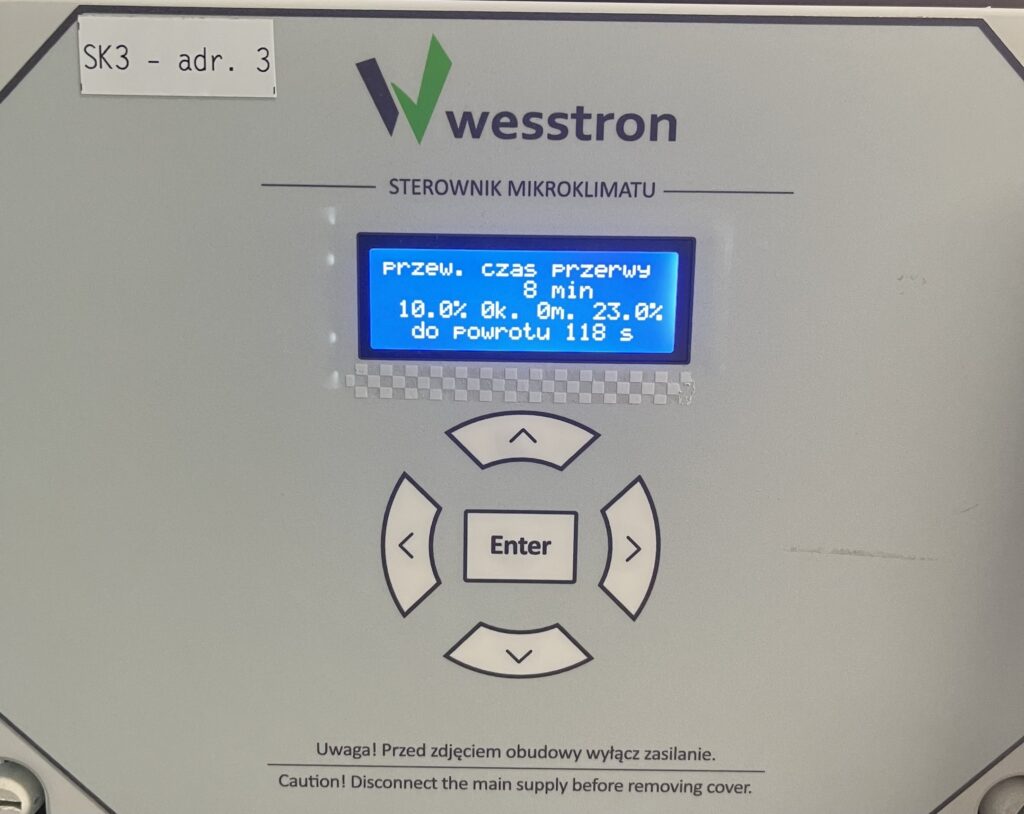
Ventilation interval time
To using the right arrow go to menu lead time . Use the down / up arrows to change the value of the parameter. Click Enter to save the changes.
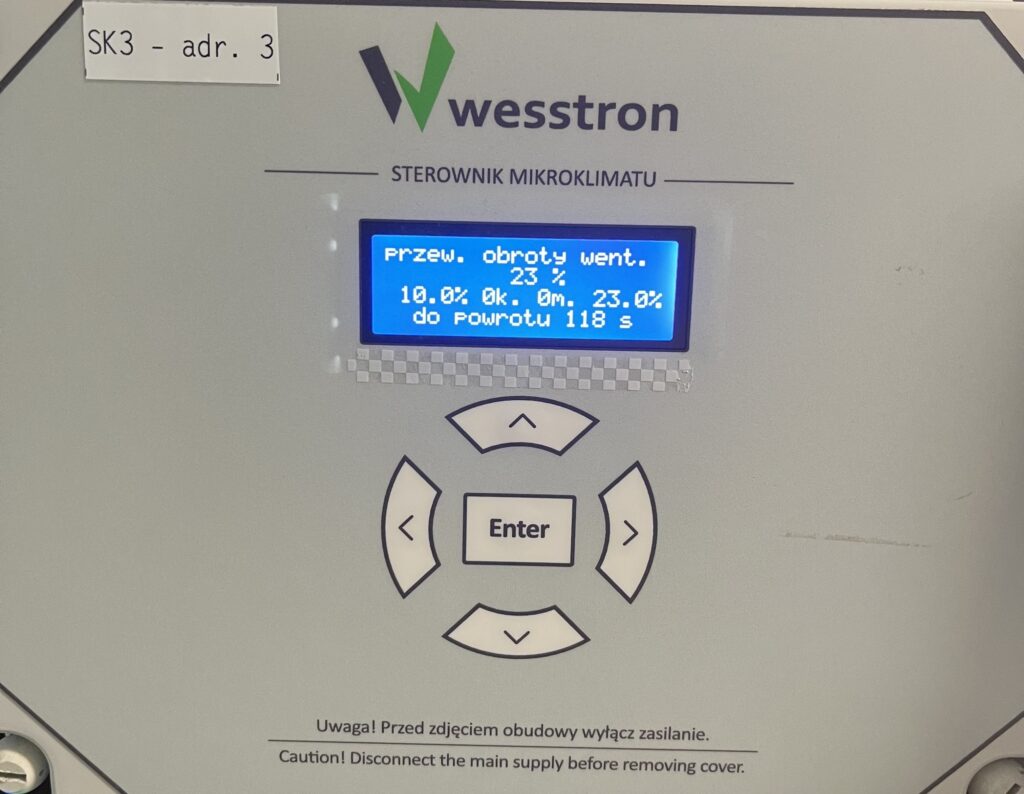
Fan rotation
To using the right arrow go to menu vent. speed . Use the down / up arrows to change the value of the parameter. Click Enter to save the changes.
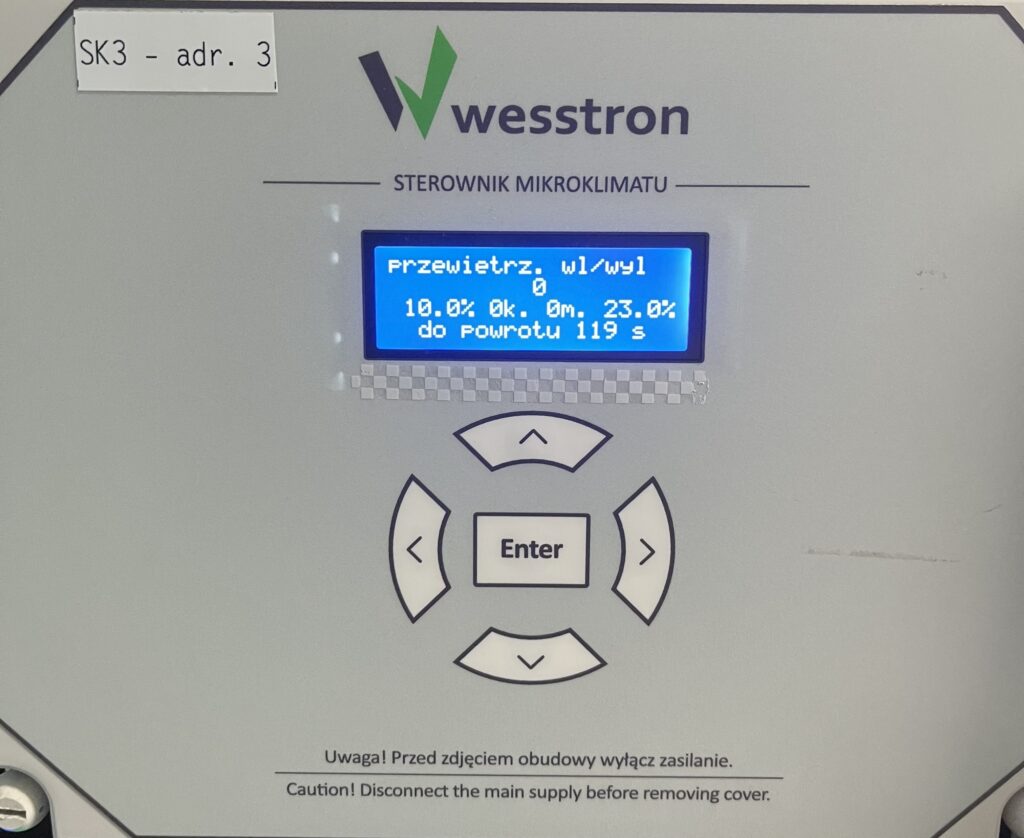
Turn ventilation on/off
To using the right arrow go to menu ventilate. in/out . Use the down / up arrows to change the value of the parameter. On airing has a value of 1, and off airing has a value of 0. Click Enter to save the changes.
Ventilation settings on the SK-4 controller
In order to directly set ventilation settings on the SK-4 controller, you need to log on the climate controller. To do this, click the highlighted item.
Enter the PIN you set, or swipe your card to log in.
Once you have logged in correctly, a gear icon will appear. Click it to go to the climate controller settings.
In the new view, go to the Ventilation tab .
Go to the second page and use the sliders and buttons on their sides to configure ventilation.
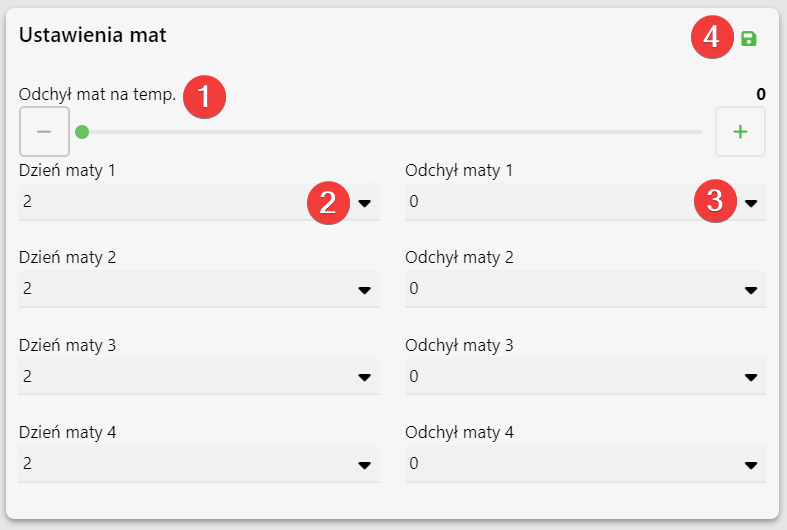
Electric mat settings
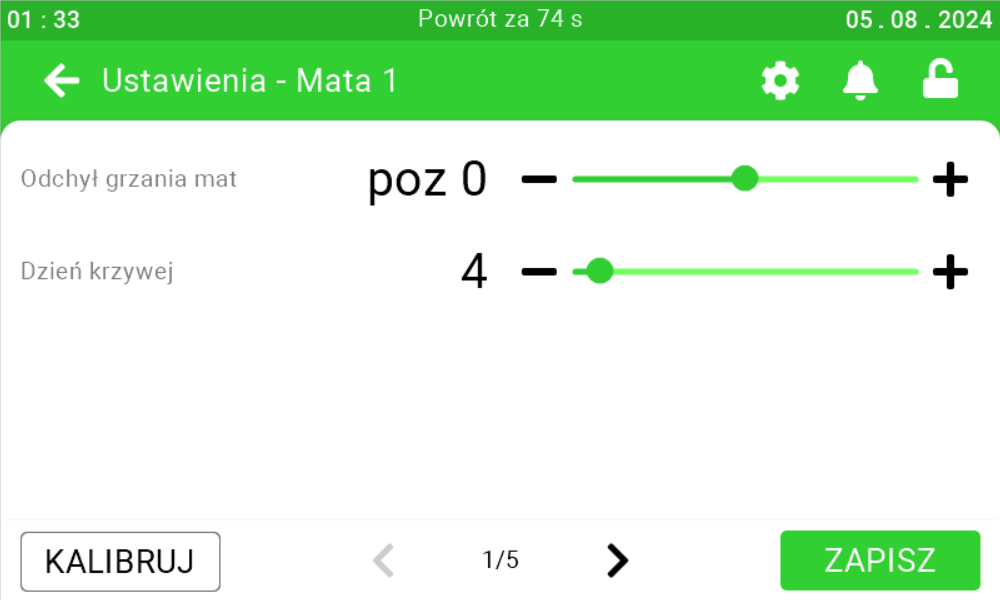
On this panel it is possible to set every how many degrees the level of electric mats should decrease by 1 [1], that is, if the deviation is set to 2, the desired temperature is equal to 20°C, then only when the temperature rises to 22°Cthe power deviation of the mat will decrease by 1 level, if the temperature is equal to 24°Cthe power deviation of the mat will decrease by 2 levels. For mats connected to a specific input, it is possible to change the current day of the curve without changing the day of the climate controller curve [2], and also to change the deviation for selected mats [3].
Attention!
The deviation of the mats is not set for a specific day, instead each day the selected deviation will be set.
Electrical mat settings on the SK-3 controller
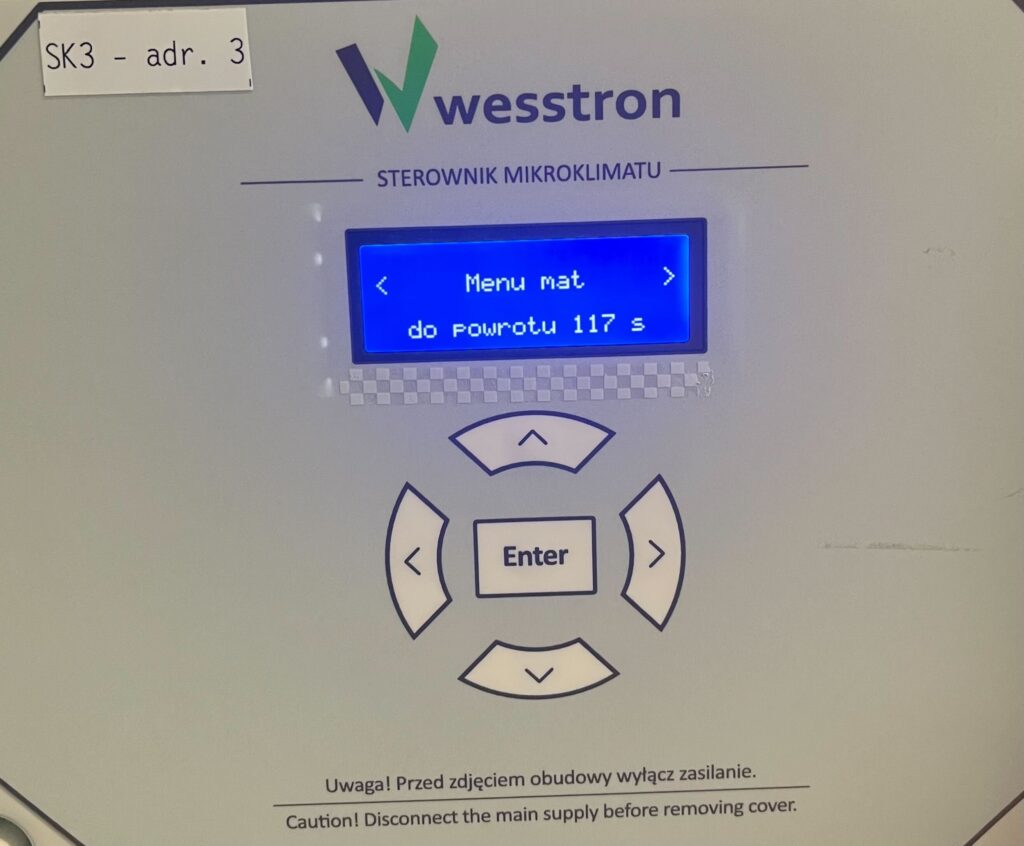
To set the parameters on the controller directly, click the highlighted Enter button on the controller.
Use the right arrow to go to the Mat Menu and click Enter.
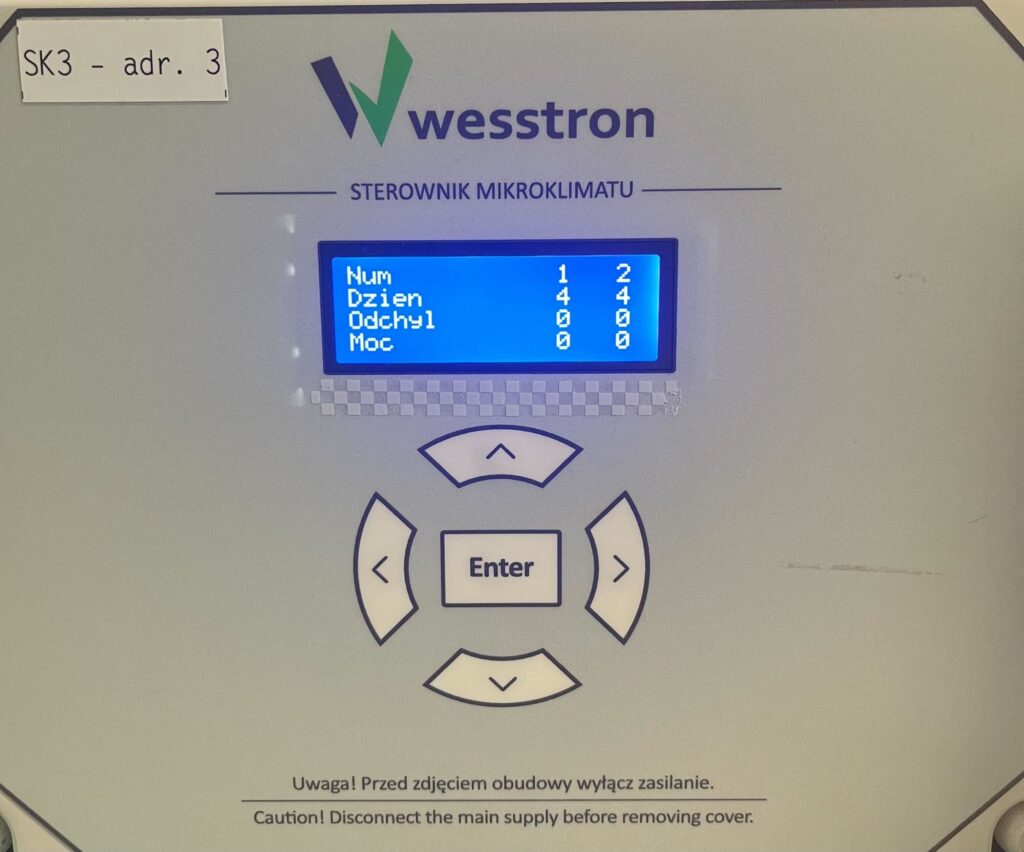
Use the down / up arrows to select which parameter you want to change, then click the right arrow to select on which mat you want to change the parameter value. To save the changes , click Enter.
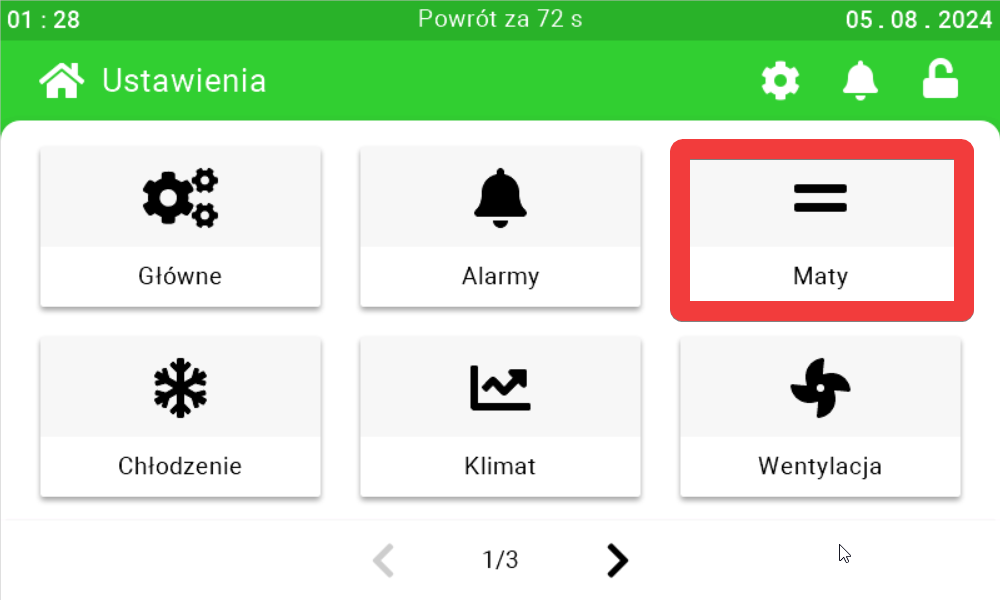
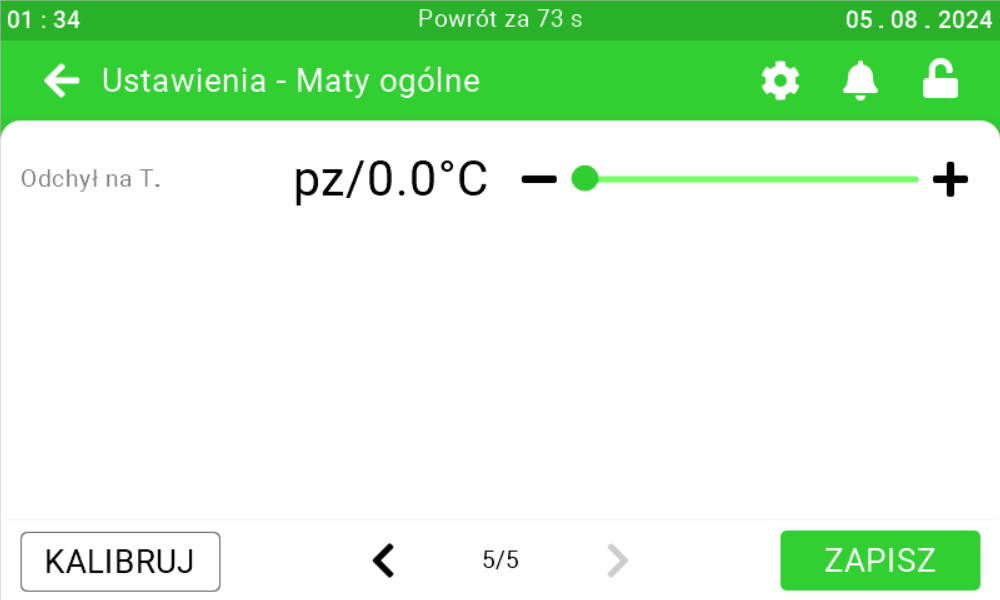
Electrical mat settings on the SK-4 controller
In order to directly set the settings of the electrical mats on the SK-4 controller, you need to log on the climate controller. To do this, click the highlighted item.
Enter the PIN you set, or swipe your card to log in.
Once you have logged in correctly, a gear icon will appear. Click it to go to the climate controller settings.
In the new view, go to the Mats tab .
Go to the second page and use the sliders and buttons on their sides to configure the electric mats. Each mat is configured on a separate page. On the last page, it is possible to configure the temperature deflection of the mats.
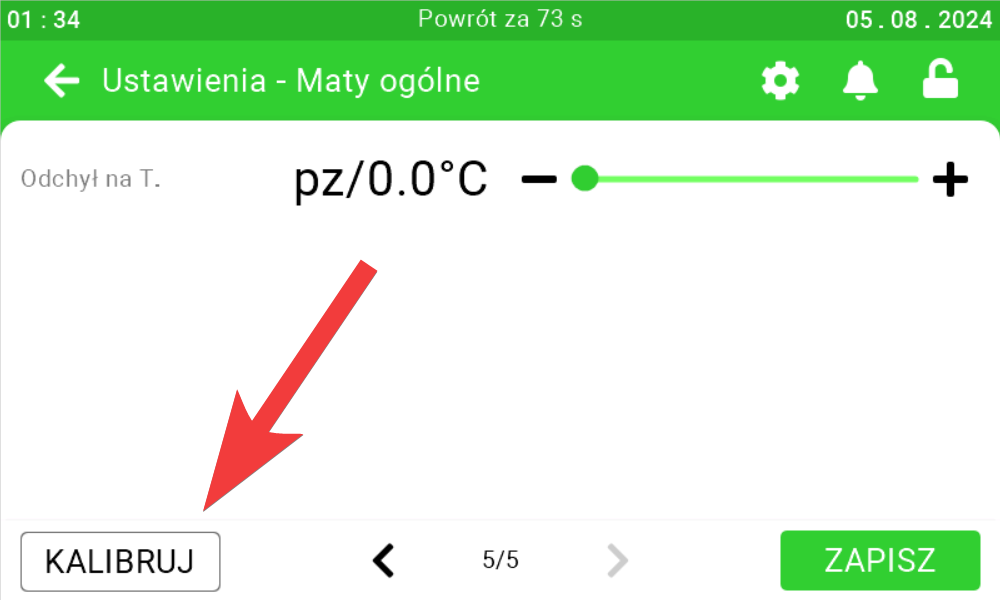
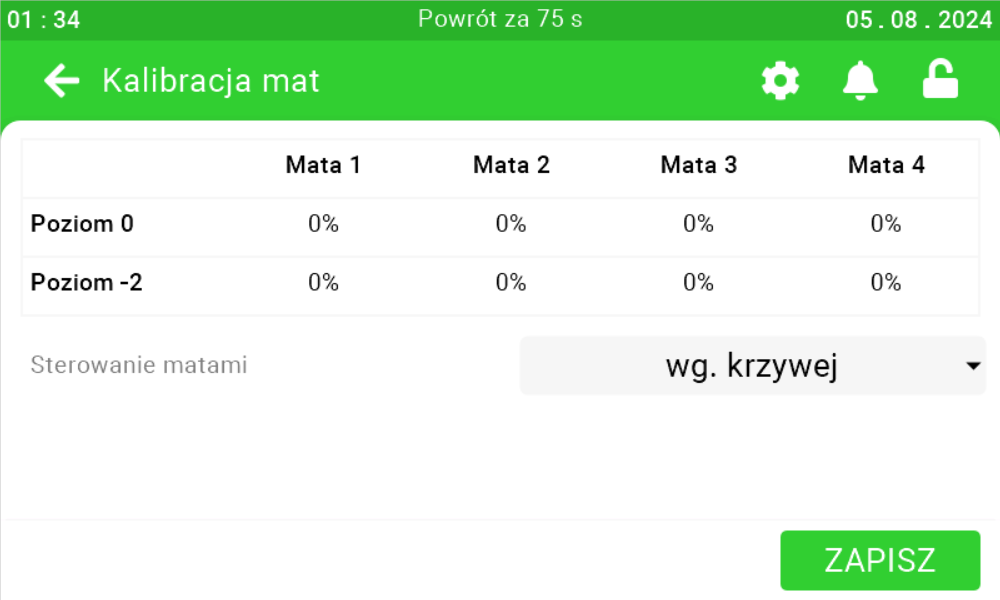
If there is a need to calibrate the mats, click the highlighted button and calibrate the mats accordingly.
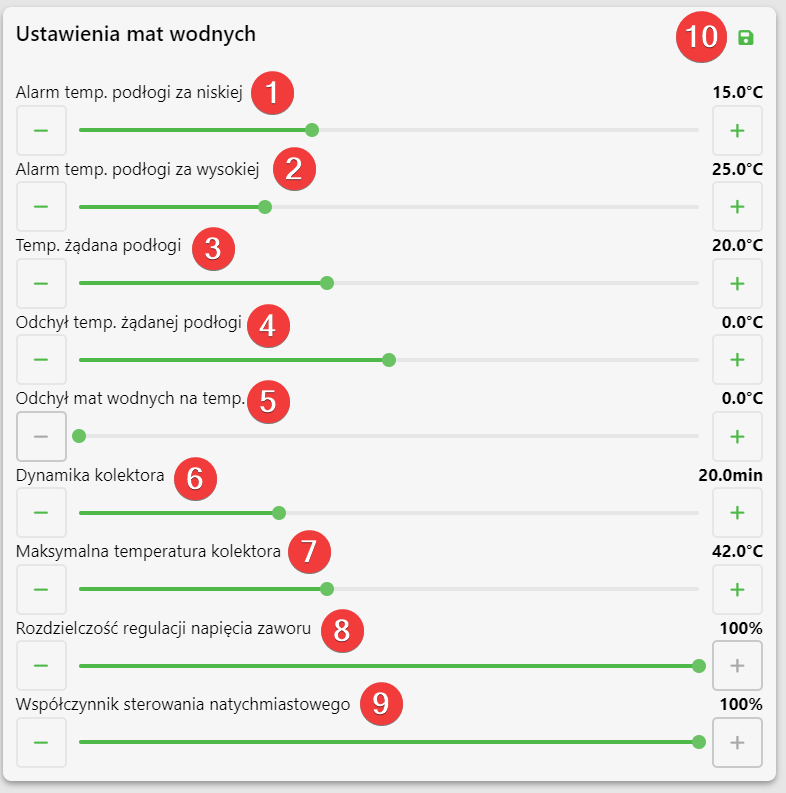
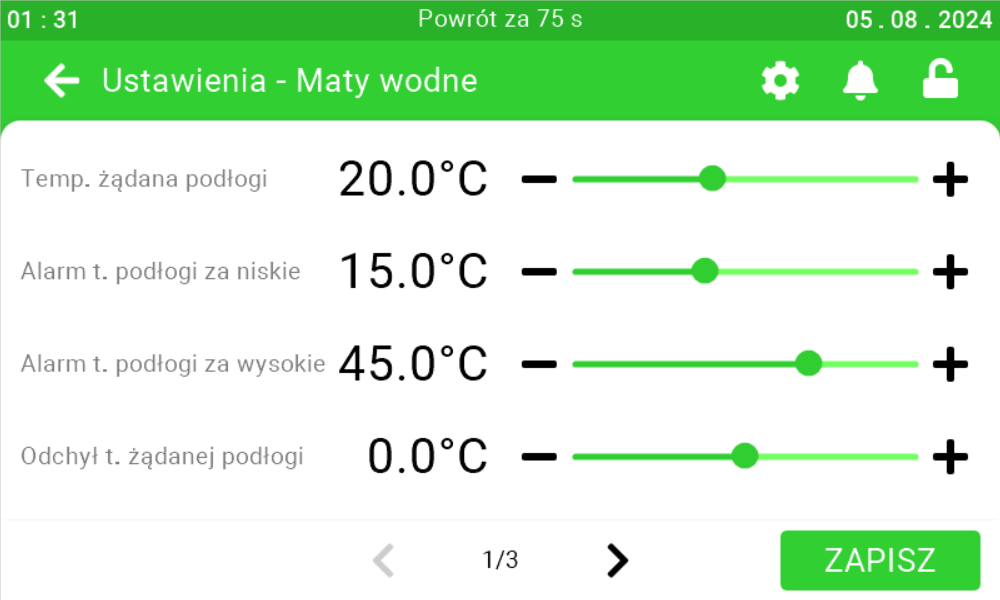
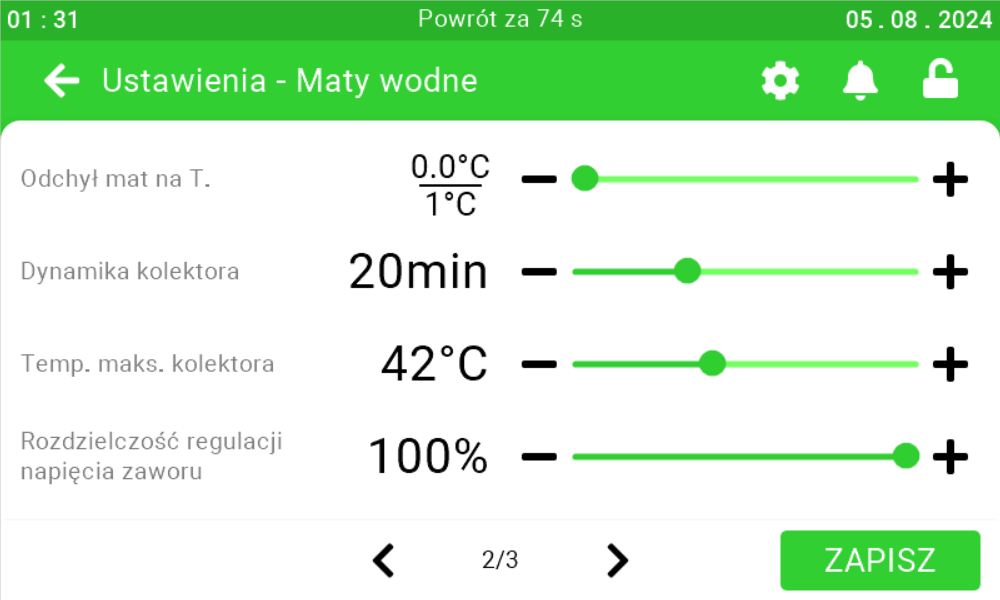
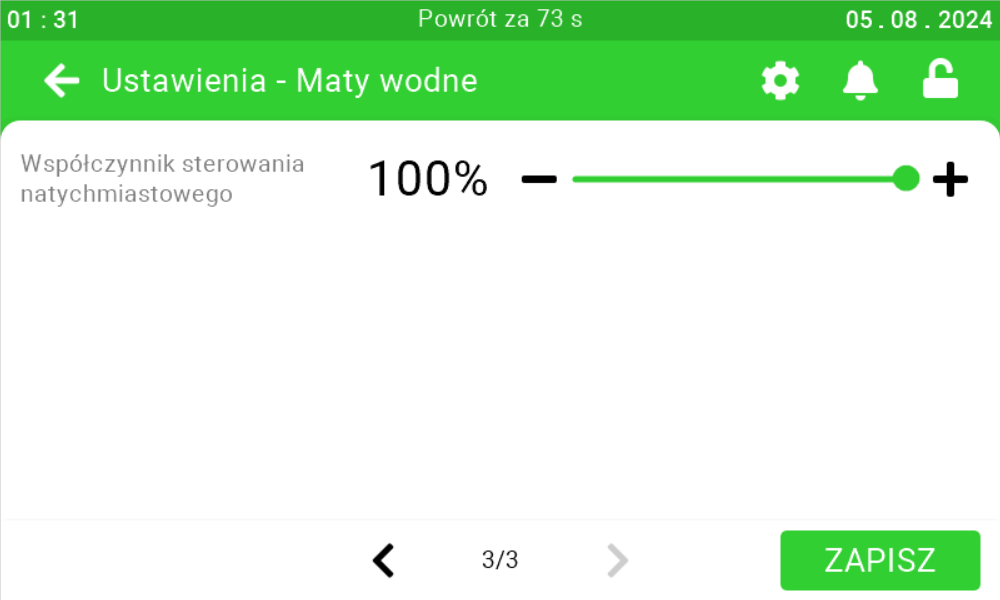
Water mat settings
On this panel it is possible to set at what temperature the floor temperature alarm will be set too low [1], at what temperature the floor temperature alarm will be set too high [2], what the floor temperature should be [3], by how much higher
the desired floor temperature should be for each day of the curve [4], by how much
the desired floor temperature should decrease if the air temperature is higher
than the floor temperature by a specific number of degrees [5]. If you set the deviation of the water mats for the temperature to 1°Cand the air temperature increases by 2°Cthen the desired floor temperature will decrease by twice the set deviation, which in this case is 2°C, if the deviation was set to 1.2°Cthen the desired temperature would decrease by 2.4°C. The dynamics of the collector [6] determines how long it takes for the temperature indicated by the third sensor to stabilize from the moment the position of the three-way valve is changed. In order to protect against too high a floor temperature, the maximum collector temperature [7] should be specified 2 – 6 degrees higher than the desired floor temperature. If the supply manifold sensor is not located directly
after the three-way valve, or the water flow in the floor is too slow, unstable operation of the controller may occur. In this case, reduce the valve voltage control resolution [8] to 25%, and if this does not help then even lower. For the instantaneous control factor [9], follow the same procedure. After setting the parameters, click the save button [10].
Water mat settings on the SK-3 controller
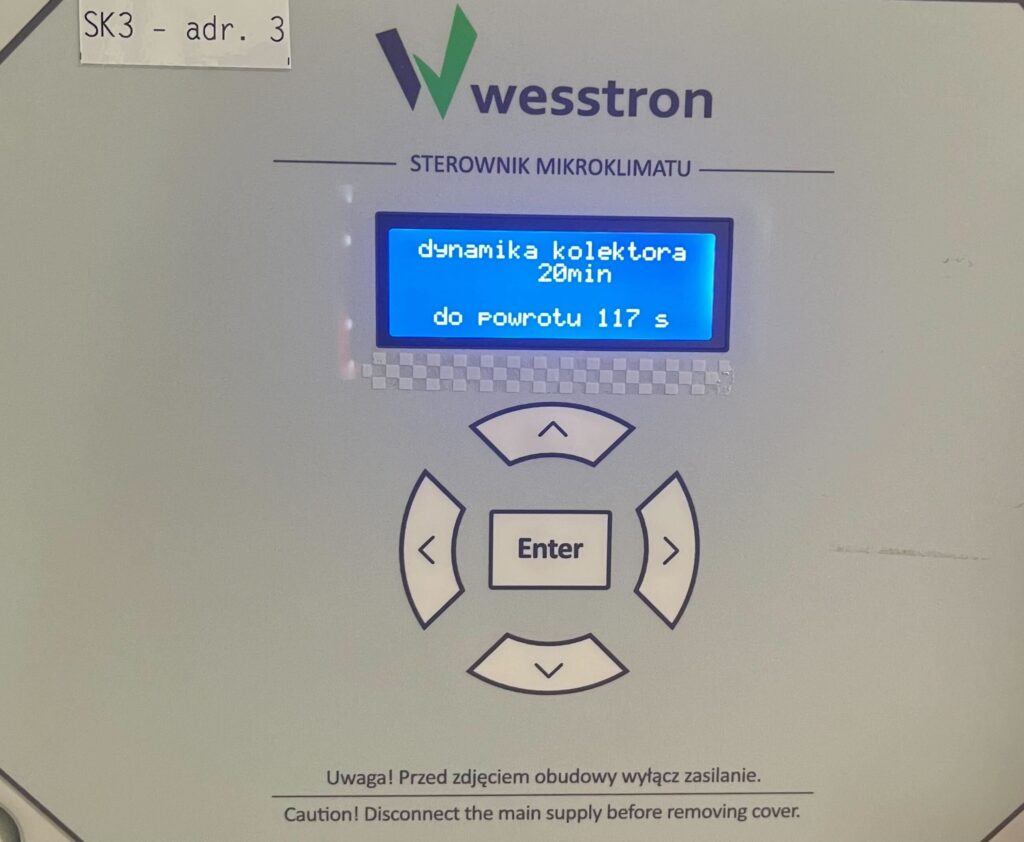
Collector dynamics
To set the collector dynamics on the controller directly, click the highlighted Enter button on the controller.
Use the right arrow to go to the Installer Menu and click Enter.
Use the right arrow to go to the menu param. mat water collector dynamics and click Enter.
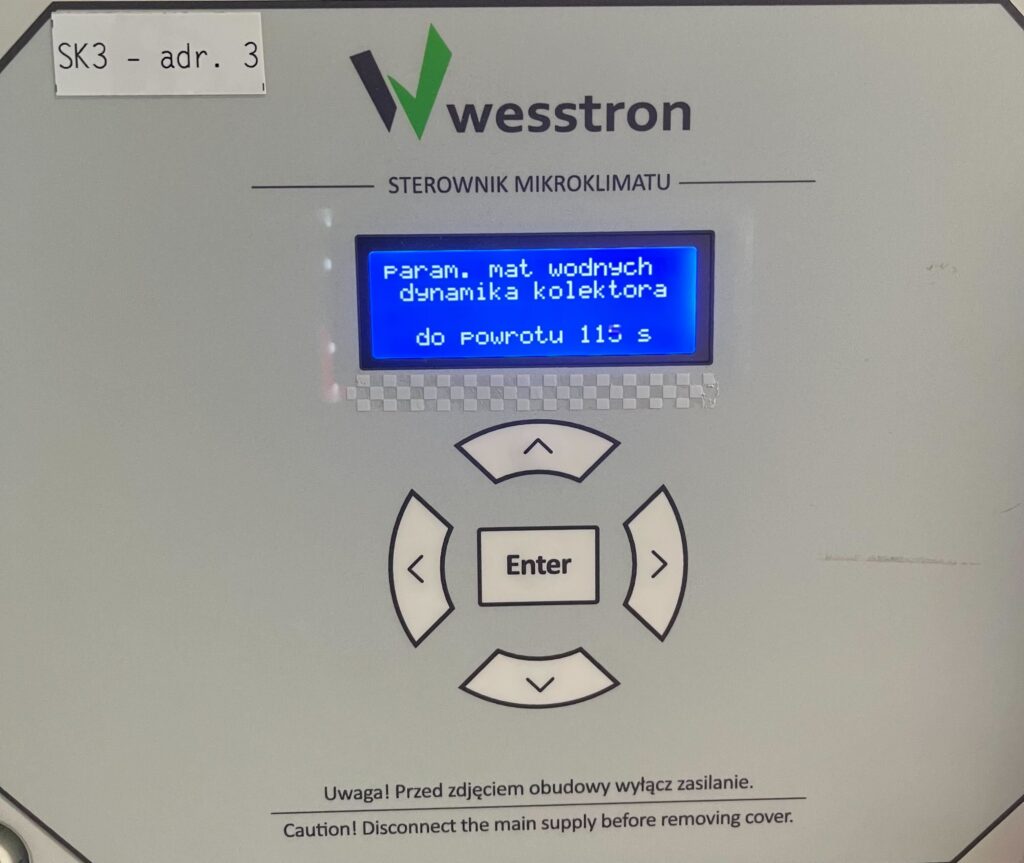
Use the down / up arrows to set the collector dynamic time.
Alarms and floor temperature
To directly set parameters on the controller, click the highlighted Enter button on the controller.
Use the right arrow to go to the User Menu and click Enter.
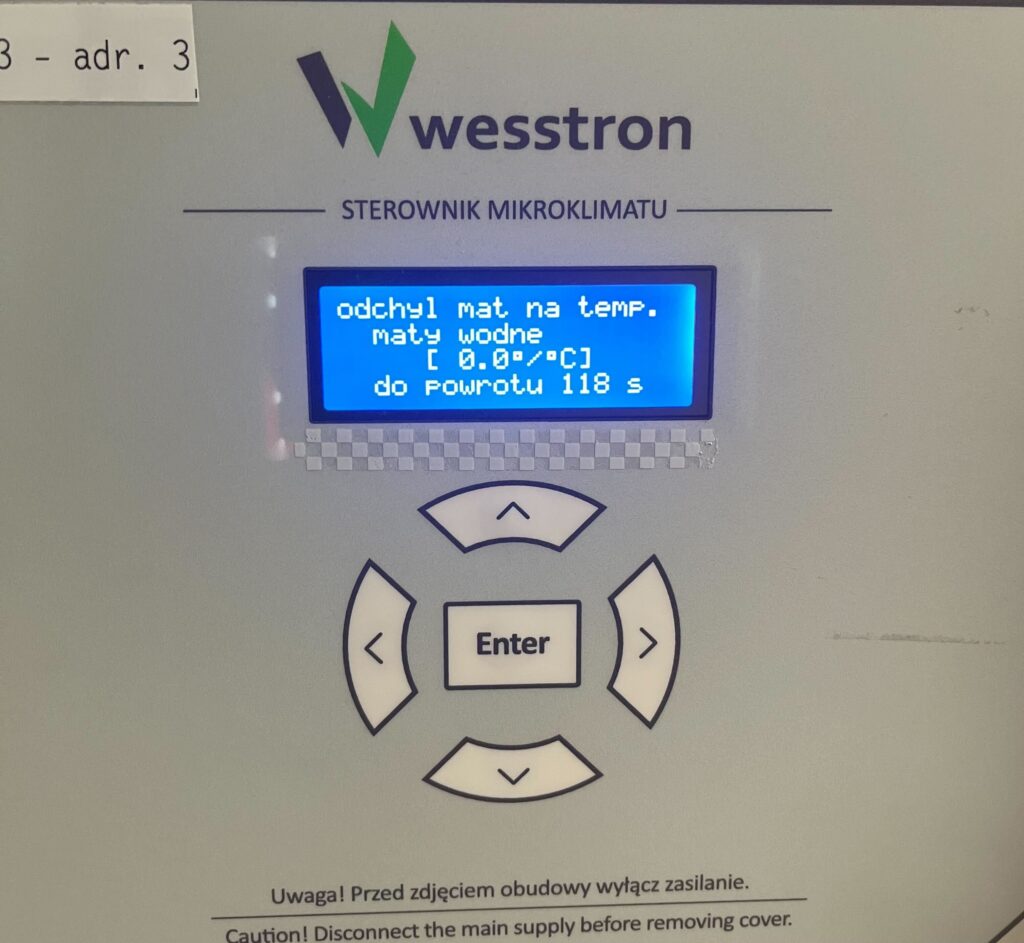
Water mats deviation to temperature
Again use the right arrow to access the menu deviation of mats for temp. water mats and use the down / up arrows to change the value of the parameter. Click Enter to save your changes.
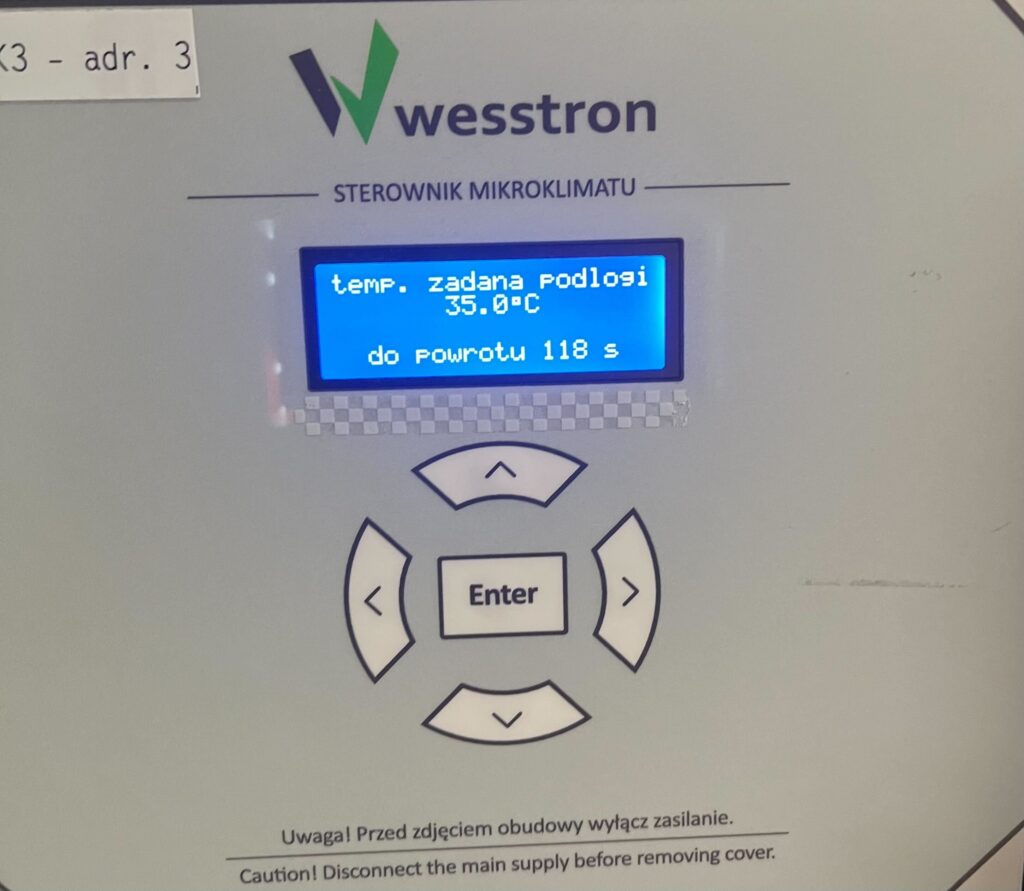
Desired floor temperature
Use the right arrow to go to the menu desired floor temp. and use the down / up arrows to change the value of the parameter. Click Enter to save your changes.
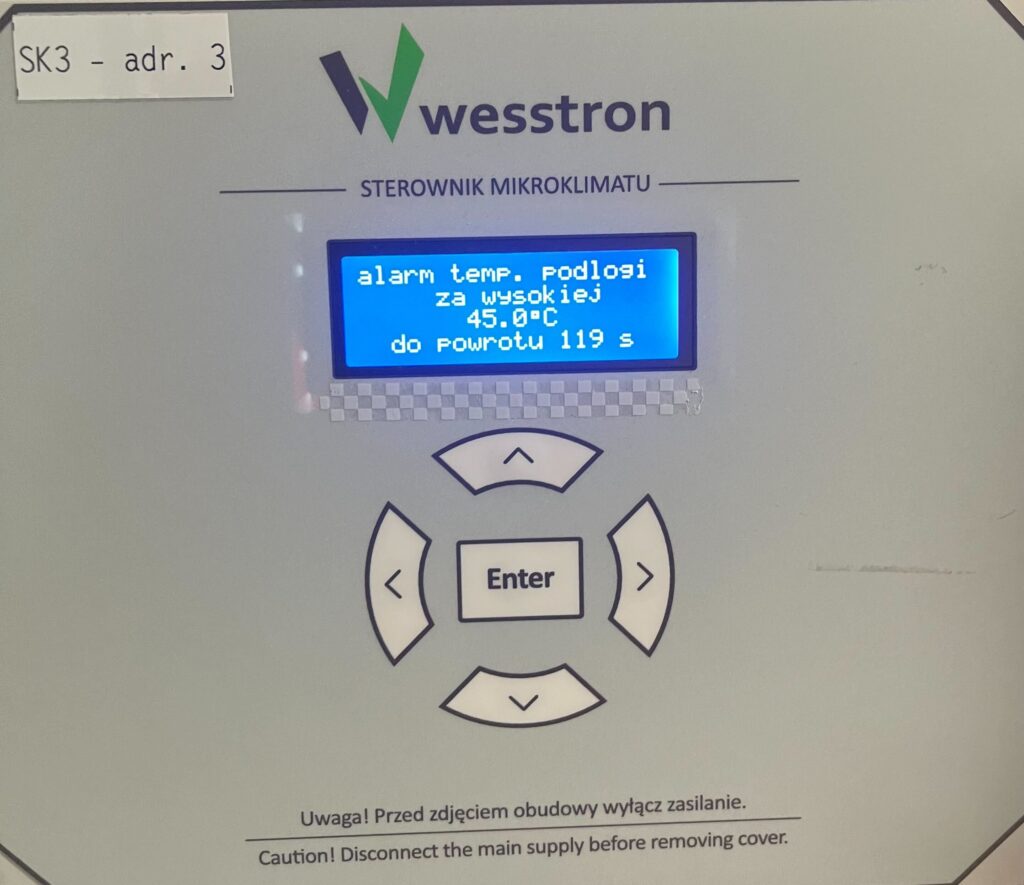
Floor temperature too high alarm
Use the right arrow to go to the menu floor temp. alarm too high and use the down / up arrows to change the value of the parameter. Click Enter to save your changes.
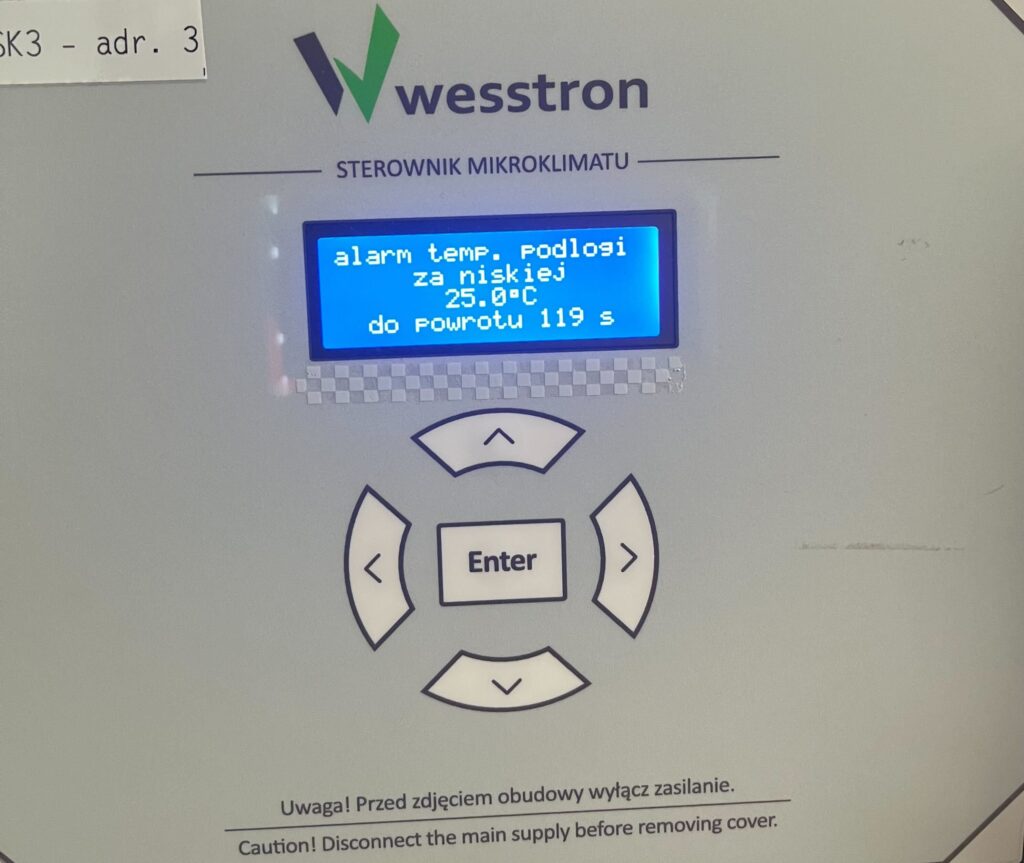
Floor temperature too low alarm
Use the right arrow to go to the menu floor temp. alarm for low and use the down / up arrows to change the value of the parameter. Click Enter to save your changes.
Water mat settings on the SK-4 controller
In order to directly set the water mat settings on the SK-4 controller, you need to log on to the climate controller. To do this, click the highlighted item.
Enter the PIN you set, or swipe your card to log in.
Once you have logged in correctly, a gear icon will appear. Click it to go to the climate controller settings.
In the new view, go to the Mats tab .
Go to the second page and use the sliders and buttons on their sides to configure the water mats.
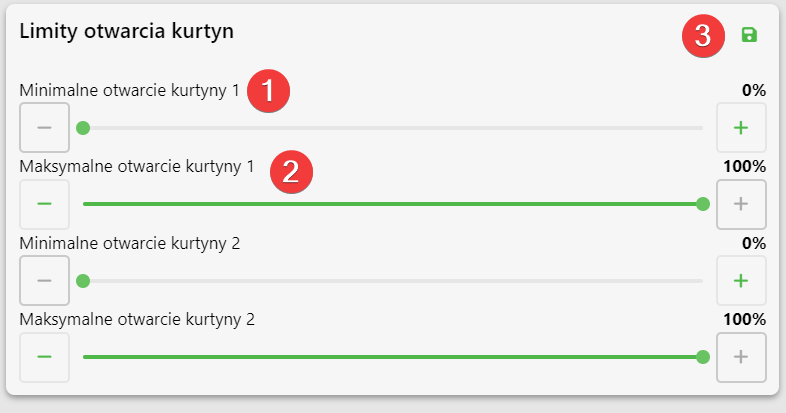
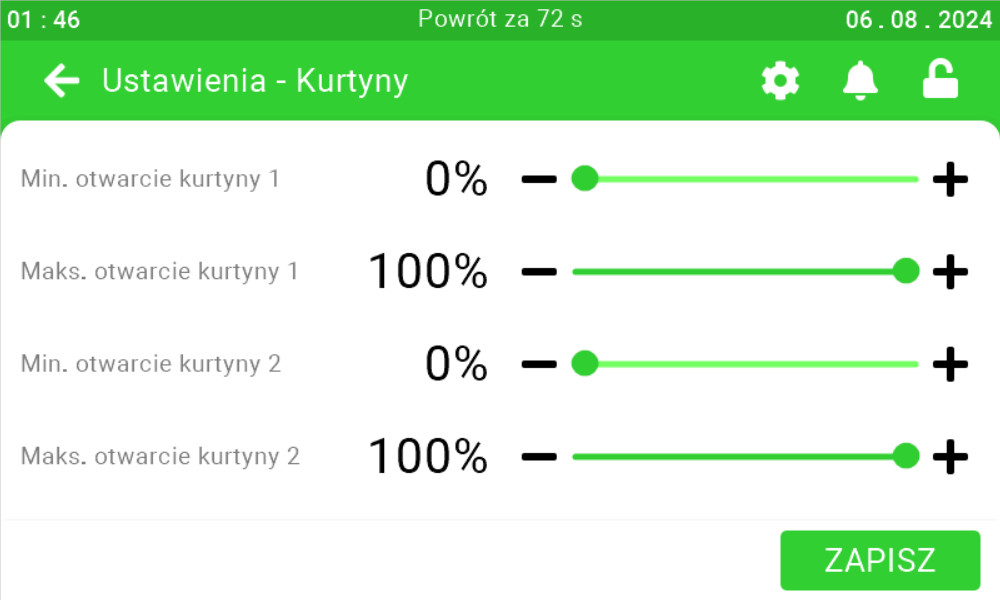
Limits for opening curtains
On this panel you can set how much minimum [1] and maximum [2] both curtains can be opened. After setting the parameters, click the save button [3].
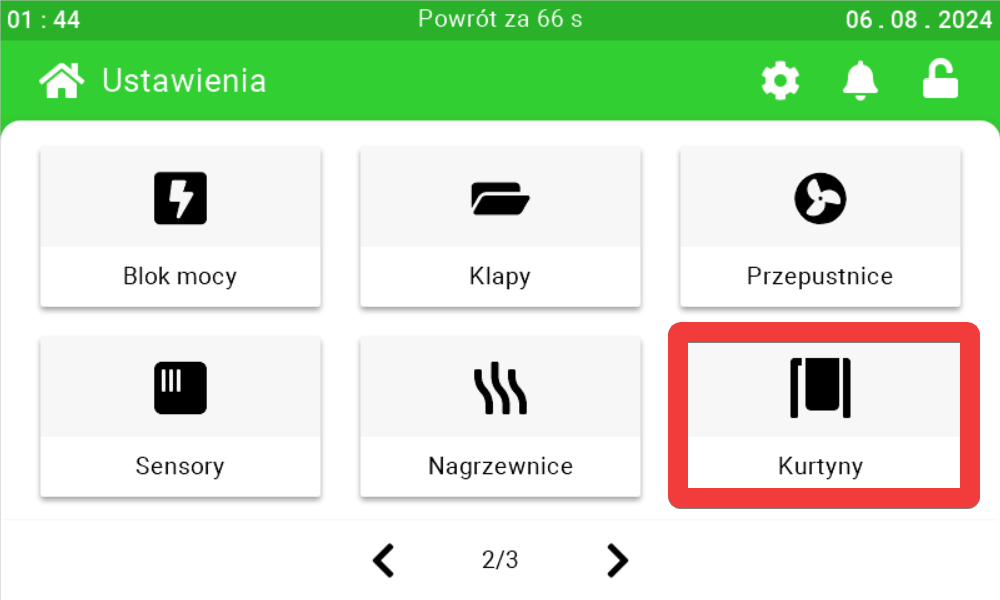
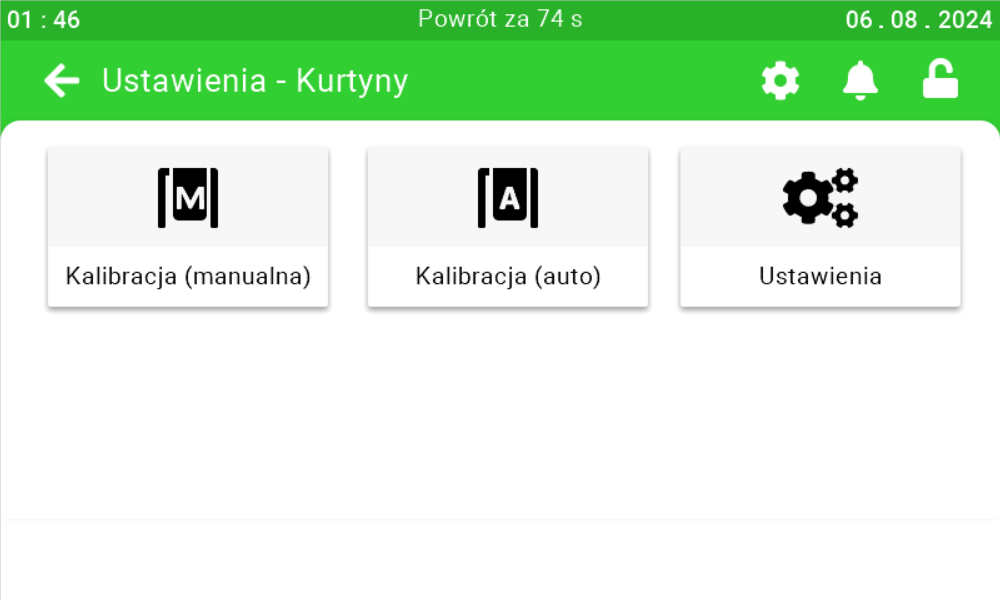
Curtain settings on the SK-4 controller
In order to directly set the curtain settings on the SK-4 controller, you need to log on the climate controller. To do this, click the highlighted item.
Enter the PIN you set, or swipe your card to log in.
Once you have logged in correctly, a gear icon will appear. Click it to go to the climate controller settings.
In the new view, go to the second page and enter the Curtains tab .
Select how the curtains are to be configured and configure them, or change the curtain settings.
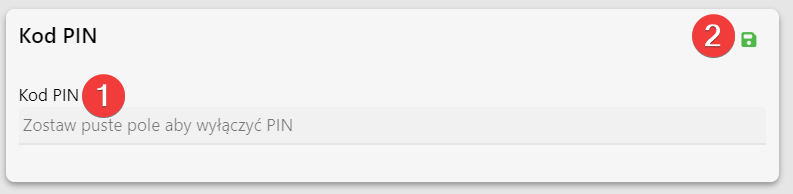
PIN code
On this panel, you can change the PIN used to enter the service mode
on the climate controller. Enter the new four-digit PIN [1] and click the save button [2].
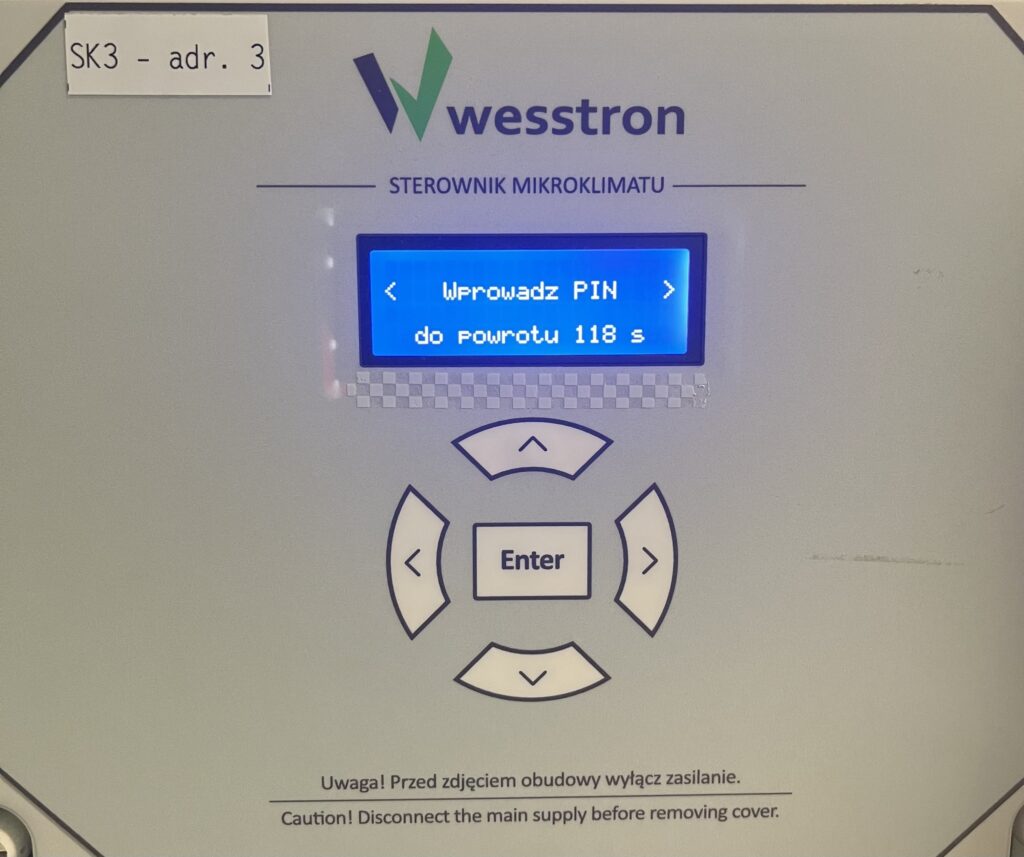
Setting the PIN code on the SK-3 controller
To directly set the PIN on the controller, click the highlighted Enter button on the controller.
Then use the right arrow to go to the Enter PIN menu. Click Enter to enter it.
Use the down / up arrows to set the PIN code. Use the left / right arrows to select the PIN code item you want to change.