1. Home
  2. Devices
  3. Cloud Box
  4. Cloud BOX – setting up wireless connection to the Internet network
  1. Home
  2. Devices
  3. Cloud BOX – setting up wireless connection to the Internet network

Cloud BOX – setting up wireless connection to the Internet network

1. Connect power supply to the Cloud Box

2. Connect to the ‘FeturaCLOUD_AP’ Wi-Fi network
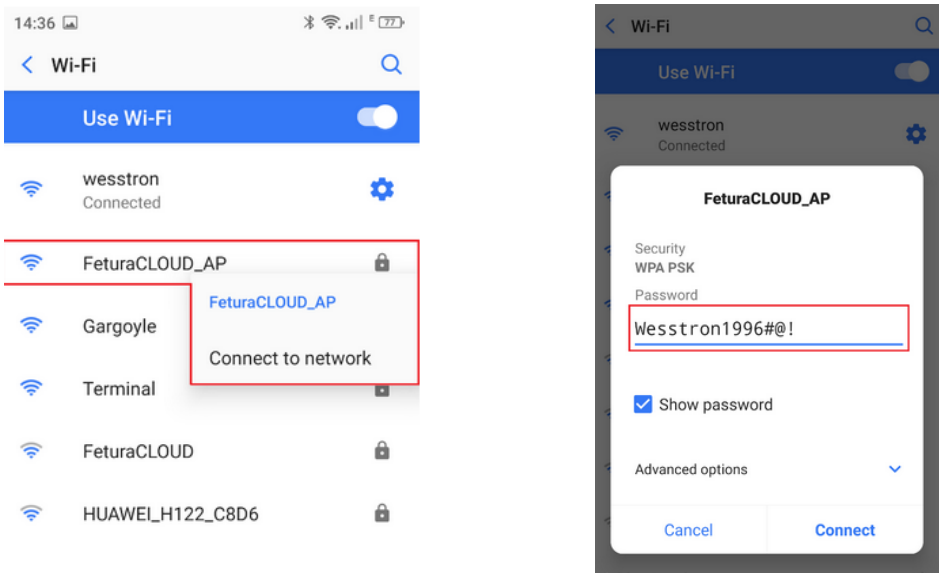
‘FeturaCLOUD_AP’ Wi-Fi password: Wesstron1996#@!

If there is no ‘FeturaCLOUD_AP’ network, press and hold the Cloud BOX reboot button for 15 seconds

Two phone screenshots showing the Wi-Fi settings list with the "FeturaCLOUD_AP" network highlighted in red, and the password entry screen with the WPA PSK password field highlighted in red, filled with the default Cloud BOX Wi-Fi password.

3. Scan the QR code to enter the Cloud BOX configuration site or open any web browser and type into the address bar: 192.168.4.1
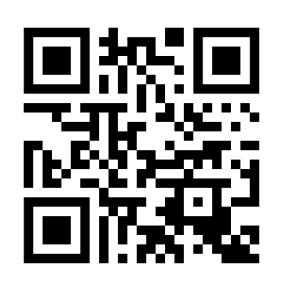
QR code used to open the Cloud BOX configuration page on a phone or tablet.

4. Enter SSID name and password of your Wi-Fi network

5. Click the Connect button to connect the Cloud BOX to your Wi-Fi
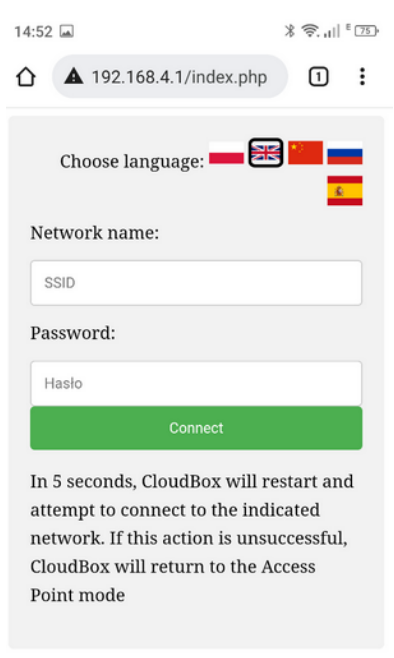
Cloud BOX configuration web page (192.168.4.1) with a language selector, Network name (SSID) and Password fields, and the green Connect button used to join the Cloud BOX to a Wi-Fi network.

6. Cloud BOX will reboot after 5 seconds and establish connection to the given Wi-Fi network (step 4)

7. Successfully connected Cloud BOX will flash a green LED indicator (top left corner)
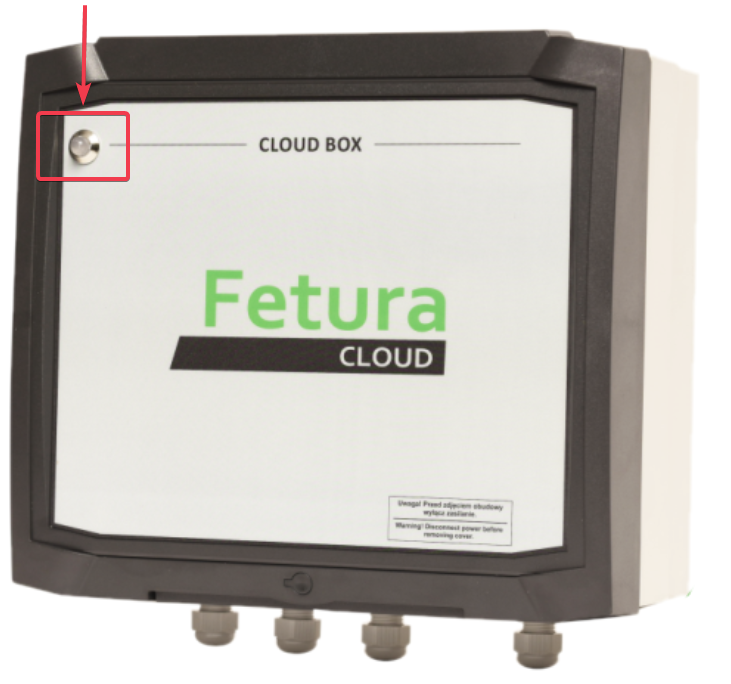
Photo of the Cloud BOX device housing with a red arrow and box pointing to the indicator LED in the top left corner, used to check the connection status.

If there is no connection to the Internet network Cloud Box will flash a blue LED indicator

Updated on 2026-07-23
Was this article helpful?

Related Articles

Need Support?
Can't find the answer you're looking for?
Contact Support

Leave a Comment