1. Home
  2. Breading
  3. Weaner/Finisher
  4. How to move in the RFID piglet to the farm?
  1. Home
  2. Breading
  3. How to move in the RFID piglet to the farm?

How to move in the RFID piglet to the farm?

Breeding

After logging in and entering the farm, go to the “Breeding” tab.
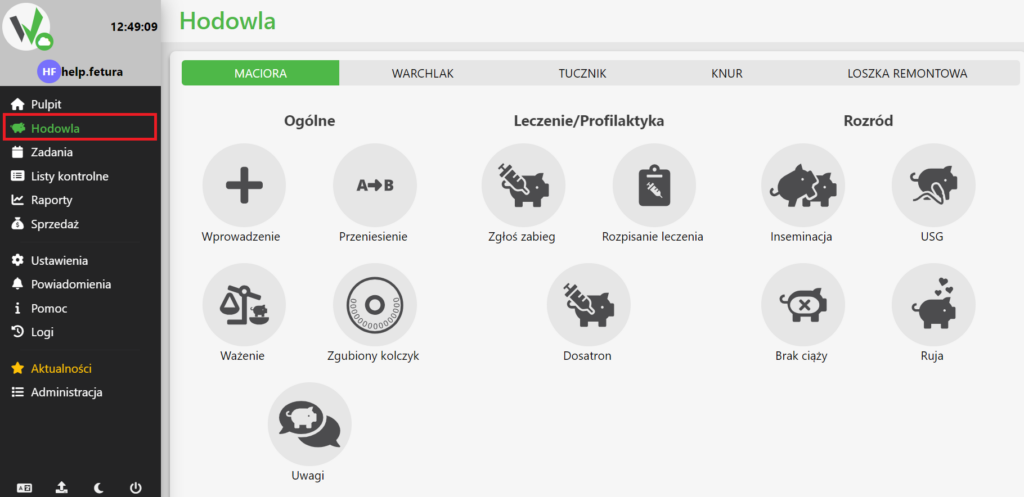
Fetura CLOUD panel with the "Hodowla" (Breeding) item highlighted in red in the left sidebar menu, leading to the breeding module with Sow, Piglet, Porker, Boar and Gilt tabs.

Piglet tab

In the breeding panel, find the tab titled “Piglet” and click it.
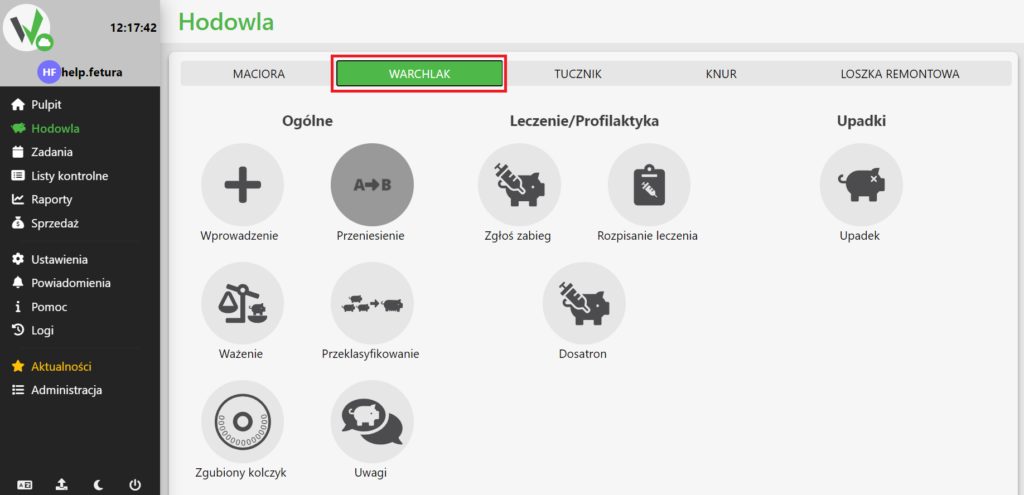
Breeding panel with the "WARCHLAK" (Piglet) tab highlighted in red on the top bar, opening the list of piglet functions such as Introduction, Transfer or Report treatment.

Introduction of the RFID piglet

In the warbler tab, there is a button labeled “Introduction.” Click it to proceed to the selection of the type of data to be entered.
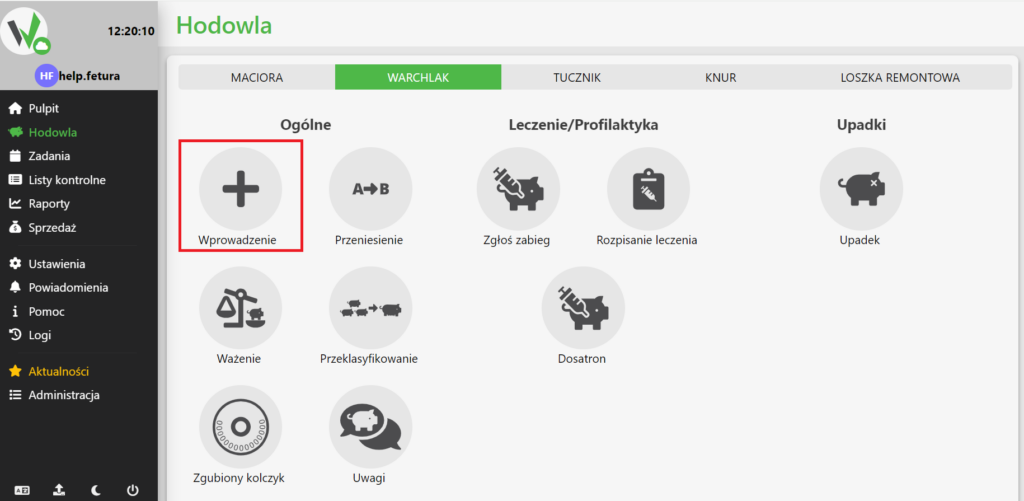
Piglet tab with the "Introduction" icon highlighted in red, used to start entering new animals onto the farm.

Selection of the type of animal to be introduced

After clicking the “Input” button, select “WARCHLAK” to enter the data for the RFID warbler.
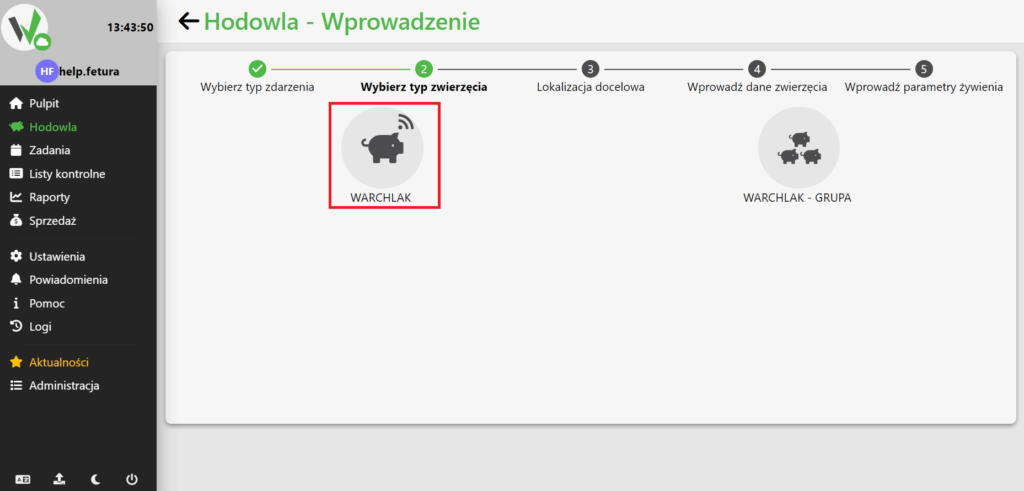
Breeding - Introduction screen, Select animal type step, with the "WARCHLAK" (Piglet) icon highlighted in red for introducing a single RFID piglet.

Sector selection

In this step, select the sector into which the piglet is to be introduced. To select a sector, type its name in the field, or click it and select a sector from the list.
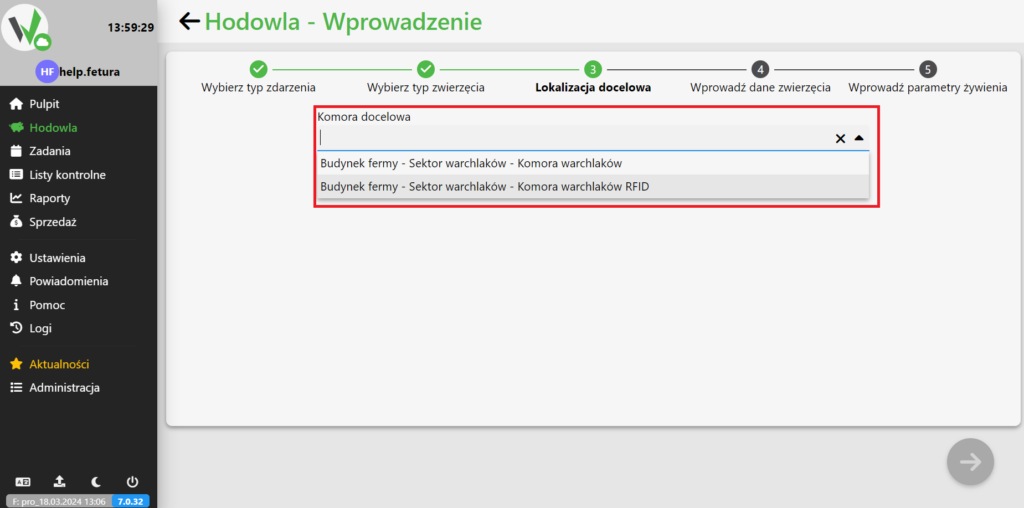
Breeding - Introduction screen, Target location step, with the "Komora docelowa" (Target chamber) dropdown highlighted in red, showing the available sectors and chambers to choose from.

If there are no sectors on the farm yet, use the following guide.

After selecting a sector, click the button in the lower right corner to go to the RFID porker entry form.
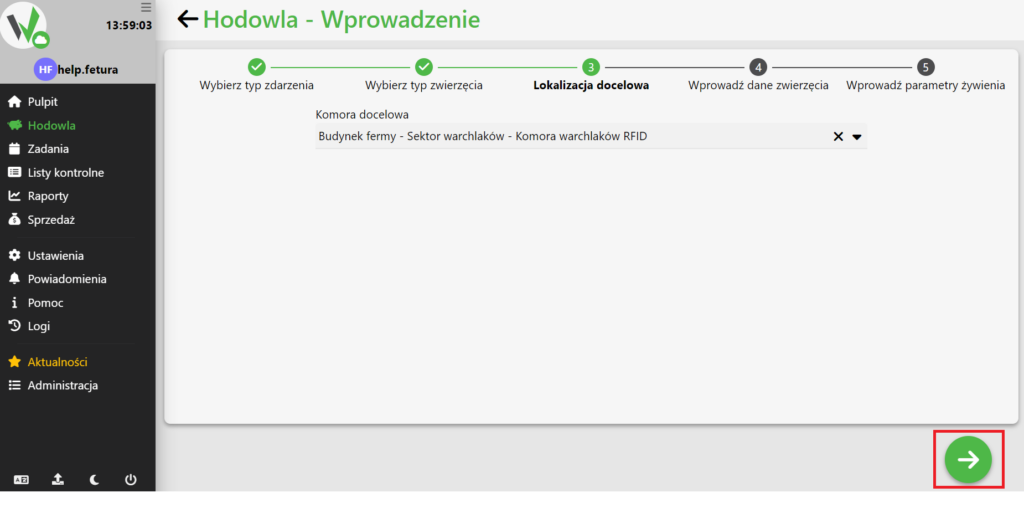
Breeding - Introduction screen with the target chamber selected and the green arrow button in the bottom-right corner highlighted in red, moving to the RFID piglet entry form.

RFID piglet data entry

If the RFID piglet is to be in a new group, click the “new group” button and enter the name you want the group to have.
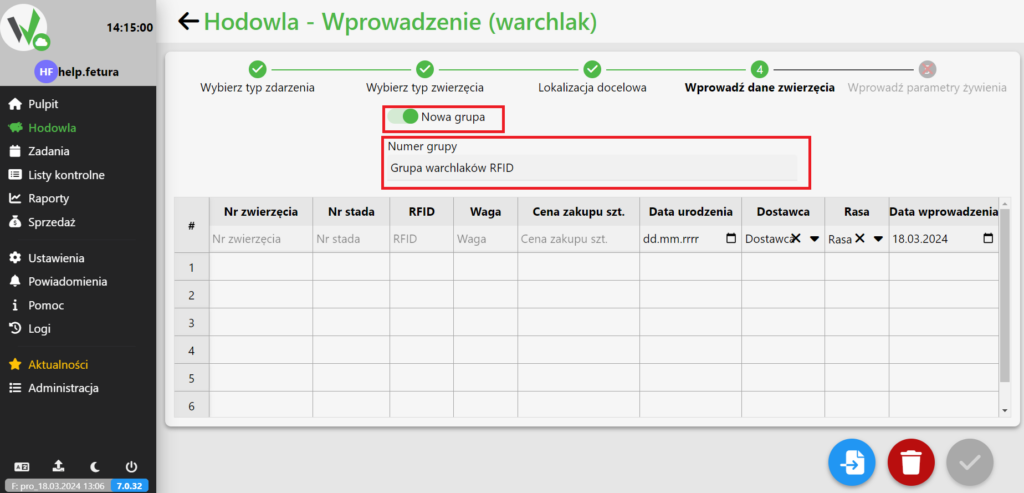
Piglet entry form (step 4) with the "Nowa grupa" (New group) toggle switched on and the group name field highlighted in red, used to create a new piglet group.

If, instead of creating a new group, you want to join a warbler to an existing group, you should enter the name of the group in the highlighted box, or select it from the list after clicking on the box.
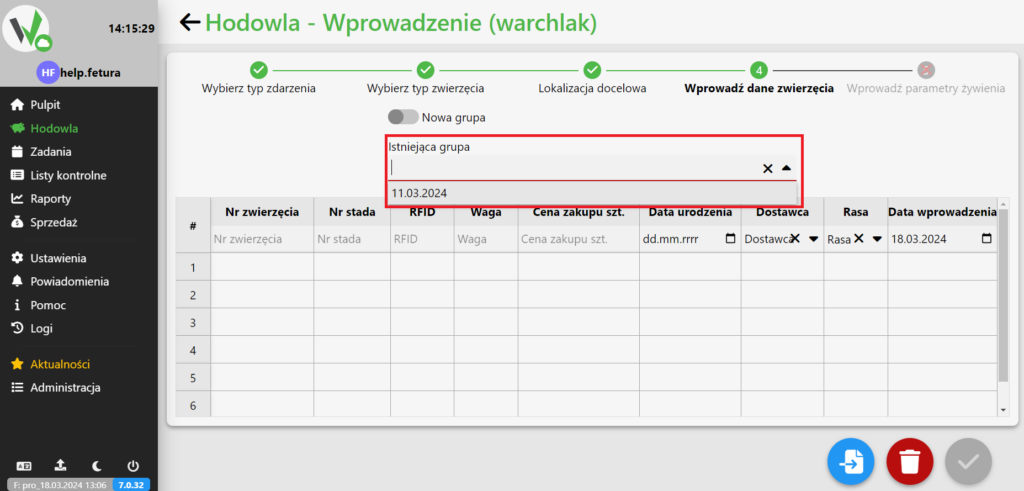
Piglet entry form with the "Istniejąca grupa" (Existing group) field highlighted in red, allowing an existing group to be selected from the list instead of creating a new one.

The image below highlights the mandatory fields. You need to fill them in so that the RFID piglet can be introduced. Fields that are not marked are optional and may not be filled in.
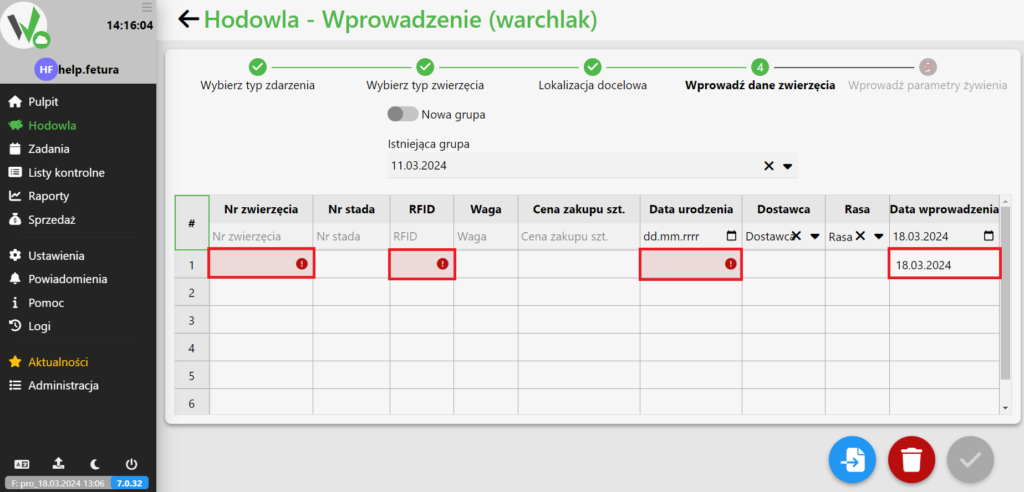
RFID piglet data table with the mandatory Animal number, RFID and Date of birth fields highlighted in red as required entries.

After completing the form, click the highlighted button to create an RFID warbler.
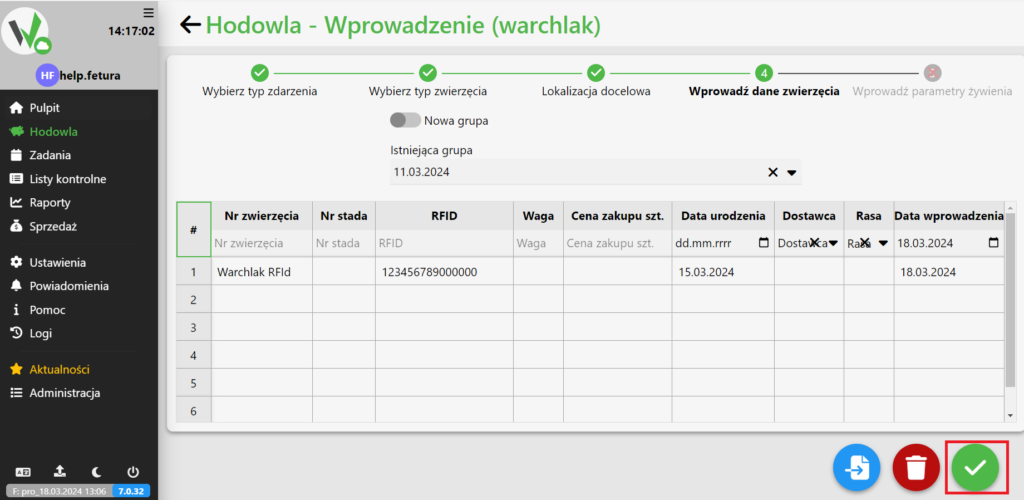
Completed RFID piglet data table with the green confirm (checkmark) button in the bottom-right corner highlighted in red, used to create the RFID piglet.
Updated on 2026-07-22
Was this article helpful?

Related Articles

Need Support?
Can't find the answer you're looking for?
Contact Support

Leave a Comment