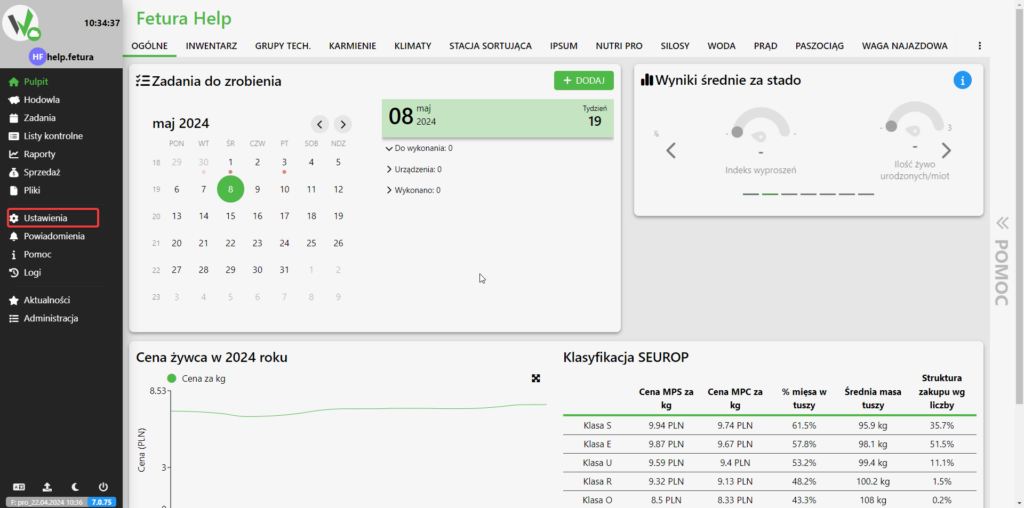
To configure the Nutri ONE dispenser, first go to the “Settings” tab.
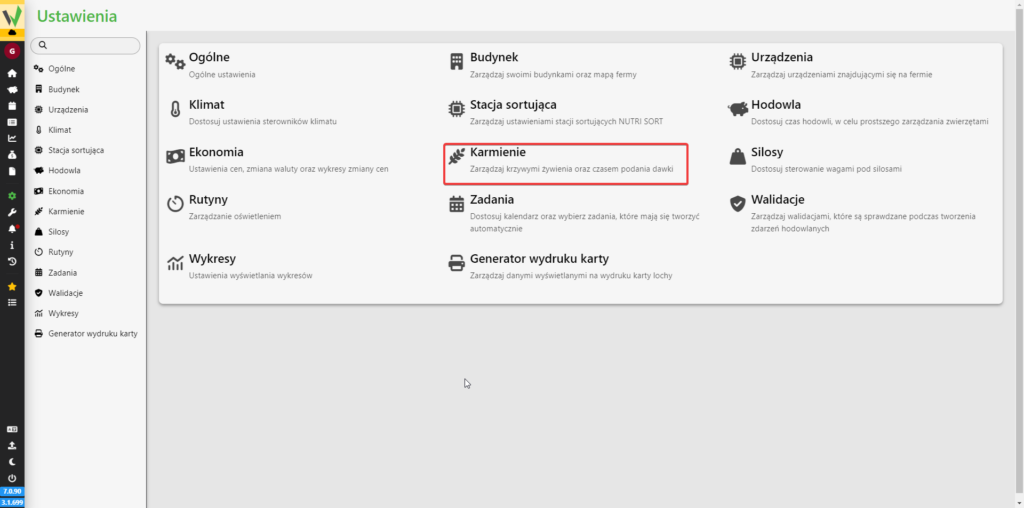
Then go to the “Feeding” tab.
Then go to the “NUTRI ONE dispenser settings” tab.
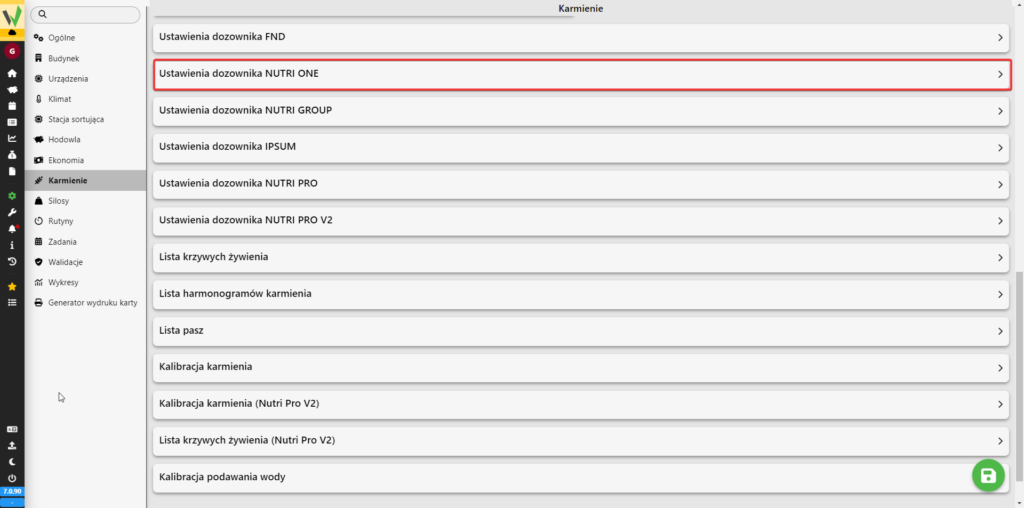
In the next step, select the dispenser you want to configure and proceed.
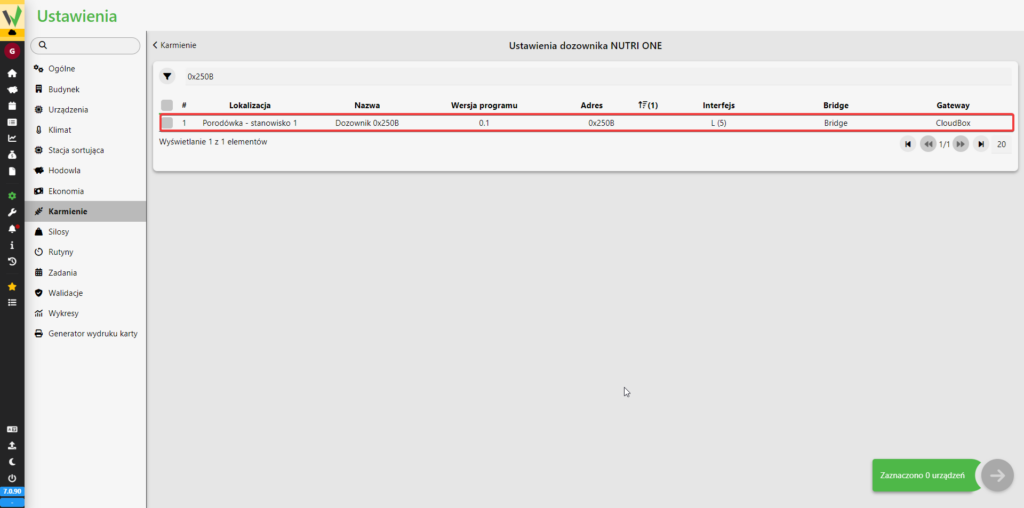
NUTRI ONE feeding configuration
All possible settings for the NUTRI ONE Dispenser are now visible.
Mode of operation
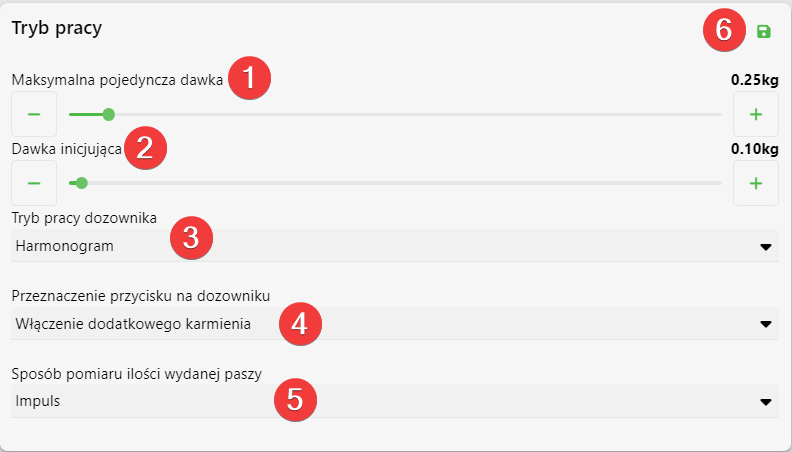
Maximum single dose
To determine the maximum single dose, use the Maximum Single Dose slider [1] to set the desired dose. The maximum single dose is the maximum portion that will be dispensed at one time in Trigger or RFID operating mode.
Initiating dose
To determine the initiating dose, use the Initiating Dose slider [2] to set the desired dose. By initiating dose is meant the portion that will be dispensed at one time at the start of the time interval according to the set schedule. This portion is designed to stimulate the animals and signal the start of feeding time.
Dispenser mode
To determine the dispenser’s mode of operation, select the desired mode from the Dispenser Mode drop-down [3]list. Dispensers, depending on the type used, can operate in the following modes:
– Schedule – in this mode, feed dispensing will be carried out according to the set feeding curve and hourly schedule. At predetermined times, the devices will dispense the entire scheduled feed ration.
EXAMPLE SCENARIO:
Dose dispense time according to the schedule – from 13:00 to 13:30
Scheduled dose to be released – 2kg
Maximum single dose – 0.5kg
Initiating dose – 0.2kg
Interval time between doses – 30s
At 13:00, an initiation dose (0.2kg) will be dispensed, then after 30s the scheduled dose will begin. The dispenser will dispense 0.5kg of feed, after 30s another 0.5kg of feed will be dispensed. This cycle will continue until the scheduled dose is released.
– Trigger – in this mode, feed dispensing will be carried out according to the set feeding curve and hourly schedule. In addition, it will be necessary for the animal to use a trigger to start the dispenser. At predetermined times, the devices will dispense the scheduled feed according to the use of the trigger.
EXAMPLE SCENARIO:
Dose release time according to the schedule – from 13:00 to 13:30
Scheduled dose to be released – 2kg
Maximum single dose – 0.5kg
Initiating dose – 0.2kg
Interval time between doses – 30s
At 13:00, an initiation dose (0.2kg) will be issued, then after 30s the scheduled dose can be issued. Using the trigger will spill 0.5kg of feed, after 30s it will be possible to use the trigger again resulting in spilling 0.5kg of feed. This cycle can be repeated until the scheduled dose is dispensed. In the scenario presented, the dispensing of feed will be possible from 13:00 to 13:30.
NOTE!
– Using the trigger during the interval between doses will not cause feed spillage.
– Using the trigger at unscheduled times will not result in a feed spill.
– The amount of feed dispensed depends on the use of the trigger. This means that it is possible to dispense less than the planned amount of feed (e.g., dispensing 1kg instead of the planned 2kg). In practice, this means dispensing feed according to the needs of the animal, which can individually decide its needs.
SPECIAL CASE:
If the animal does not eat the scheduled feed ration at the designated feeding time, it will be possible to eat the resulting excess feed during any subsequent (any) feeding time of the day. In practice, if the farmer planned that by 12:00 the animal should have eaten 4kg of feed, and in fact ate 2kg, then at each subsequent (any) scheduled feeding time it will be able to eat a larger ration than planned by no more than the resulting uneaten surplus feed. The total daily feed ration does not change, while the rations provided at feeding times defined in the schedule may be increased by the sum of the currently uneaten feed on a given day.
– RFID – in this mode, feed dispensing will be carried out according to the set feeding curve and hourly schedule. In order to start the dispenser, it will be necessary to read the RFID ear tag. At predetermined times, the devices will dispense a scheduled feed ration according to the data read from the RFID ear tag.
EXAMPLE SCENARIO:
Dose release time according to the schedule – from 13:00 to 13:30
Scheduled dose to be released – 2kg
Maximum single dose – 0.5kg
Initiating dose – 0.2kg
Interval time between doses – 30s
At 13:00, an initiation dose (0.2kg) will be issued, then after 30s the scheduled dose can be issued. Reading the RFID ear tag will result in dumping 0.5kg of feed, after 30s it will be possible to read the RFID ear tag again resulting in dumping 0.5kg of feed. This cycle can be repeated until the scheduled dose is dispensed. In the scenario presented, the dispensing of feed will be possible from 13:00 to 13:30.
NOTE!
– Reading the RFID ear tag during the break between doses will not result in feed spillage.
– Reading an RFID ear tag at unscheduled times will not result in a feed spill.
– The amount of feed issued depends on the reading of the RFID ear tag. This means that it is possible to dispense less than the planned amount of feed (e.g., dispensing 1kg instead of the planned 2kg). In practice, this means dispensing feed according to the needs of the animal, which can individually decide its needs.
SPECIAL CASE:
If the animal does not eat the scheduled feed at the designated feeding time, it will be possible to eat the resulting excess feed during any subsequent (any) feeding time of the day. In practice, if the farmer planned that by 12:00 the animal should have eaten 4kg of feed, but actually ate 2kg, then at each subsequent (any) scheduled feeding time it will be able to eat a larger ration than planned by no more than the resulting uneaten surplus feed. The total daily feed ration does not change, while the rations provided at feeding times defined in the schedule may be increased by the sum of the currently uneaten feed on a given day.
The purpose of the button on the dispenser
To determine the action of the button on the dispenser, select the desired action from the Destination of the button on the dispenser drop-down list [4].
How to measure the amount of feed issued
Select the method of measurement from the drop-down list [5].
Record
To save the mode configuration of the edited dispensers, select the floppy disk symbol [6].
Engine settings
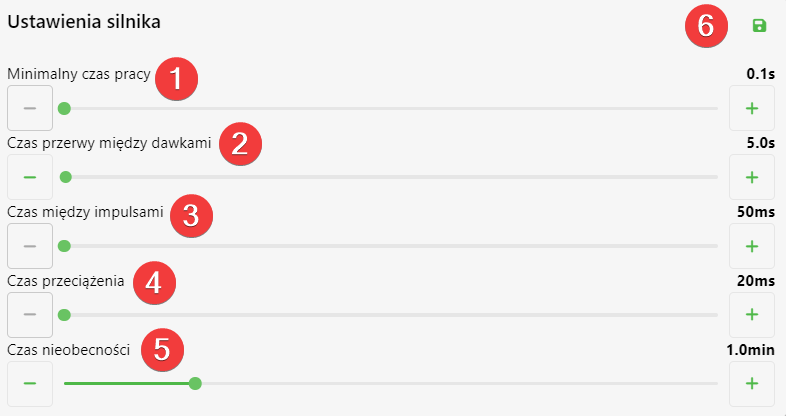
Minimum operating time [1].
This parameter determines what the minimum dispensing time of the dispenser is.
Interval time between doses [2].
This parameter determines how much time must pass before the next dose is issued.
Time between pulses [3]
This parameter determines how much time must pass between pulses.
Overload time [4]
This parameter determines how much time the motor can operate with current consumption beyond the limit.
To save the data, click the green floppy disk [6].
Temperature
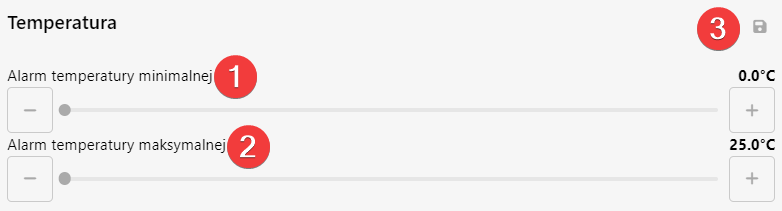
Minimum temperature alarm [1].
This parameter determines after a reading below which temperature an alarm should be reported.
Maximum temperature alarm [2].
This parameter determines after reading above what temperature an alarm should be reported.
To save the data, click the green floppy disk [3].
Performance
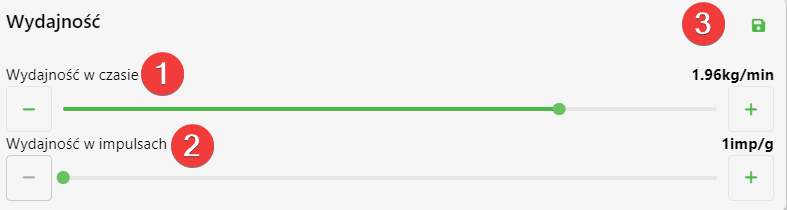
Performance over time [1].
If the method of measuring the amount of feed dispensed is set to time this parameter specifies what is the amount of feed dispensed per minute
Performance in pulses [2].
If the method of measuring the amount of feed dispensed is set to pulse this parameter determines how many pulses are needed to dispense a gram of feed.
To save the data, click the green floppy disk [3].
Kara
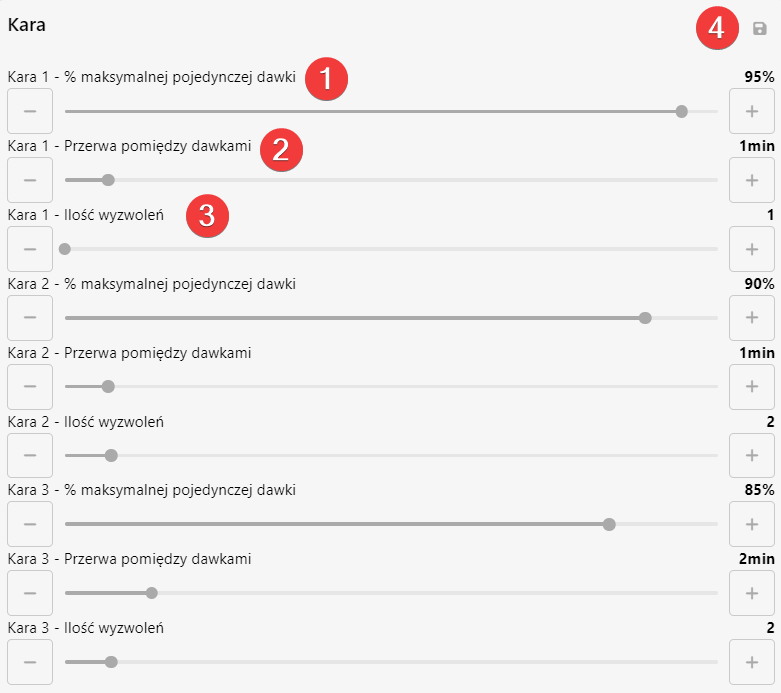
% of maximum single dose [1].
This parameter determines what % of a single dose can be maximally dispensed during the selected punishment.
Interval between doses [2].
This parameter determines what is the interval time between doses during the selected punishment.
Number of triggers [3].
This parameter determines what is the number of triggers during the selected penalty.
To save the data, click the green floppy disk [4].
NRF power

This parameter determines what the power of the antenna is. You can change its value with the slider [1] and save by clicking the green floppy disk [2].
Water
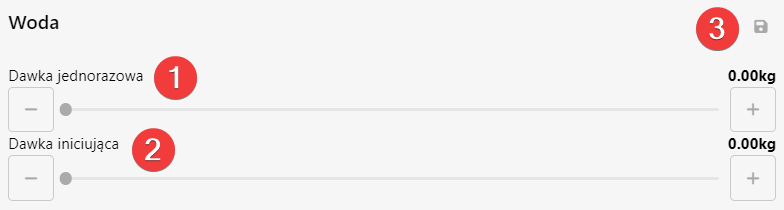
Single dose [1].
This parameter determines what is the single dose of water dispensed.
Initiating dose [2].
This parameter determines what is the initiating dose of water dispensing.
To save the data, click the green floppy disk [3].
CAN notifications

[PLACEHOLDER]
Diode settings

From the drop-down list [1] it is possible to select what the LED should show. To save the data, click the green floppy disk [2].
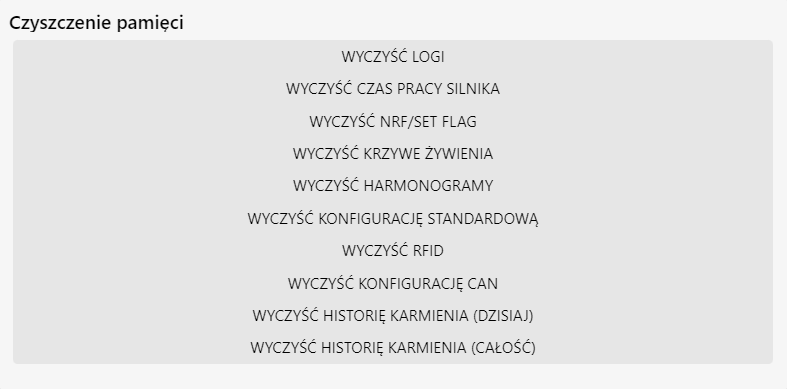
Memory cleaning
When you click any of the visible commands, it will be sent to the dispenser.