1. Home
  2. Devices
  3. Nutri One
  4. How to add a device by scanning and configure its channel, address and sub-address?
  1. Home
  2. Devices
  3. Nutri Group
  4. How to add a device by scanning and configure its channel, address and sub-address?

How to add a device by scanning and configure its channel, address and sub-address?

Adding a device by scanning

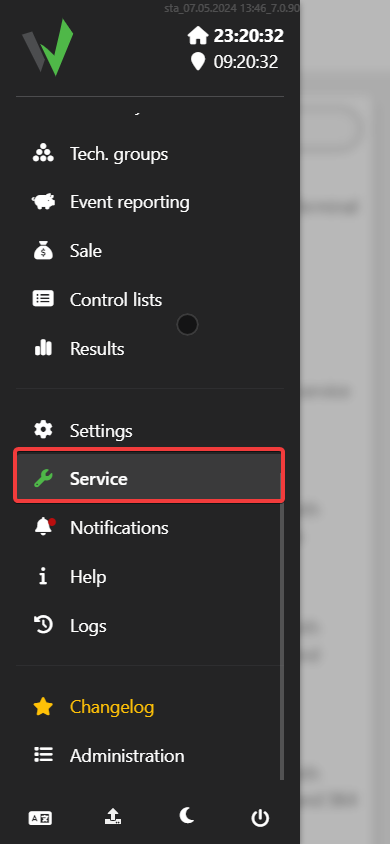
After logging in, click the highlighted button.
Fetura Help mobile app home screen with a red box around the app logo button in the top-left corner, used to open the main menu.

Scroll down the displayed panel to the very bottom so that the “Settings” button is visible, and click it.
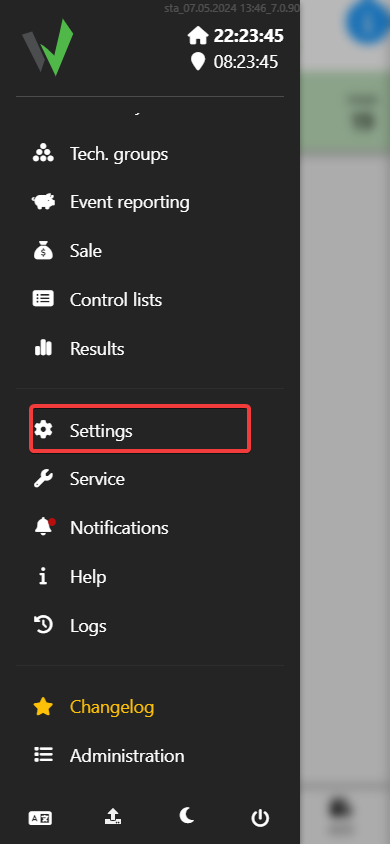
Fetura CLOUD sidebar menu with the Settings item highlighted in red, used to open the settings panel.

Go to the “Devices” tab, then in the newly opened window scroll to the very bottom and go to the “Add devices by scanning” tab.
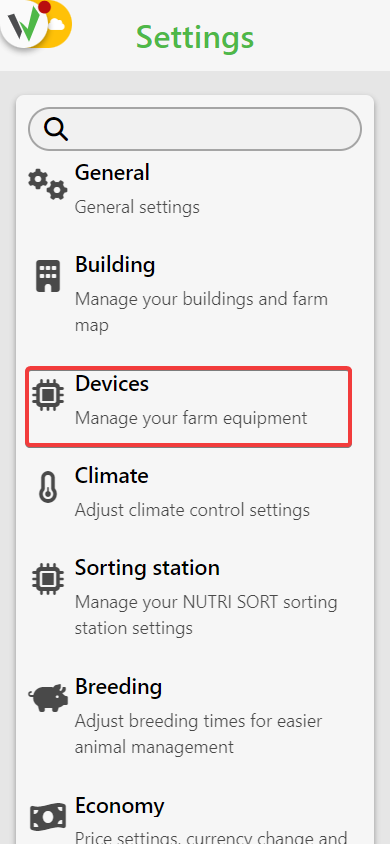
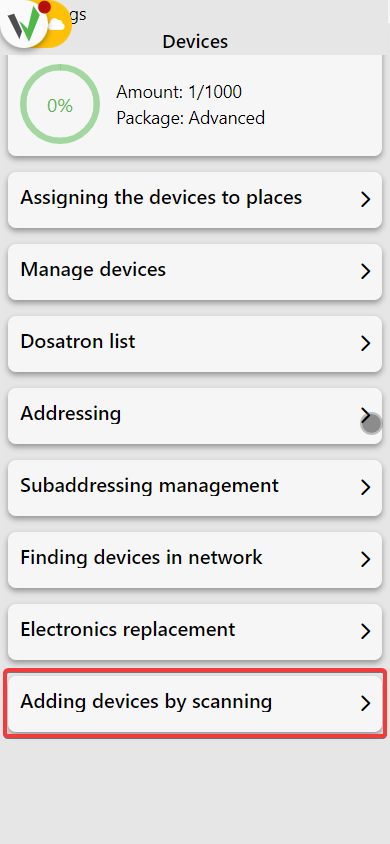
Settings screen list with the Devices option highlighted in red, used to open device management.
Devices menu list with the "Adding devices by scanning" option highlighted in red.

Select which Bridge you want to add a Nutri ONE dispenser to [1] and choose to add dispensers from the list [2], then select the Nutri ONE dispenser type.
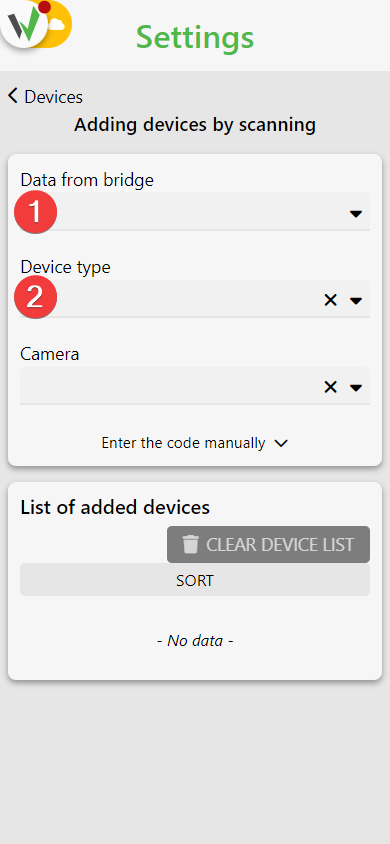
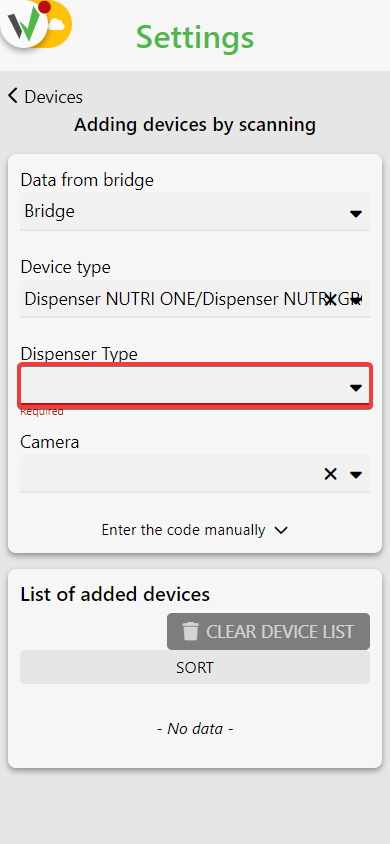
Add devices by scanning form, with red numbered circles 1 and 2 marking the "Data from bridge" dropdown and the Device type dropdown to fill in.
Device type selection step of the scanning form, with the required Dispenser Type dropdown highlighted in red, used to choose the Nutri ONE dispenser type.

Scan the QR code on the device case.
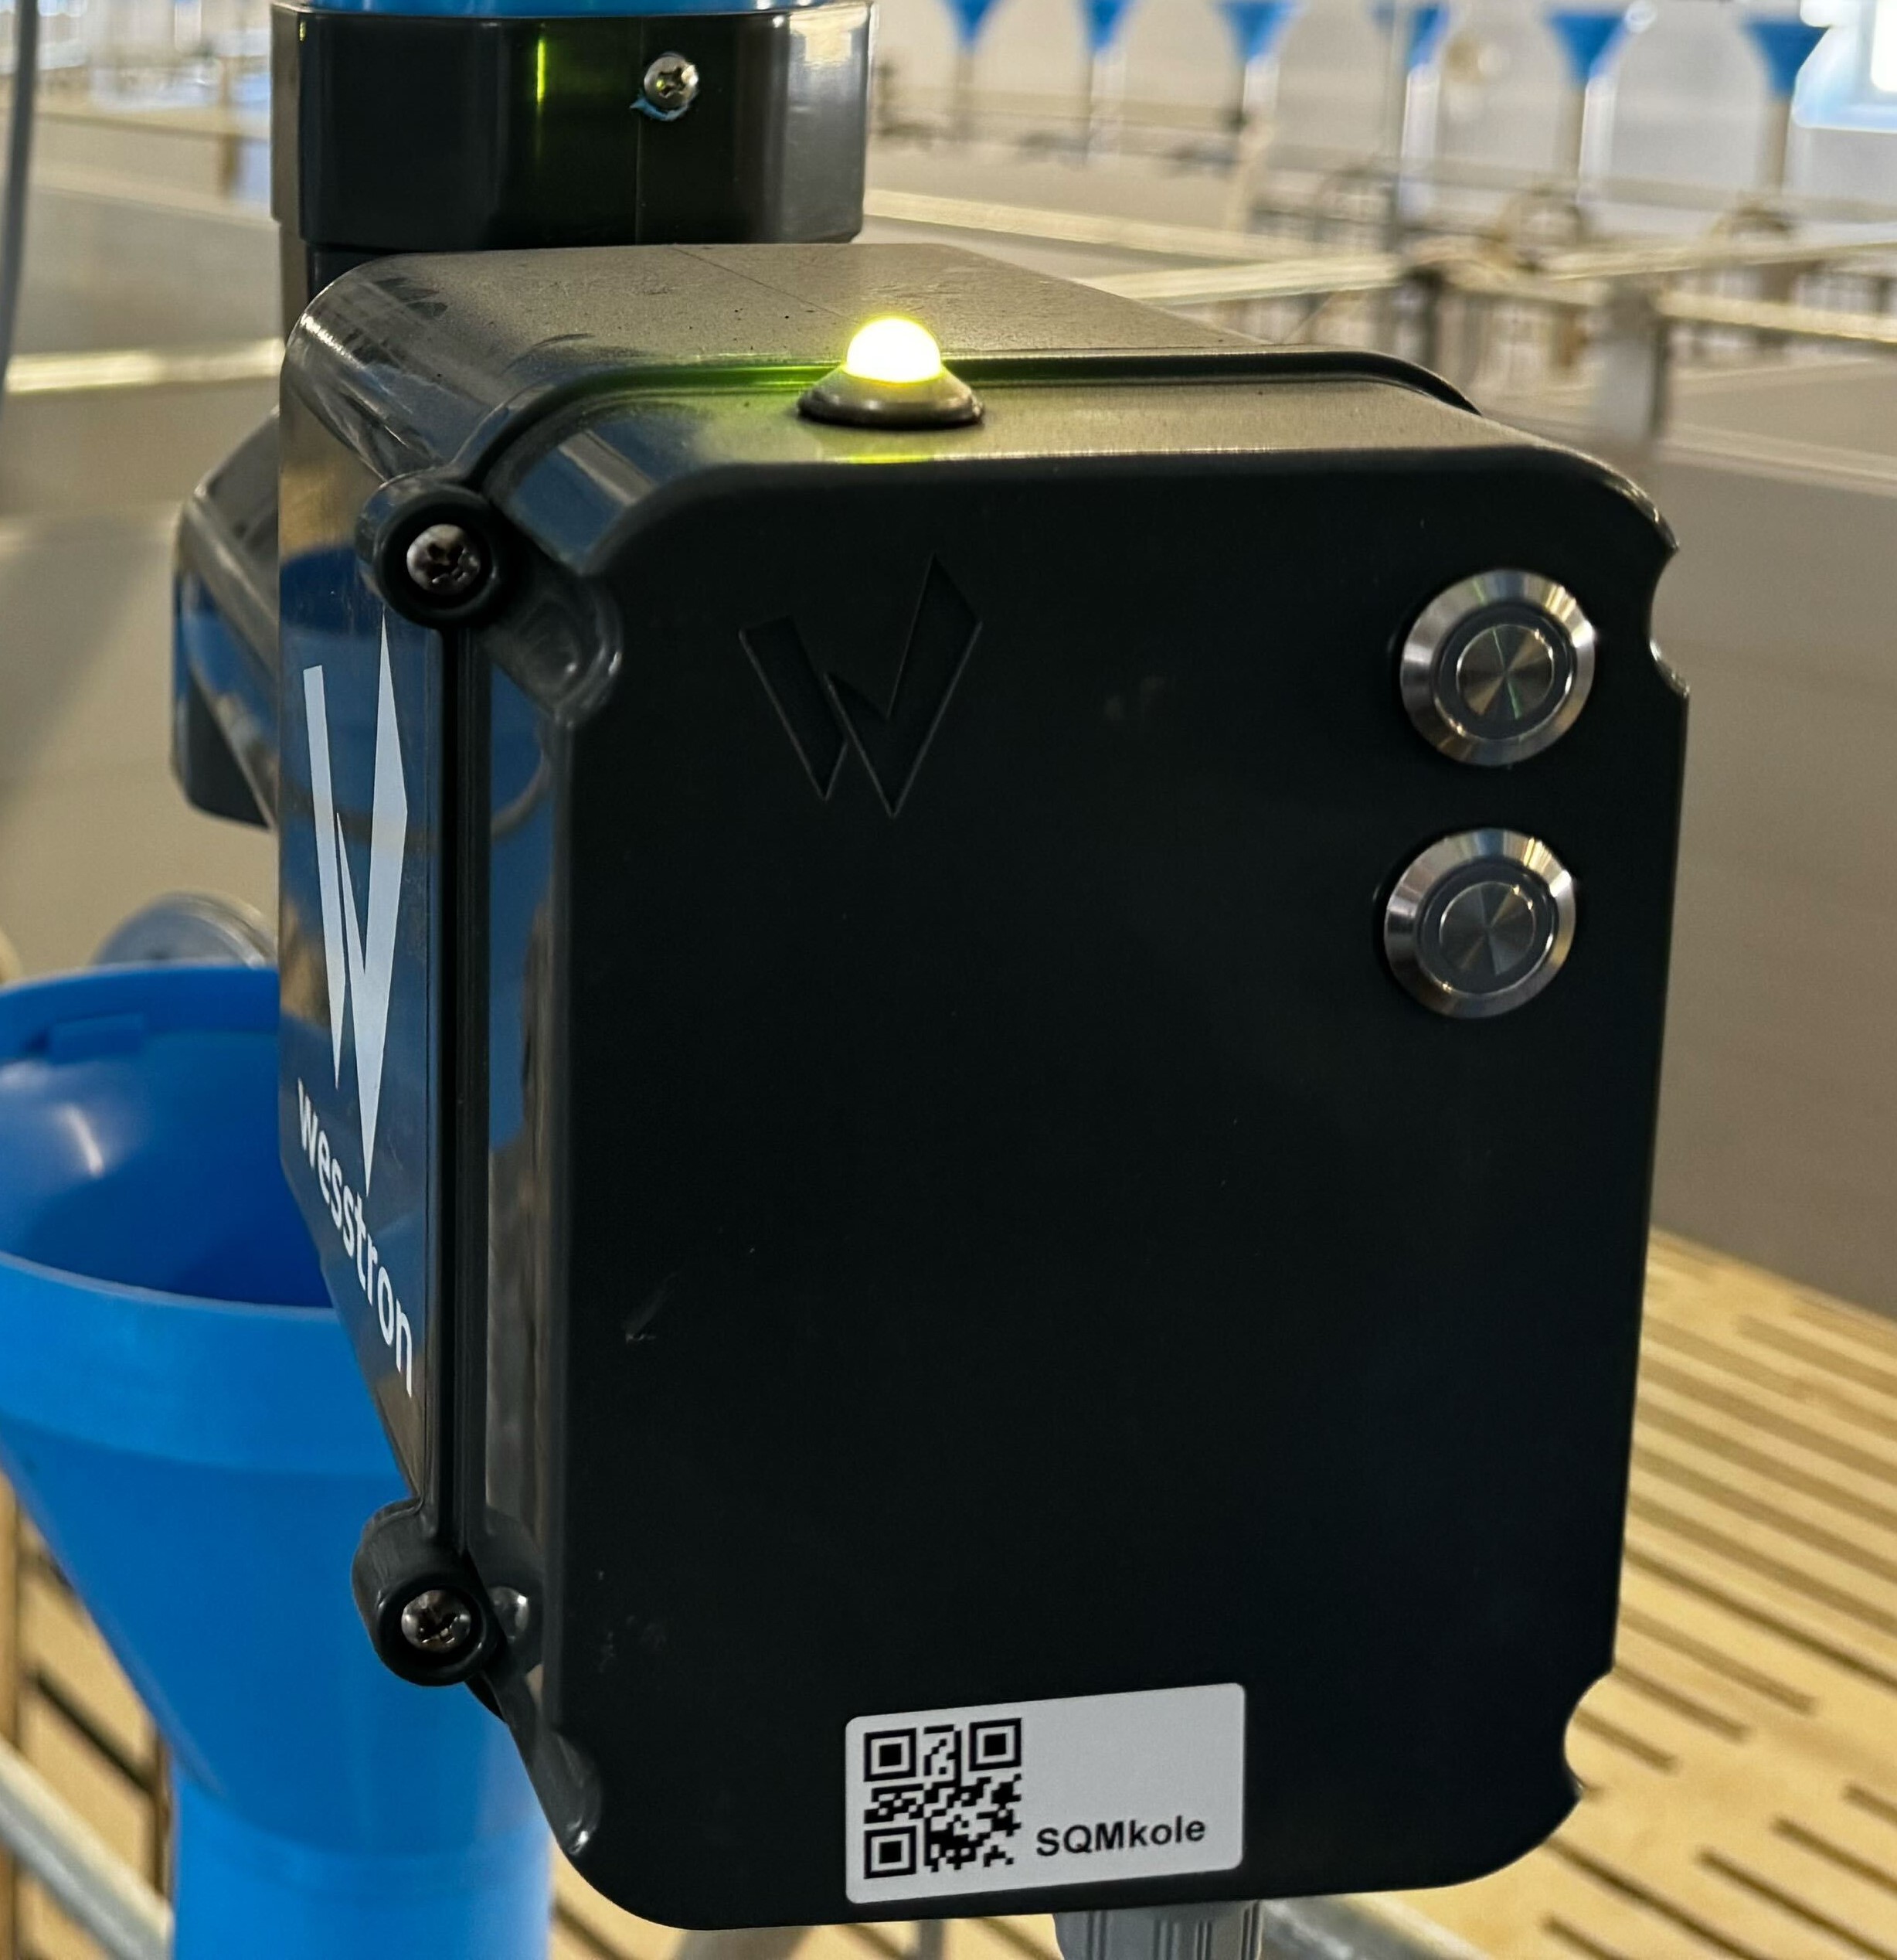
Close-up of the Nutri GROUP/ONE dispenser housing showing the QR code label used for scanning, with an LED indicator and two push buttons.

Configure the channel, address and subaddress for the dispenser.

After logging in, click the highlighted button.

Fetura Help mobile app home screen with a red box around the app logo button in the top-left corner, used to open the main menu.

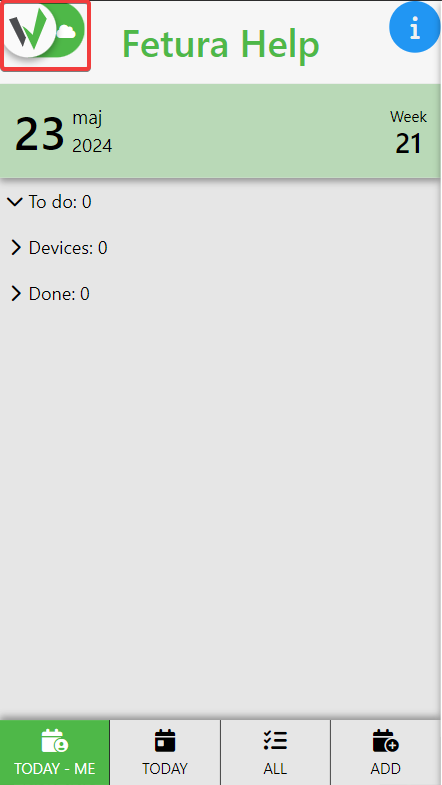
Then go to the “Service” tab.

Fetura CLOUD sidebar menu with the Service item highlighted in red.

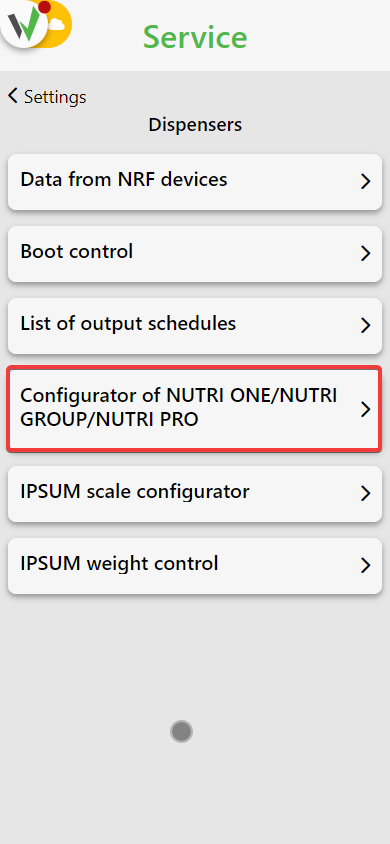
From the available tabs, select “Dispensers” and then go to the “NUTRI ONE / NUTRI GROUP / NUTI PRO Configurator” tab.
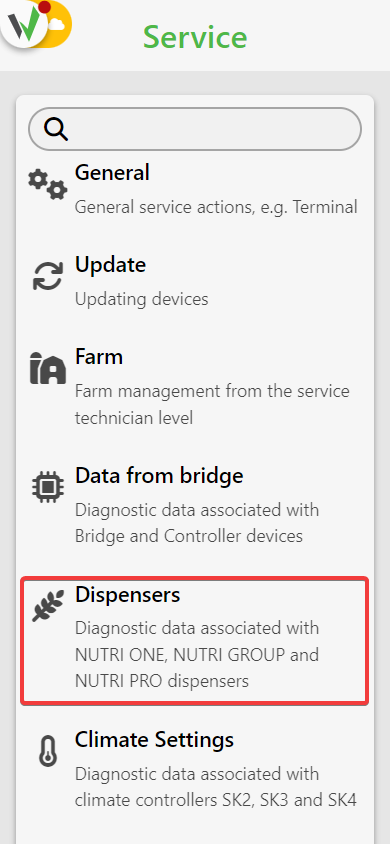
Service menu list with the Dispensers option highlighted in red.
Dispensers service menu with the "Configurator of NUTRI ONE/NUTRI GROUP/NUTRI PRO" option highlighted in red.

In the first step, choose to which Bridge [1] and on which channel [2] to add the Nutri ONE dispenser.
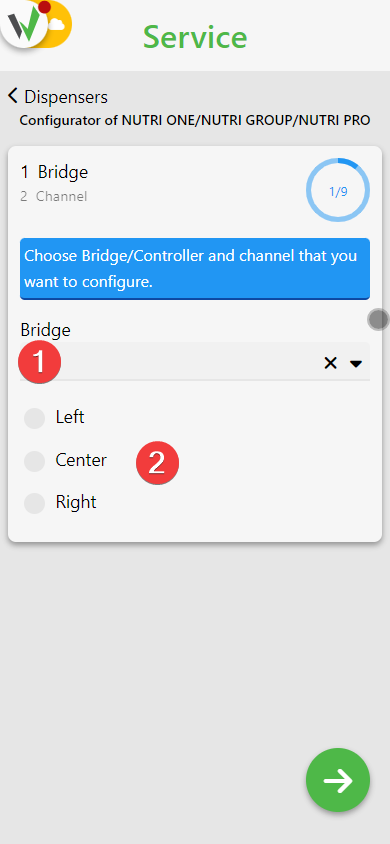
First step of the dispenser configurator, with red numbered circles 1 and 2 marking the Bridge dropdown and the channel selection (Left/Center/Right).

In the next step, configure the channel. Follow the instructions on the screen.
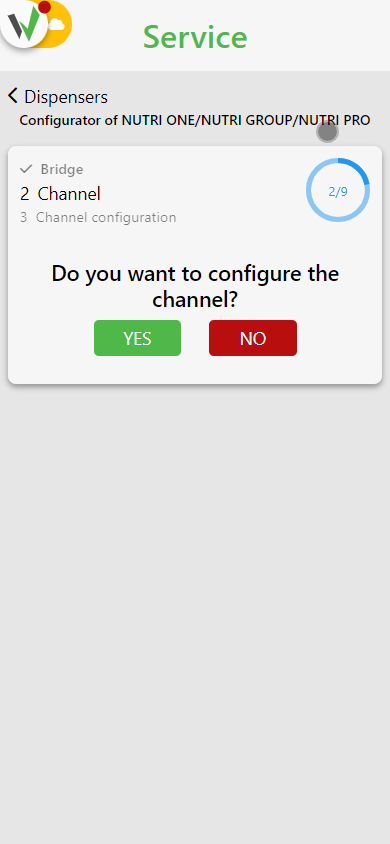
Configurator step for the channel, asking "Do you want to configure the channel?" with green Yes and red No buttons.

1. disable all connectors that have a different channel and / or have already been previously configured.
2. Proceed further to start channel configuration.
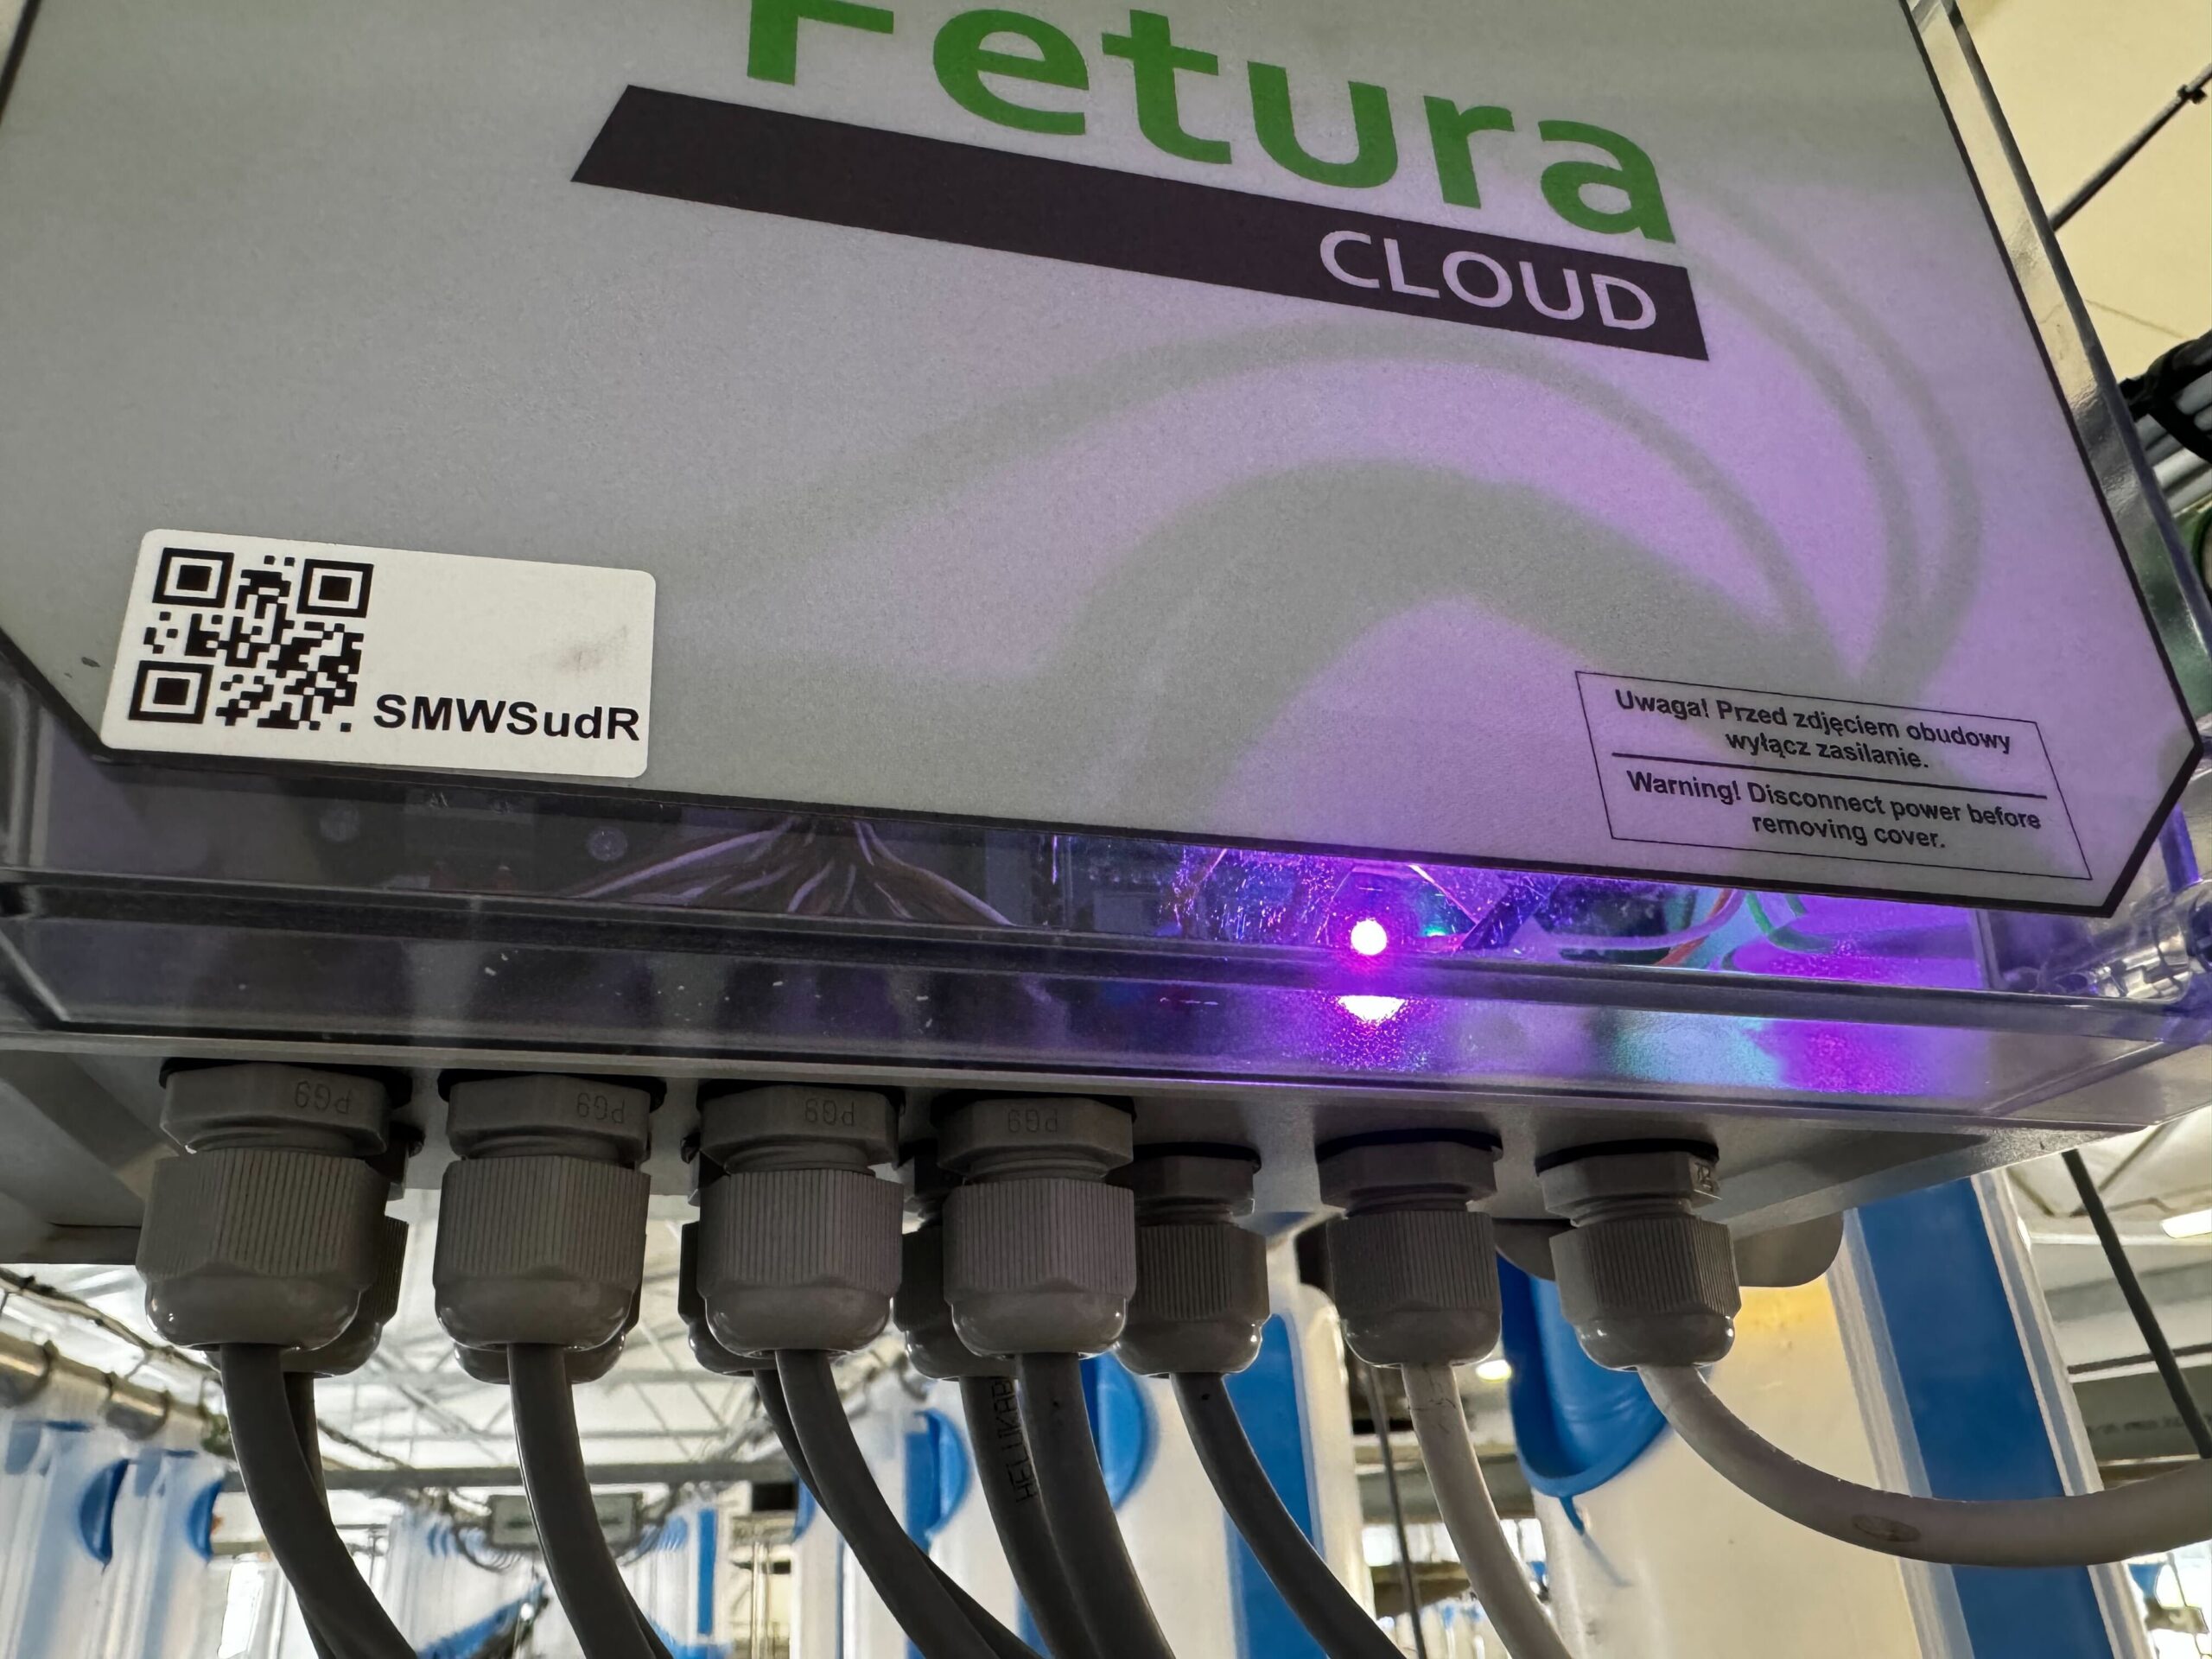
3. Wait until the desired connectors start blinking pink with the LED and click the button to proceed.
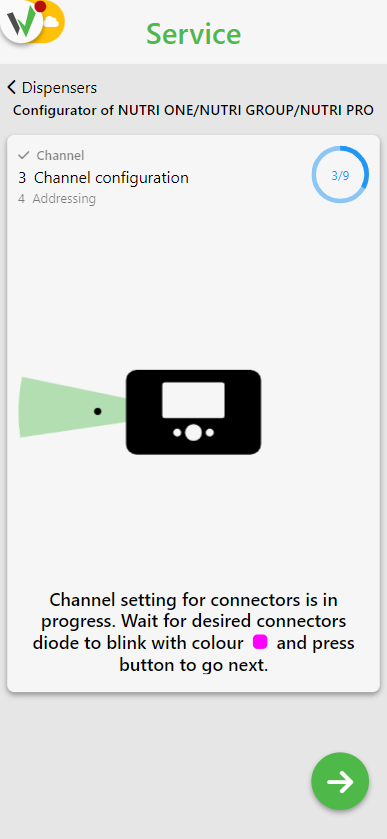
Configurator screen showing an illustration of a Connector device with a signal icon, instructing the user to wait until the desired connectors blink pink and then continue.
Close-up of a Fetura CLOUD Connector enclosure with its QR code label and a pink/purple LED lit inside, matching the "connector blinking pink" step.

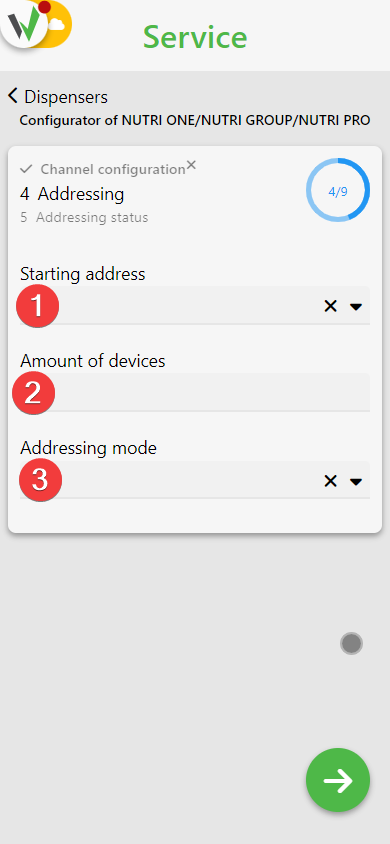
In the next step, perform device addressing. Select the starting address from the available address pool [1], specify the number of devices to be addressed [2] and select the addressing mode [3].
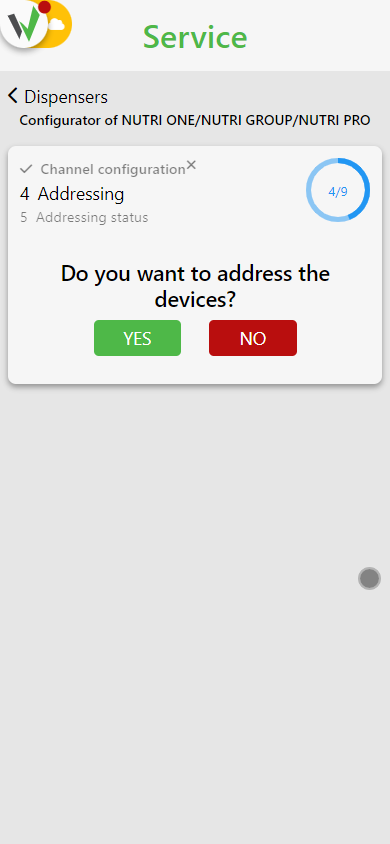
Configurator step for addressing, asking "Do you want to address the devices?" with green Yes and red No buttons.
Addressing configuration form with red numbered circles 1, 2 and 3 marking the starting address, number of devices, and addressing mode fields.

Follow the instructions on the screen.
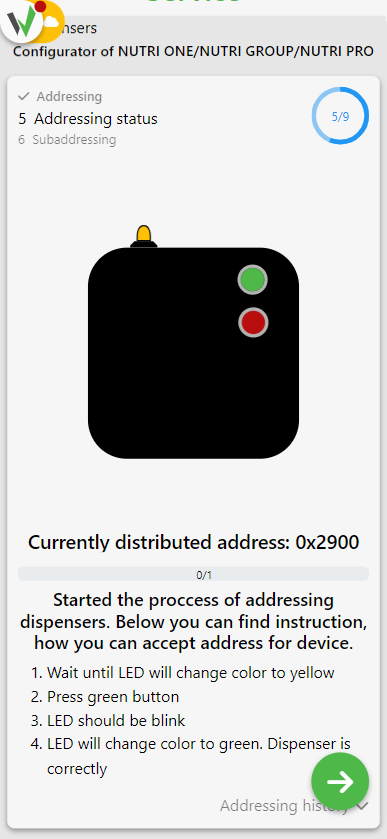
Configurator addressing status screen with a dispenser illustration and the currently distributed address, listing the steps to accept the address on the device (wait for yellow LED, press the green button, wait for it to turn green).

1. wait until the LEDs on the Nutri ONE dispensers turn yellow.
2. press the top green button on the Nutri ONE dispenser
3. the LED on the dispenser will start flashing.
4. the LED on the Nutri ONE dispenser will turn green after a while. This is a confirmation of correctly performed addressing.
5. if you are addressing more than one dispenser wait until the LEDs on the unaddressed Nutri ONE dispensers turn blue and repeat steps 2 through 4.
6. Repeat the steps until you have addressed all devices.
7. In the next configuration step, perform subaddressing. Follow the steps on the screen.
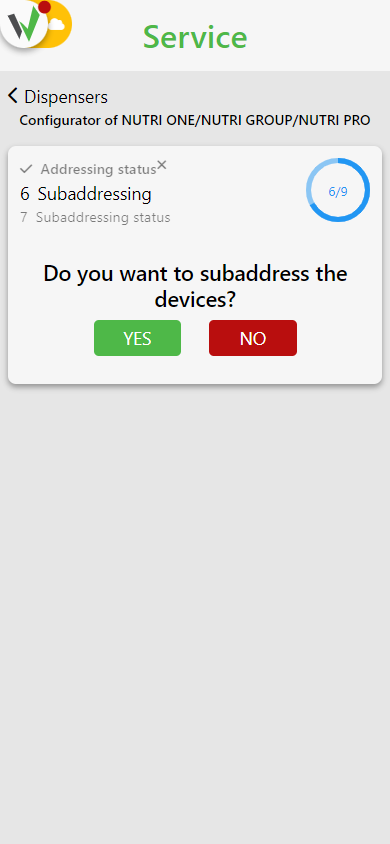
Configurator step for sub-addressing, asking "Do you want to subaddress the devices?" with green Yes and red No buttons.
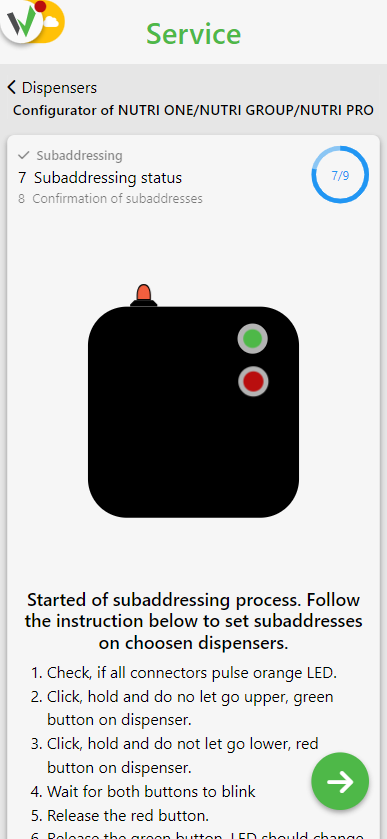
Configurator sub-addressing status screen with a dispenser illustration and a step-by-step list for pressing and holding the green and red buttons to assign sub-addresses.

1. Check that all Connectors flash the orange LED.
2. press, hold and do not release the top green button on the Nutri ONE dispenser
3. press, hold and do not release the lower red button on the Nutri ONE dispenser.
4 Wait for both buttons to blink.
5. release the red button.
6. Release the green button. The LED on the dispenser will turn orange.
7. starting from stand no. 1, press the top button on the dispenser. The LED will turn blue.
8. Repeat the previous point on subsequent dispensers, in the order in which the positions will be numbered.
9. repeat steps 2 – 8 on the following Connectors.
10. after addressing the last dispenser, press the button to move on and complete the subaddressing process.
11. Confirm that subaddressing was performed
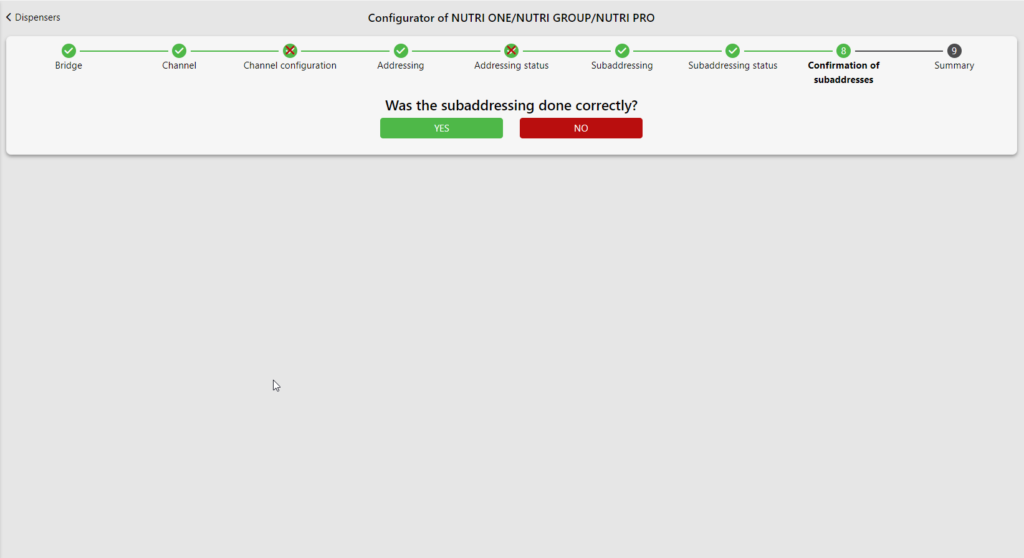
Desktop view of the NUTRI ONE/GROUP/PRO configurator wizard at the sub-address confirmation step, asking "Was the subaddressing done correctly?" with Yes and No buttons and the full 9-step progress bar at the top.
Updated on 2026-07-22
Was this article helpful?

Related Articles

Need Support?
Can't find the answer you're looking for?
Contact Support

Leave a Comment