
This guide explains how to find, name, and connect a camera to the Pig Counter device. The procedure does not require you to enter the camera address manually. The device can automatically detect cameras connected to the same local network.
A local network is a connection created by a router or network switch located in the building. The camera and the Pig Counter device must be connected to the same network.
Before You Begin
Before adding a camera, make sure that:
- the camera is installed correctly,
- the camera is connected to a power source,
- the network cable is connected correctly to the camera,
- the other end of the cable is connected to the same network as the Pig Counter device,
- the camera has been turned on.
Step-by-Step Guide to Adding a Camera
1. Open the Camera Settings
On the home screen, locate the gear icon in the upper-right corner.
Tap the gear icon to open the device settings.
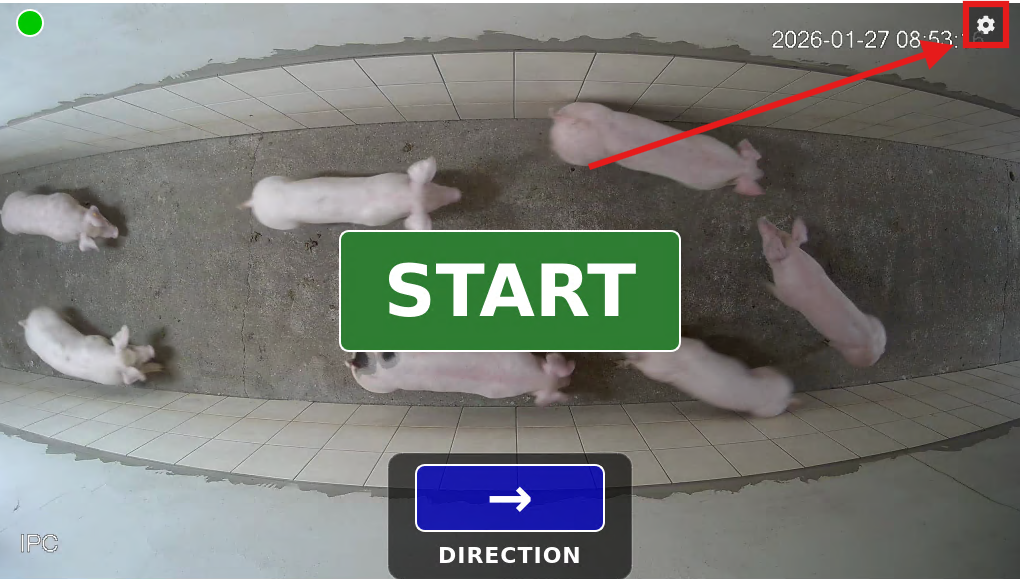
A “Camera Settings” window should appear on the screen . The window displays a list of cameras that the device has already detected.
2. Searching for Cameras on the Network
Press the blue “Rescan” button at the bottom of the window.
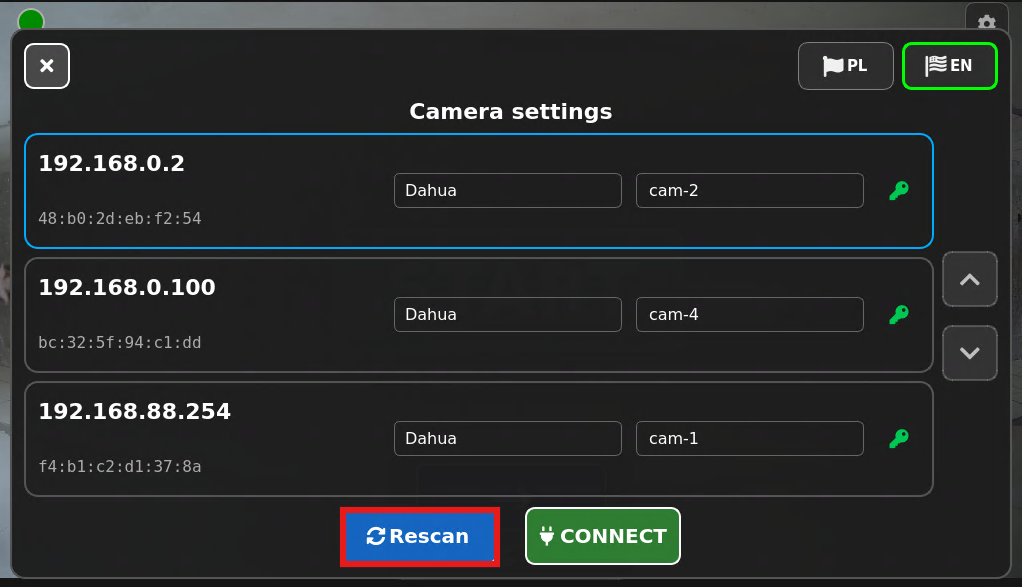
The device will begin searching for cameras connected to the same local network. The scan may take several seconds.
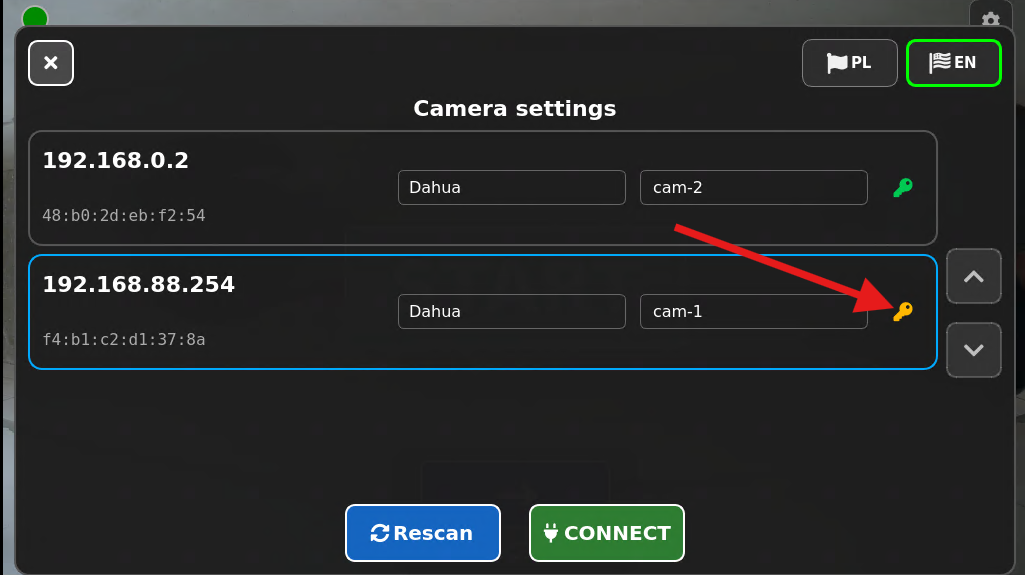
The following information may be displayed next to each camera:
- the camera address — a series of numbers, for example, 192.168.0.2
- the camera’s MAC address — a series of pairs of letters and numbers separated by colons, for example, “48:b0:2d:ed:f2:54”
- the camera manufacturer, for example, “Dahua”,
- the camera name, for example, “cam-1”.
The camera address allows devices to identify one another on the network. You do not need to change or remember it.
Once the search is complete, check the list of cameras. The newly detected camera should appear as the next entry. It may have a default name, such as “cam-2.”
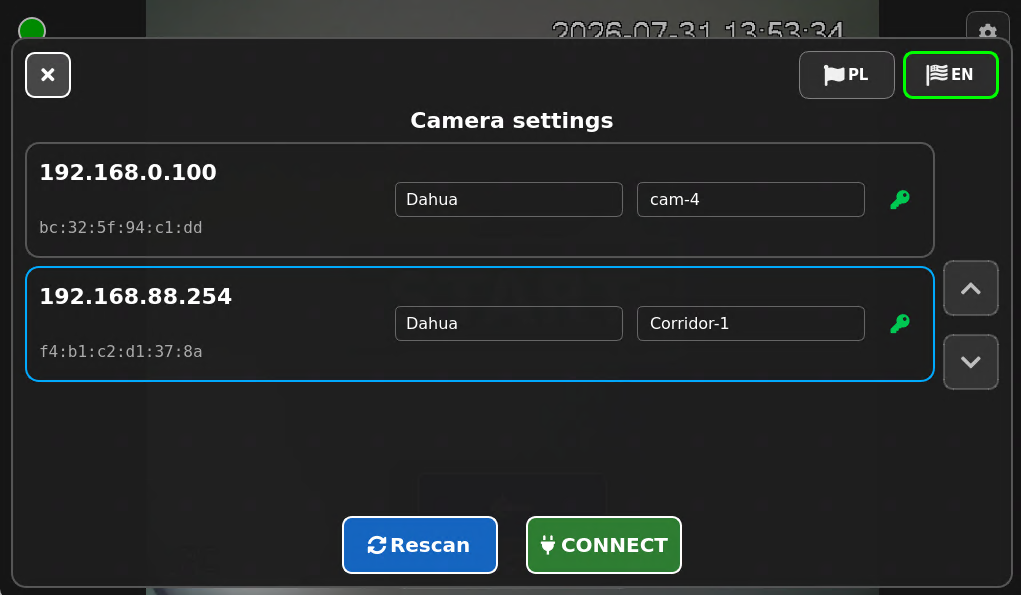
The selected entry is marked with a blue border. When the camera is not selected, press its entry on the list.
3. Selecting the camera manufacturer
Click the “Manufacturer” field to open the drop-down list of camera manufacturers, then select the appropriate option.
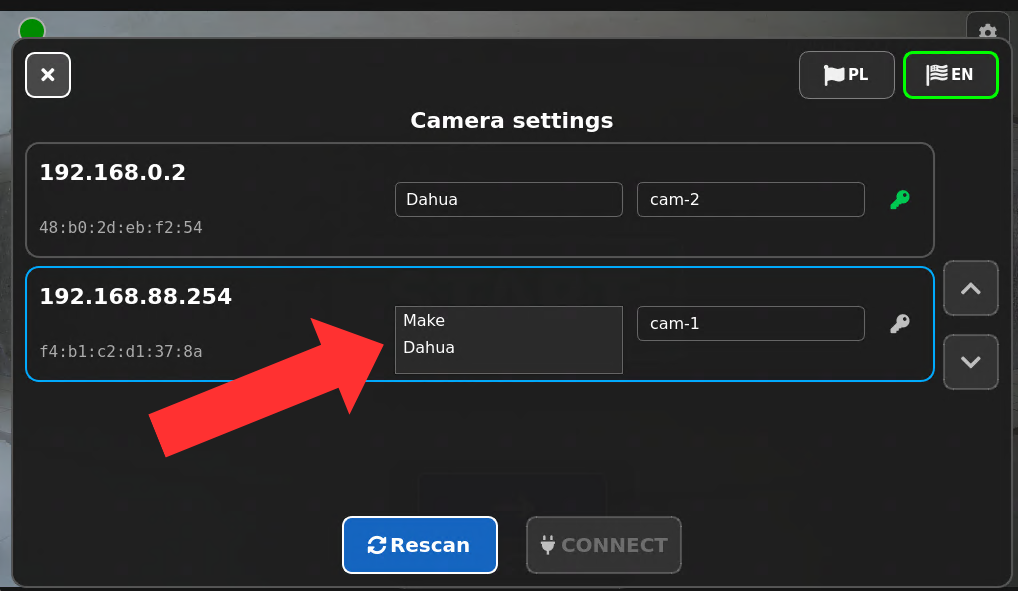
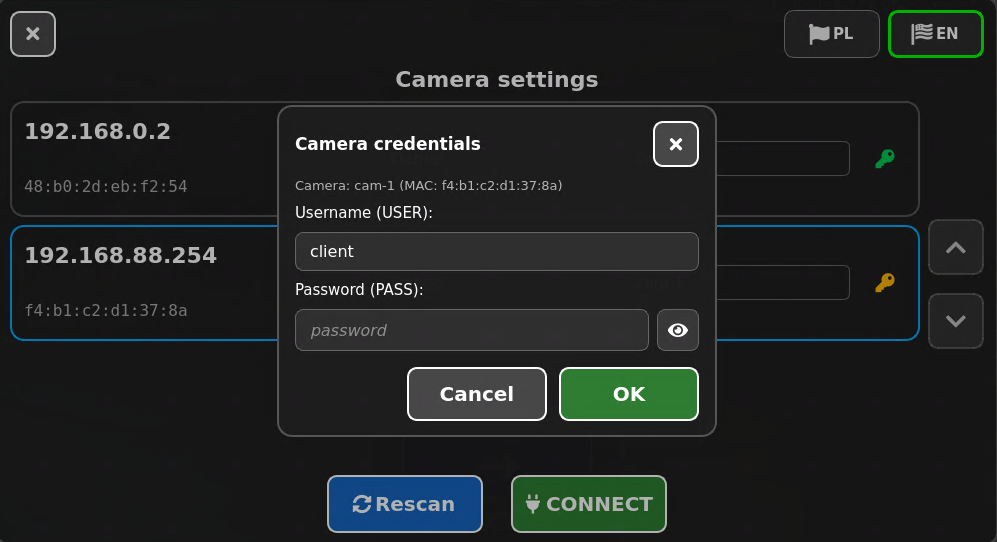
4. Logging in to the camera
Press the yellow key icon located to the right of the camera name field.
A new window will appear. Enter the user name and password assigned to your camera, and then confirm the details by pressing the green OK button.
5. Renaming the camera
Find the newly added camera in the list.
Press the field containing its current name.
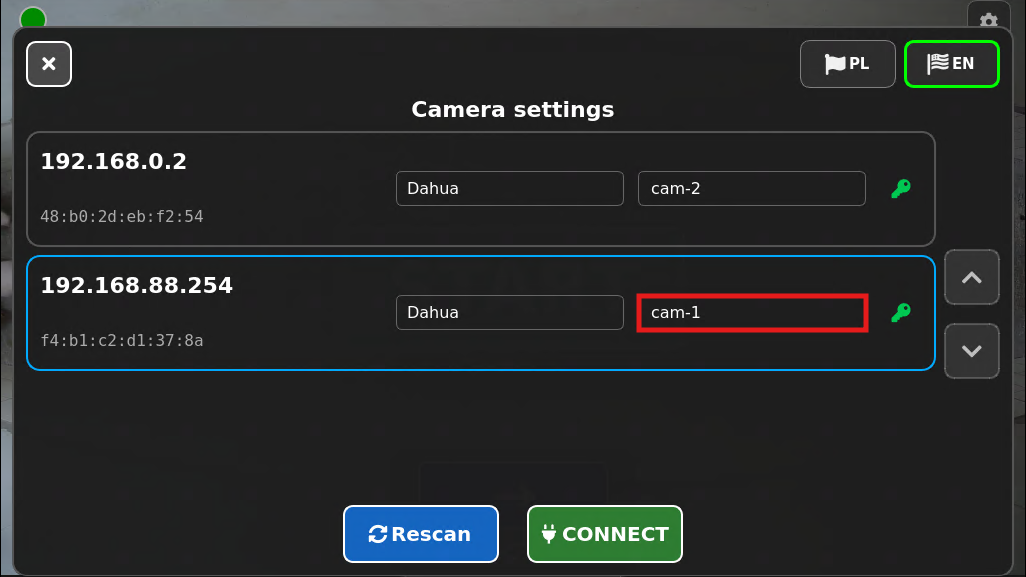
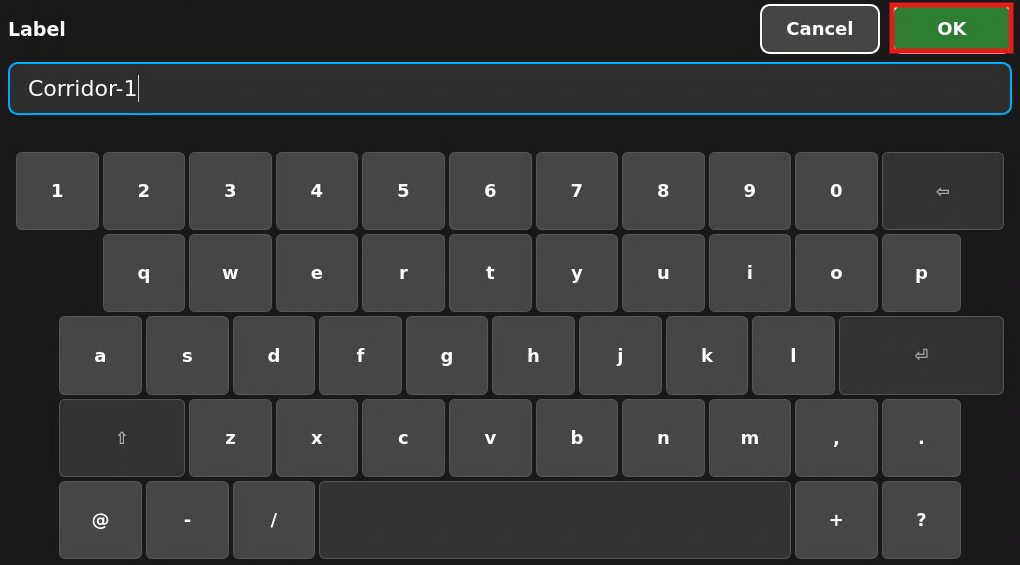
An edit window should open on the screen, displaying the “Description” field and an on-screen keyboard.
Give the camera a name that clearly identifies its installation location or the area it monitors. For example, you can use the following names:
- Corridor-1
- Entrance,
- Section-A,
- Feed-Room.
It is recommended to use short and unambiguous names. This will make it easier to identify the camera and determine its location.
6. Entering and approving a new name
Delete the previous name if it is still in the “Label” field .
Use the on-screen keyboard to enter a new name for the camera, such as “Corridor-1.”
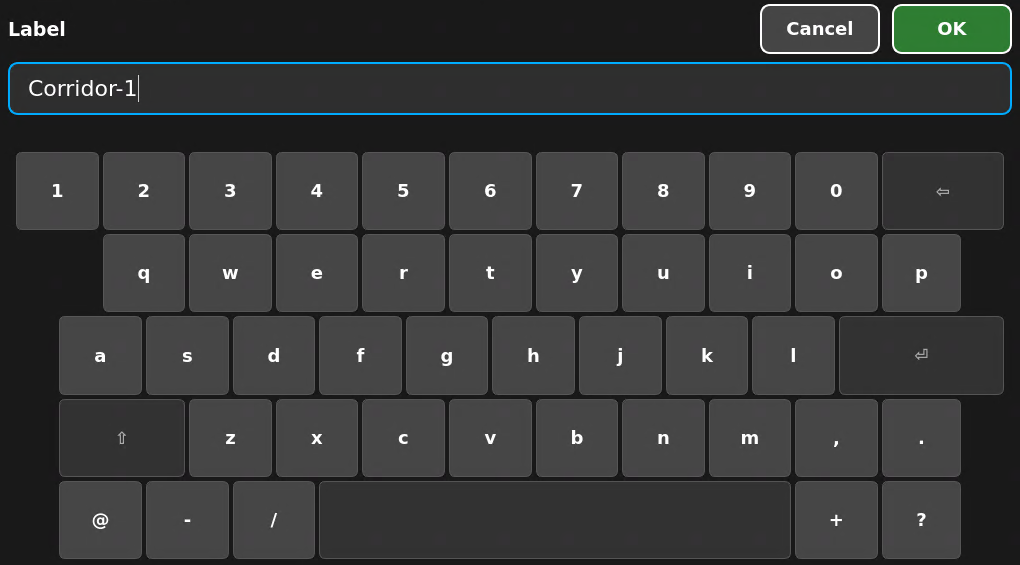
Check to see if the name was entered correctly.
Press the green “OK” button in the upper-right corner to save the change.
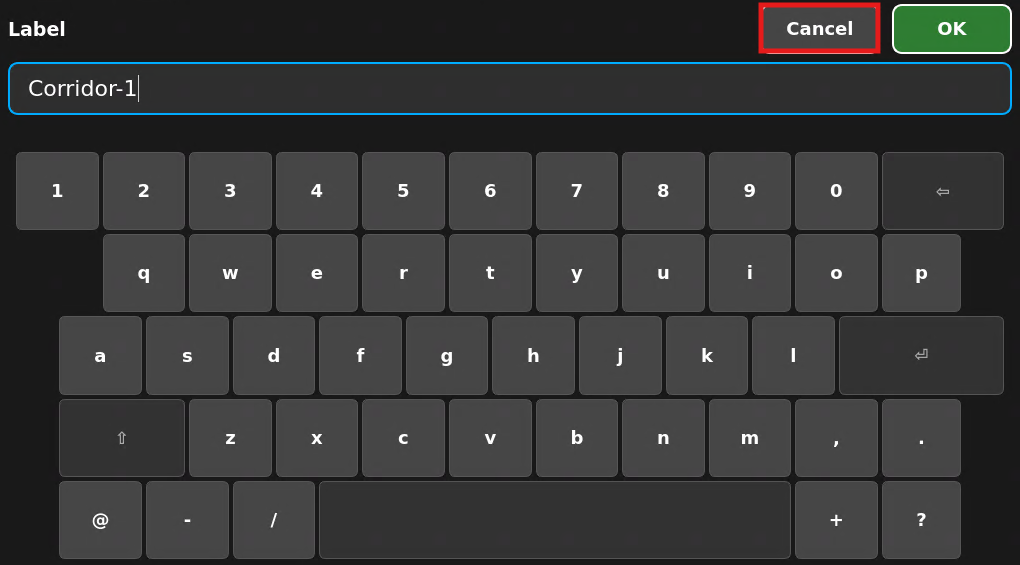
The “Cancel” button closes the window without saving the change you made.
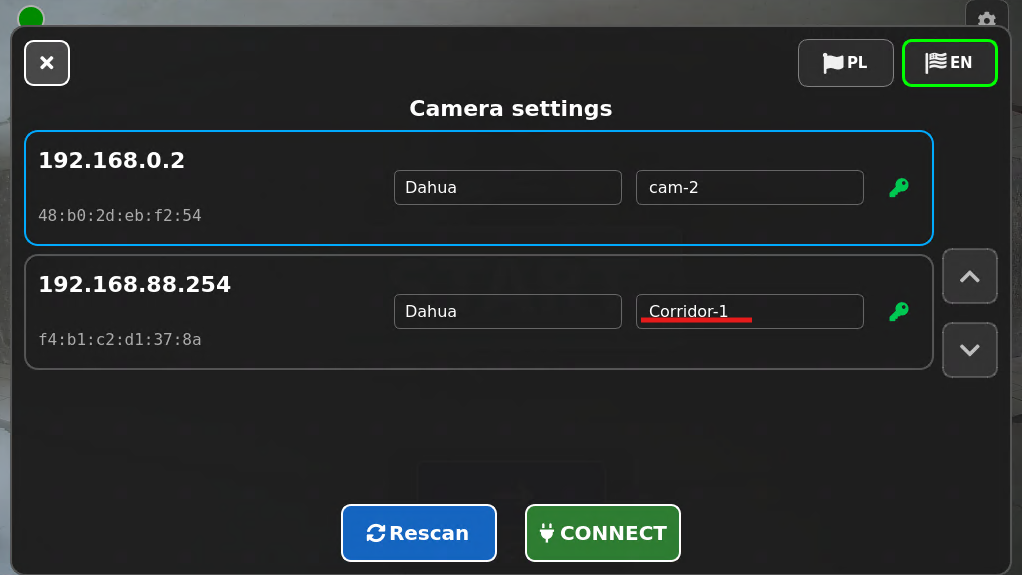
Once you confirm , you will be returned to the “Camera Settings” window . The new name should appear in the name field, for example , “Corridor-1”.
7. Connecting to the camera
Tap the camera you want to connect. The selected camera should be highlighted with a blue border.
Check to see if the correct camera name appears in the list.
Press the green “Connect” button at the bottom of the screen.
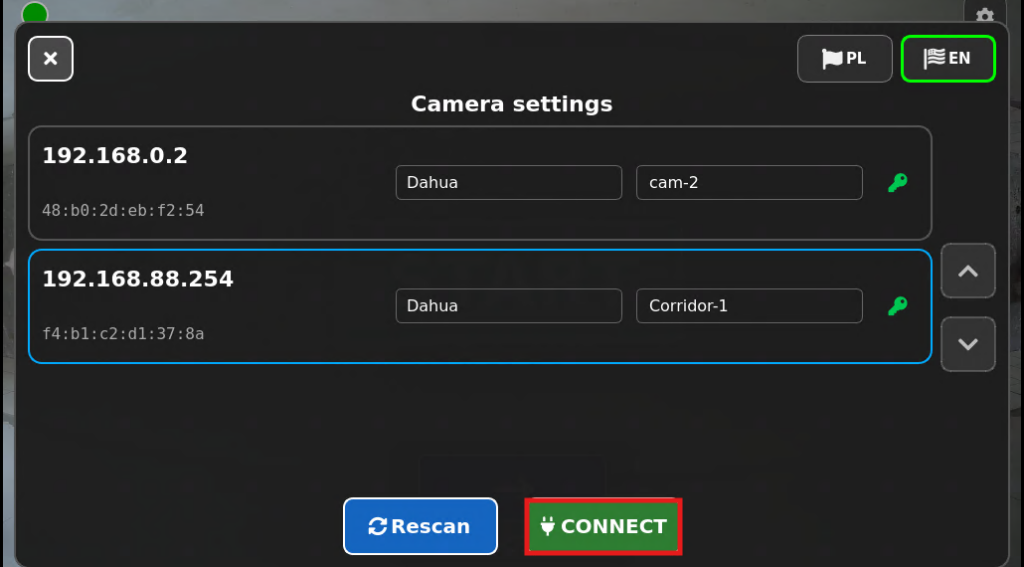
The device will attempt to connect to the selected camera. Once the connection is established, the camera will be ready to work with the device.
What do the colors of the key icon mean?
| Key Color | Meaning |
|---|---|
 | a properly connected camera |
 | Login required to access the camera |
 | Camera Login Lock |
Problem Solving
The camera does not appear after scanning the network
If the camera does not appear in the list, follow these steps:
- Check to see if the camera is connected to a power source.
- Check to make sure all the plugs are fully inserted.
- Check to make sure the power cord is not loose, pinched, or damaged.
- Check to see if the camera and the device are connected to the same router or network switch.
- Wait one to two minutes. The camera may take some time to start up completely.
- Press the “Rescan” button again .
The camera is visible, but I can’t connect to it
Check to see if the correct camera is highlighted with a blue border, and then press the “Connect” button again .
If the connection still does not work, check the cables and the camera’s power supply. Then restart the camera and perform a network scan again.
There are several cameras on the list
Compare the names and addresses displayed next to each item. Before clicking the “Connect” button, select the camera you want to add.
To make future use easier, give each camera a different name that corresponds to its installation location.
The problem still persists
If the camera still does not appear in the list or you cannot establish a connection, contact the person responsible for installing or maintaining the system. Provide them with the camera’s name and the address displayed on the screen, for example, “192.168.88.251.”


