1. Home
  2. FarmWatch Pro
  3. How do I change the sensor’s name?

How do I change the sensor’s name?

Assigning clear names to sensors makes it easier to identify them and manage the system later on. Instead of using the default names based on serial numbers, it’s a good idea to use names that describe the sensor’s location or purpose.

Renaming the sensor

On the main screen, select the sensor whose name you want to change.
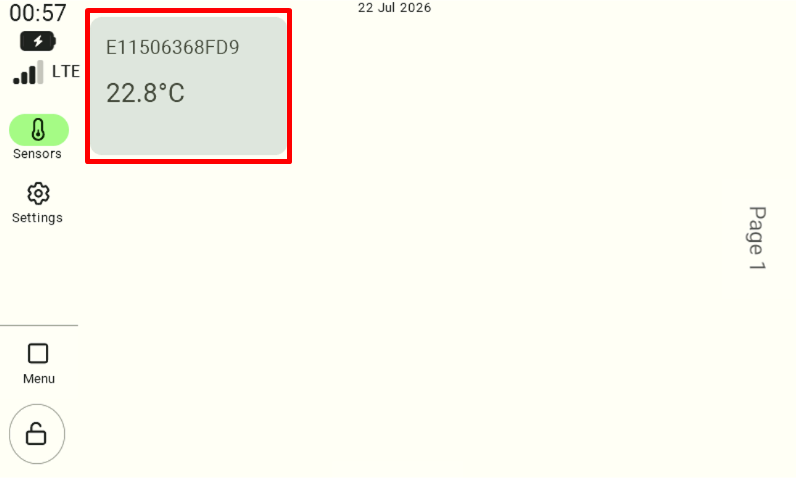
The main view of the control panel dashboard with the "Sensors" tab active in the left-hand menu. In the main part of the screen, a gray tile for the added sensor is visible, displaying its name and current temperature reading. The user must click this sensor tile to view its details.

After opening the details view, click the settings icon ( gear).
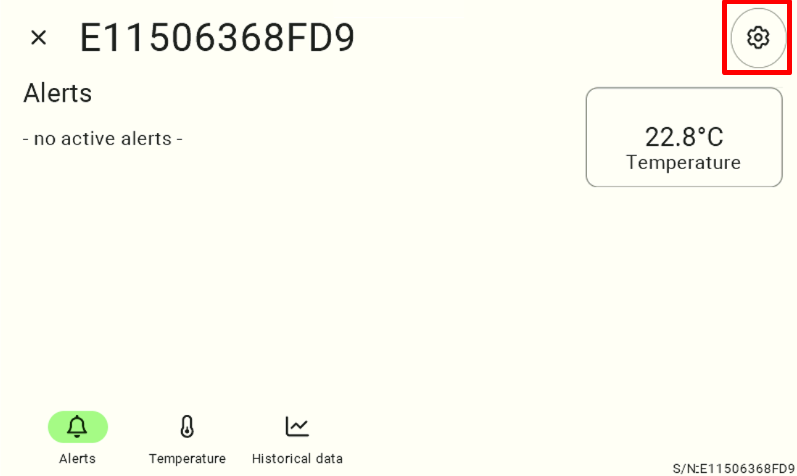
Details view for the selected temperature sensor. To open the editing options, the user must locate and click the round button with the gear icon (settings) located in the upper-right corner of the screen.

Next, select the “Change General” option .
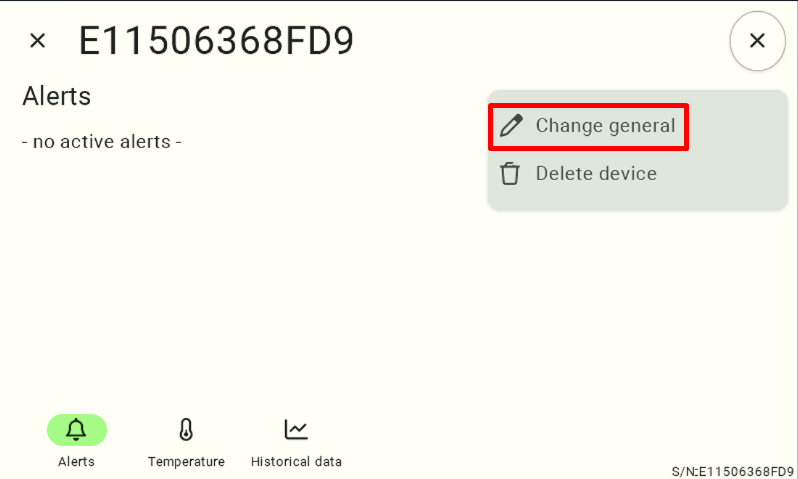
A detailed view of the sensor with the context menu for settings expanded in the upper-right corner. The user must click the "Rename" option in this menu—indicated by a small pencil icon—to begin editing.

Click the field containing the current sensor name to enter edit mode.
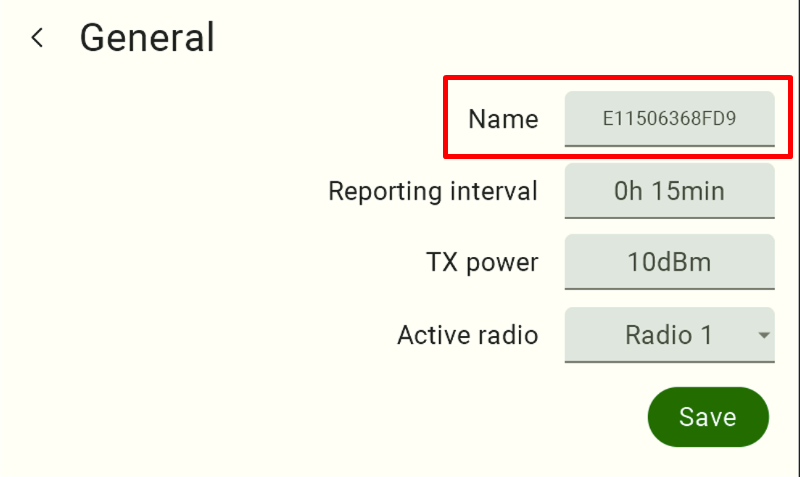
The screen labeled "Rename." In the upper-right corner, there is a light gray text field next to the word "Name," containing the device's current, factory-set name. The user must click this field to bring up the keyboard and modify the text.

Enter the new name using the on-screen keyboard.
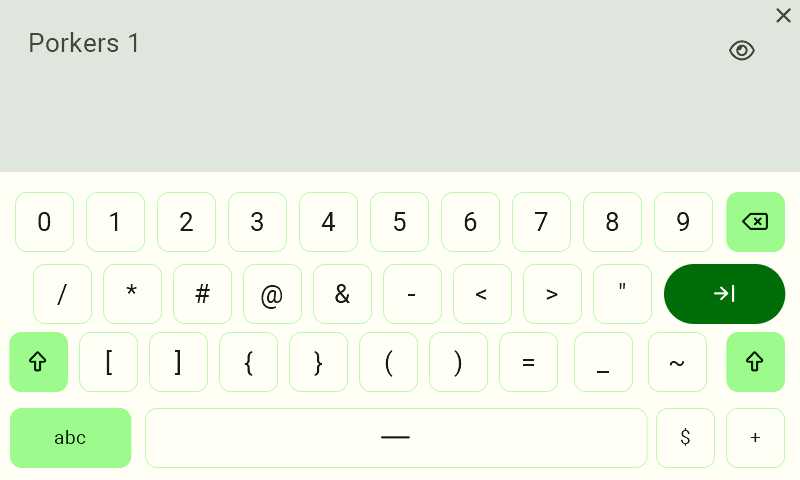
We recommend using names that clearly describe the sensor’s location or function, such as “Feeding Barn 1.” This will make it easier to identify readings and alarms from individual devices.

An interface with a full alphanumeric keyboard displayed on the screen. It is used to delete the old name and enter a new, user-friendly one (e.g., one that identifies the location, such as "Porkers 1"). After entering the text, hide/confirm the entry by clicking the dark green button with an arrow ("->|") to the right of the keyboard.

After entering the new name, click the “Save” button to confirm the changes.
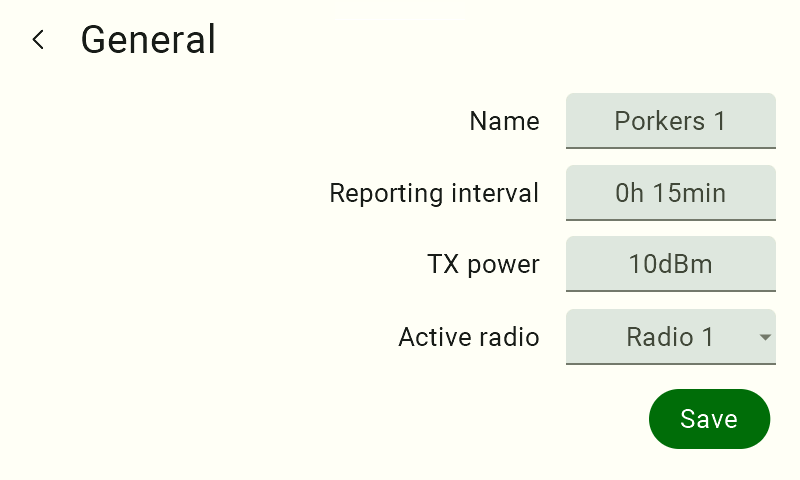
The "Rename" screen with the newly entered text in the "Name" field (e.g., "Porkers 1"). To confirm the new name and permanently assign it to the sensor in the system, the user must click the dark green “Save” button located in the lower-right corner of the interface.

The new name will be assigned to the sensor immediately and will be visible throughout the FarmWatch Pro system.

We hope this article helped you rename the sensor. We hope you enjoy using the system!

Updated on 2026-07-23
Was this article helpful?

Related Articles

Need Support?
Can't find the answer you're looking for?
Contact Support

Leave a Comment