1. Home
  2. FarmWatch Pro
  3. How do I change the order in which the sensors are displayed on the screen?

How do I change the order in which the sensors are displayed on the screen?

Adjusting the order in which sensors are displayed allows you to organize the FarmWatch Pro control panel view according to your needs. This ensures that the most important devices are located in the positions of your choice, making it easier to quickly identify and operate them.

Changing the Sensor Layout

To change the order in which the sensors are displayed:

First, unlock the control panel by entering your PIN.
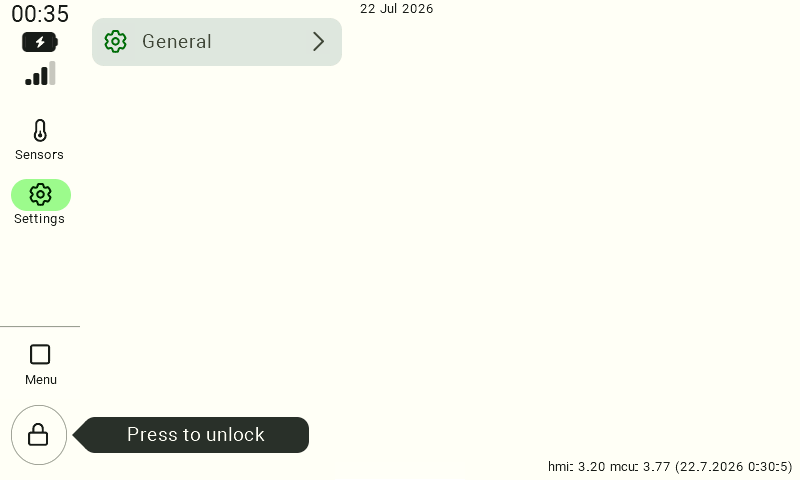
A view of the FarmWatch Pro control panel settings. The "Settings" section is selected in the left-hand menu. At the bottom of the left-hand menu is a closed padlock icon, and to its right is the text "Click to unlock."

After unlocking, select the ” Sensor Layout” option .
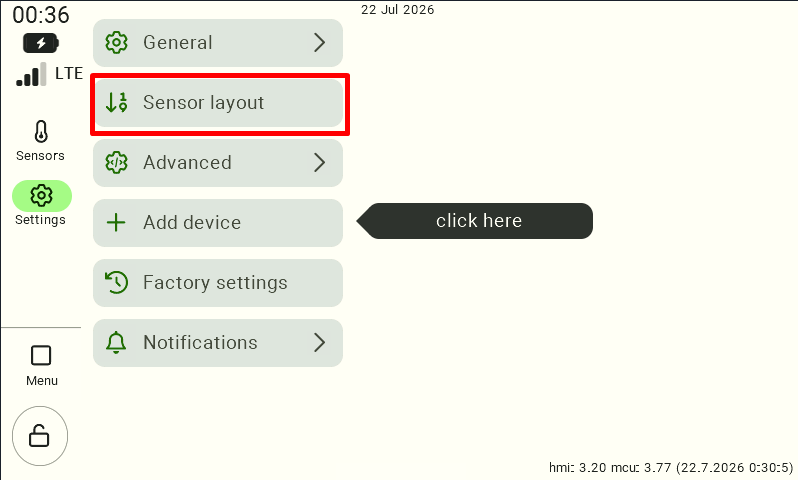
A view of the FarmWatch Pro control unit settings. In the left-hand menu, the “Settings” section has been selected, followed by the “Sensor Layout” category.

Select the type of sensor whose configuration you want to change.
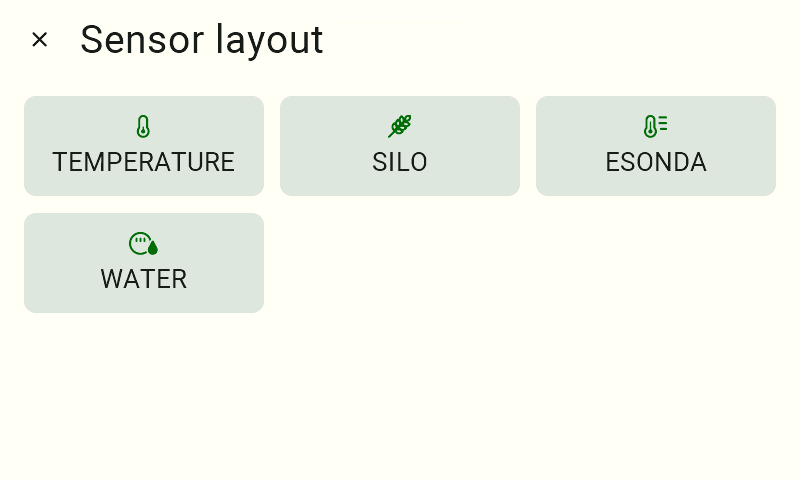
A view of the sensor type selection for the sensor system. In the upper-left corner, it says "Sensor System." Below that, there are four tiles to choose from, from left to right: "Temperature," "Silos," "Esonda," and "Water."

After selecting the sensor type, a table showing the current device configuration will be displayed.
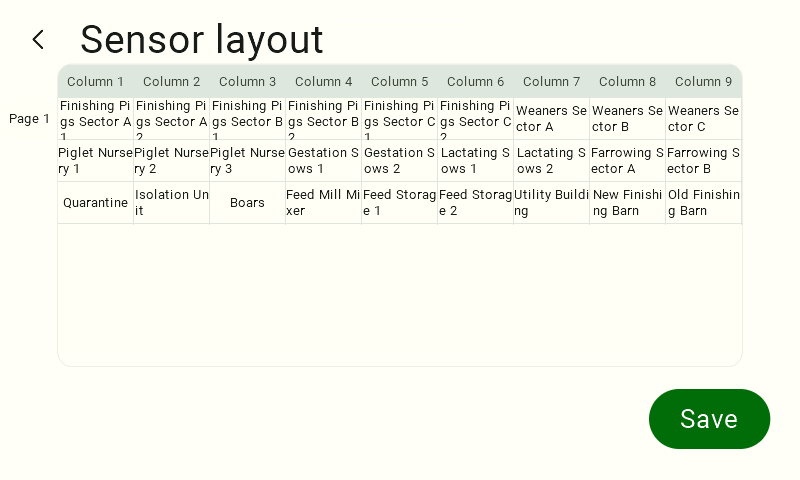
View of the sensor layout for a specific sensor type. In the upper-left corner is the text "Sensor Layout." Below is a table. To the left of the table is the page number, and the column headers list the column numbers in the layout: Column 1 through Column 9. Below the headers are the sensor names. In the lower-right corner is a green button with the white text “Save.”

Click and hold the sensor whose position you want to change.
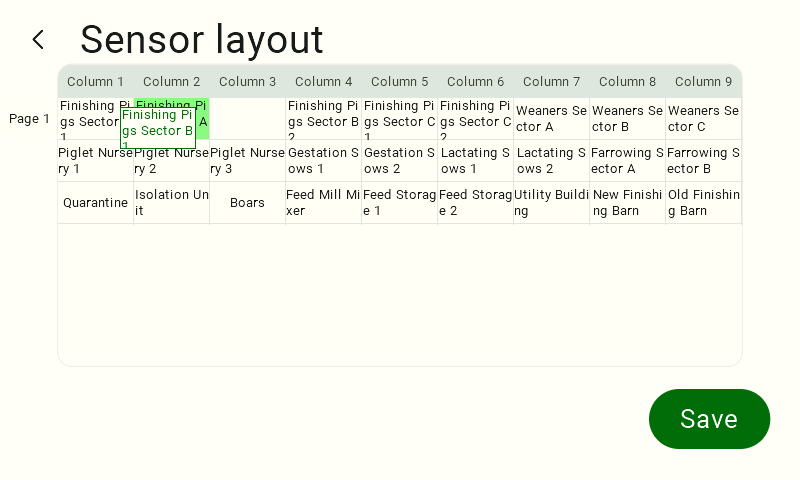
View of the sensor layout for a specific sensor type. In the upper-left corner is the text "Sensor Layout." Below is a table. To the left of the table is the page number; the header shows the column numbers in the layout: Column 1 – Column 9. Below the headers are the sensor names. In the lower-right corner is a green button with the white text “Save.” The first sensor in Column 3 is “highlighted.”

Drag the sensor to the desired location.
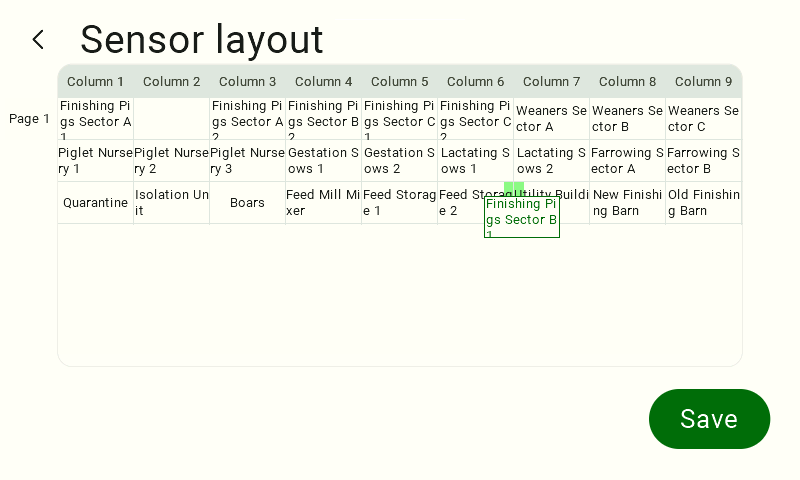
View of the sensor layout for a specific sensor type. In the upper-left corner, it says "Sensor Layout." Below is a table. To the left of the table is the page number; the column headers list the column numbers in the layout: Column 1 through Column 9. Below the headers are the sensor names. In the lower-right corner is a green button with the white text “Save.” The removed sensor is placed in the space between columns 6 and 7 in the third row.

After dropping it, the sensor will be placed in a new position, and the table will automatically adjust its layout.
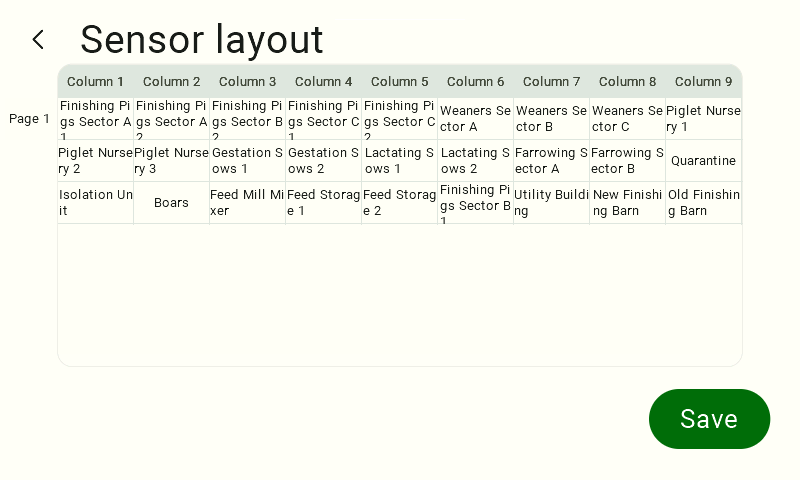
View of the sensor layout for a specific sensor type. In the upper-left corner is the text "Sensor Layout." Below is a table. To the left of the table is the page number, and the header shows the column numbers in the layout: Column 1 – Column 9. Below the headers are the sensor names. In the lower-right corner is a green button with the white text “Save.” The sensor has been repositioned, and the table has been reformatted to reflect the new settings.

To save the changes you’ve made, click the “Save” button .

The new sensor order will be applied and will be visible on the FarmWatch Pro control panel’s home screen.

We hope this article has helped you change the order in which the sensors are displayed. We hope you enjoy using the system!

Updated on 2026-07-23
Was this article helpful?

Related Articles

Need Support?
Can't find the answer you're looking for?
Contact Support

Leave a Comment