
Navigating to the configurator
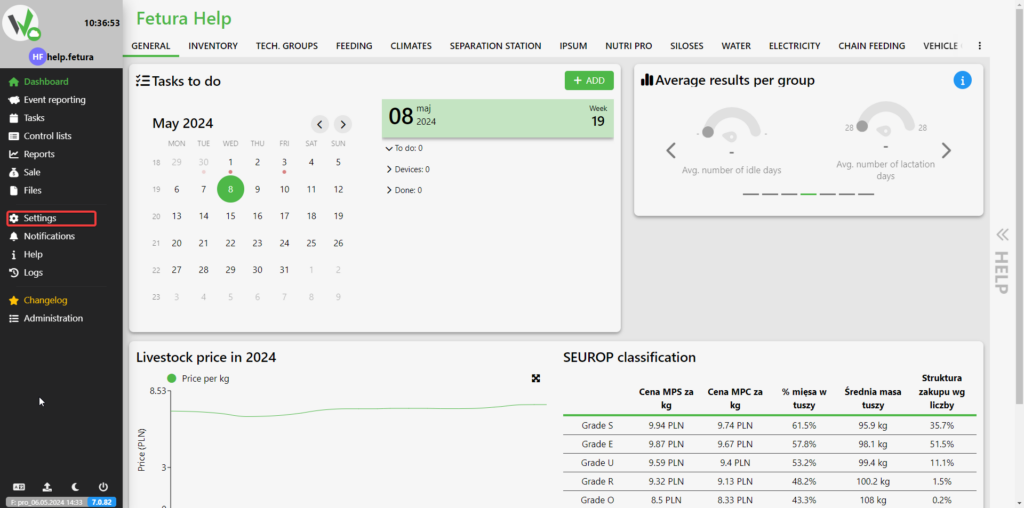
To configure the weighing panel, go to the Settings tab.
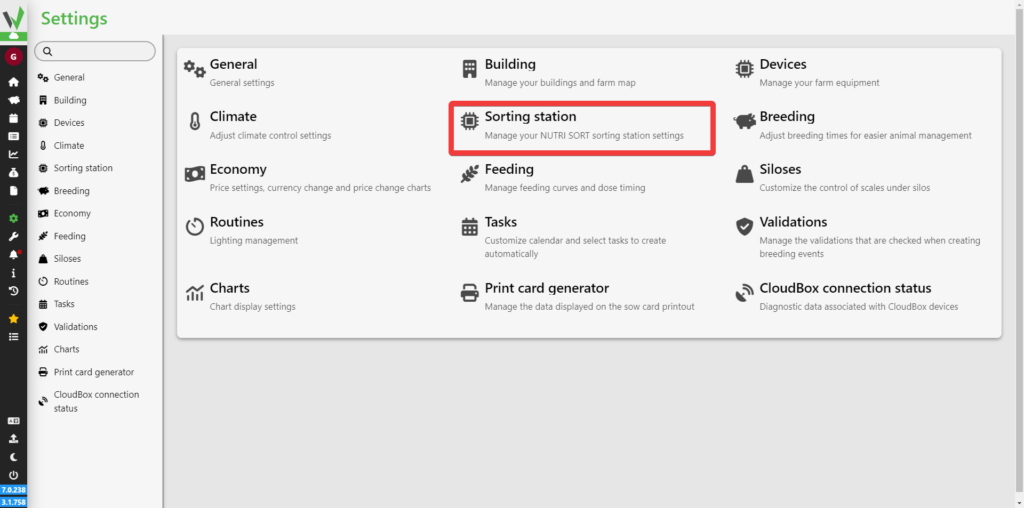
Then go to the sorting station tab.
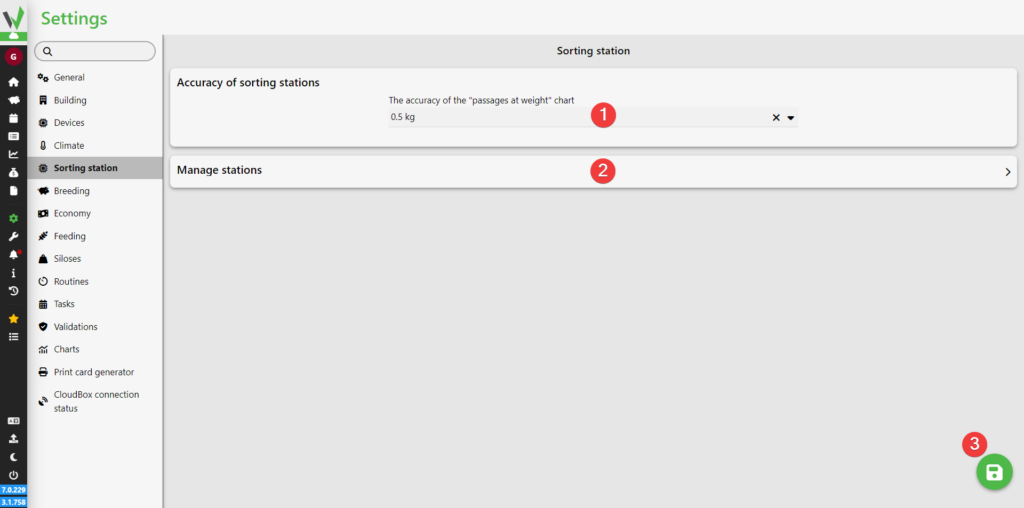
In the new view, it is possible to change the accuracy of all sorting stations [1] and navigating to station management [2]. After changing the accuracy, click the save button [3].
Sorting station management
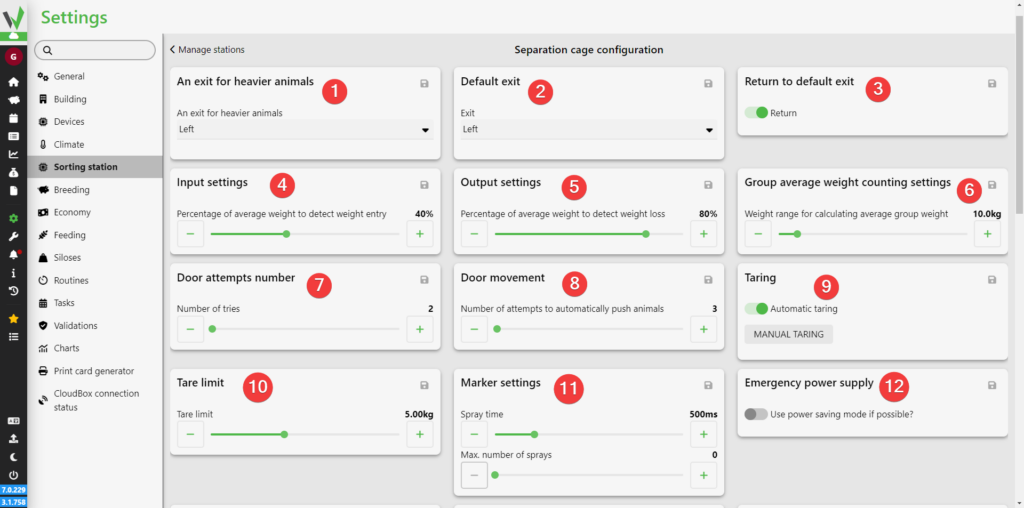
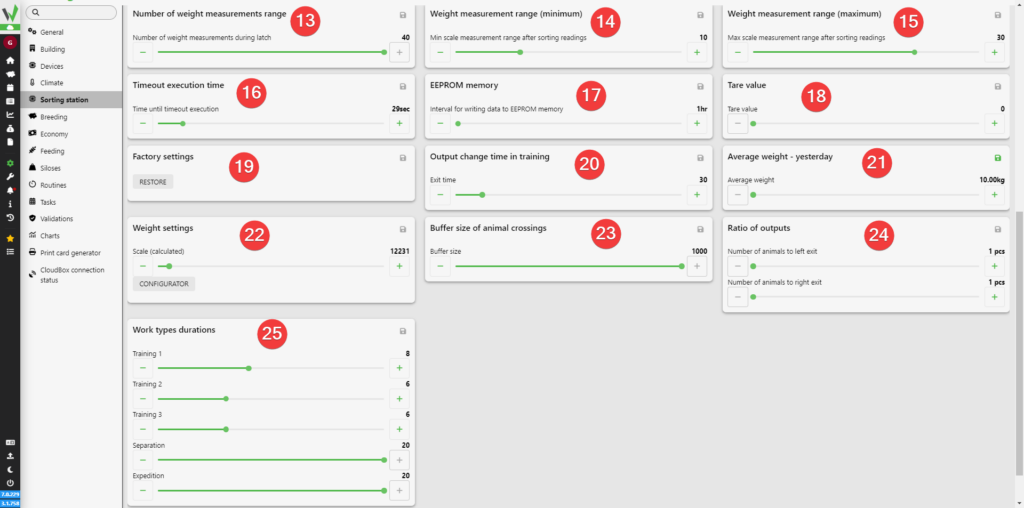
After going to the section and selecting a sorting station, it is possible to set:
- Through which exit should heavier animals leave
- What is the default exit
- Whether the station should return to the default exit after letting a pig through
- Before the next animal enters, at what percentage of the average weight the station should detect the pig entering
- At what percentage of the average weight the station should detect the pig leaving
- What is the maximum weight difference for it to be included in the group’s average weight
- What is the maximum number of times the gates can attempt to open
- How many times the gates will attempt to push the animal through
- Whether the station should tare automatically
- What is the maximum / minimum weight for automatic taring
- What is the spray duration and maximum number of sprays
- Whether operation in energy-saving mode is possible
- How many times the station will measure the weight while locked
- What is the minimum weight measurement range after sorting the readings, i.e. how many initial weight measurements should be discarded (weight measurements with an index lower than the configured value will be discarded)
- What is the maximum weight measurement range after sorting the readings, i.e. which final weight measurements should be discarded (weight measurements with an index higher than the configured value will be discarded)
- After what time the station will execute the timeout procedure if the animal does not want to leave the scale or if it is impossible to position the gates
- How often data should be saved to EEPROM memory
- What is the tare value
- Whether the station should return to factory settings
- How often, in minutes, the exit should change during training
- What is the average weight from the previous day
- What scale is configured and whether it should be configured if necessary
- How many of the most recent entries should be used to calculate the average weight
- How many animals passed to the right and how many to the left
- What is the duration of each mode in days
After changing each setting, you are required to click on the save icon located in the upper right corner of each panel.
New settlement
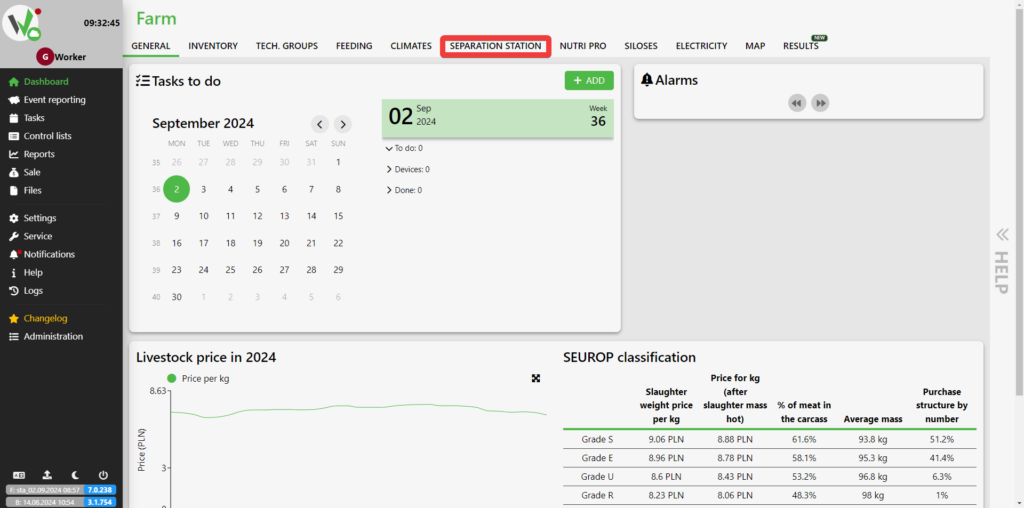
For proper operation of the sorting station, it is necessary to create a settlement. To do this, go to the SORTING STATION tab.
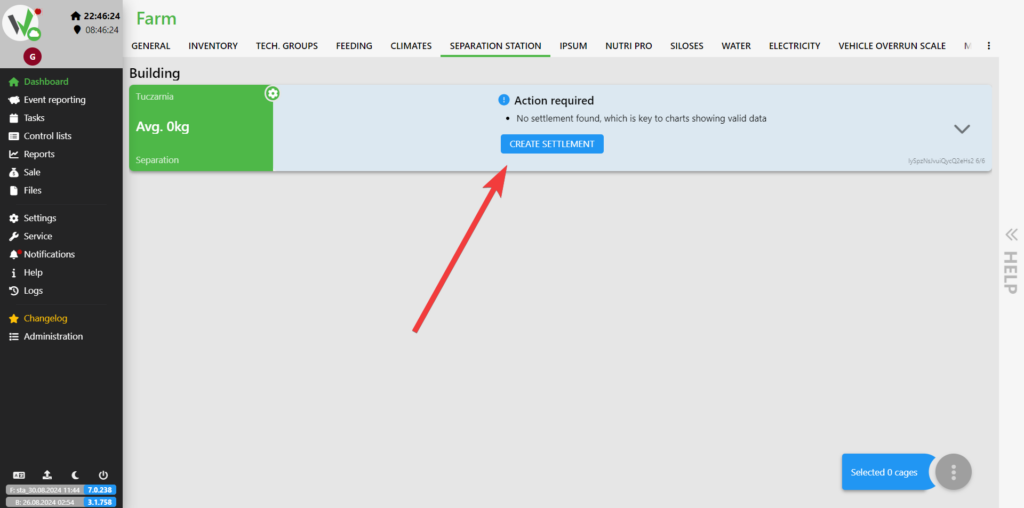
Then click the CREATE SETTLEMENT button on the tile of the desired sorter.
Enter which day the restocking started [1], how many days it will last [2] and the average age of the animals during it [3]. After entering this data, click the save button [4].
![Add settlement dialog with numbered fields for the settlement start date [1], number of settlement days [2], average age of inserted pigs [3], and the ADD button [4].](https://help.fetura.pl/wp-content/uploads/2024/08/zasiedlenie-en-1024x508.png)
Modes of operation
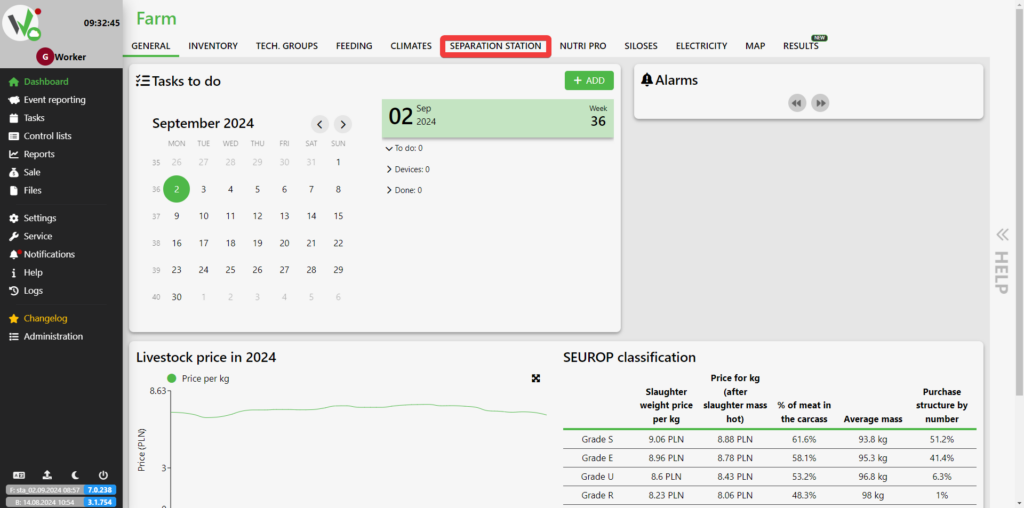
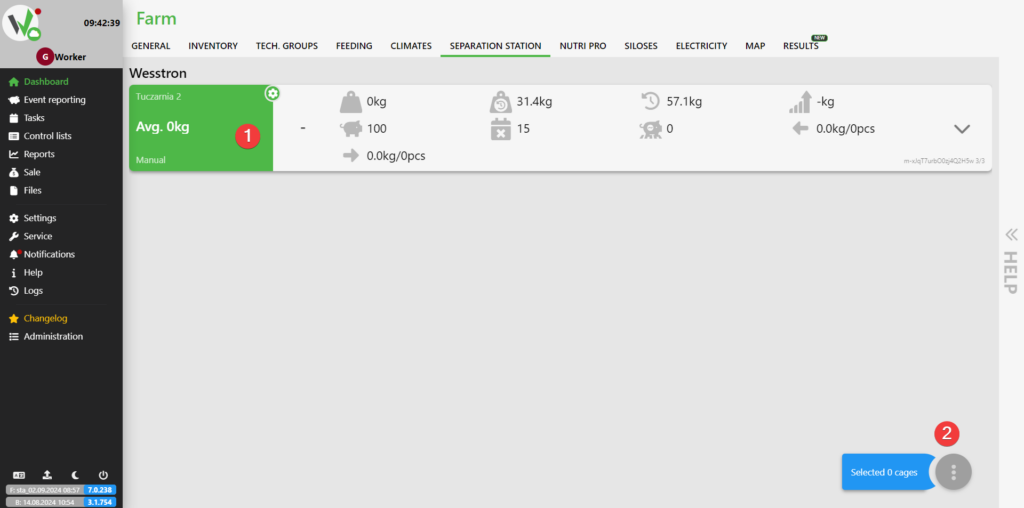
To change the mode of operation on the sorting station , go to the SORTING STATION tab .
Then select the sorter on which you want to change the mode by clicking its tile [1]
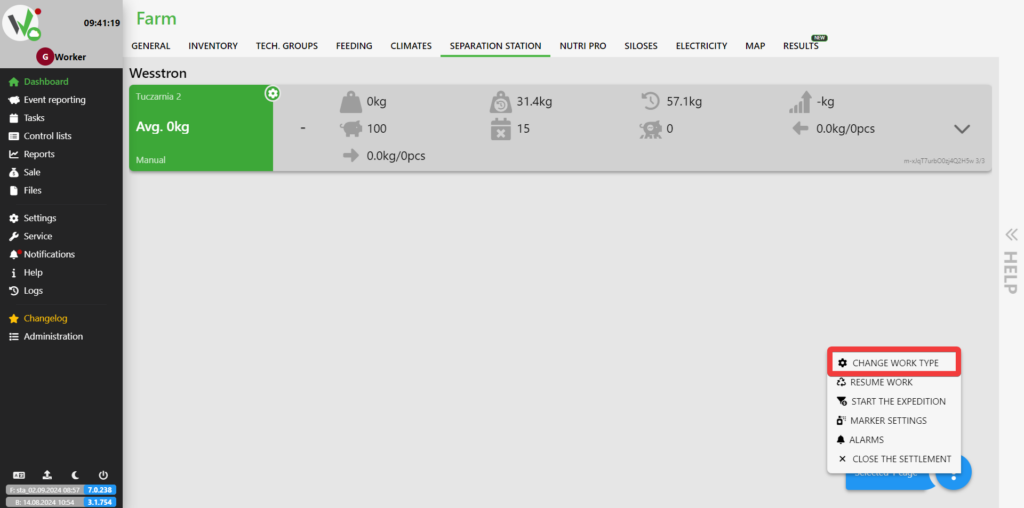
and clicking the selected button [2].
A menu will open, from which the option CHANGE WORK TYPE should be selected.
Select the mode you are interested in and then click the save button.
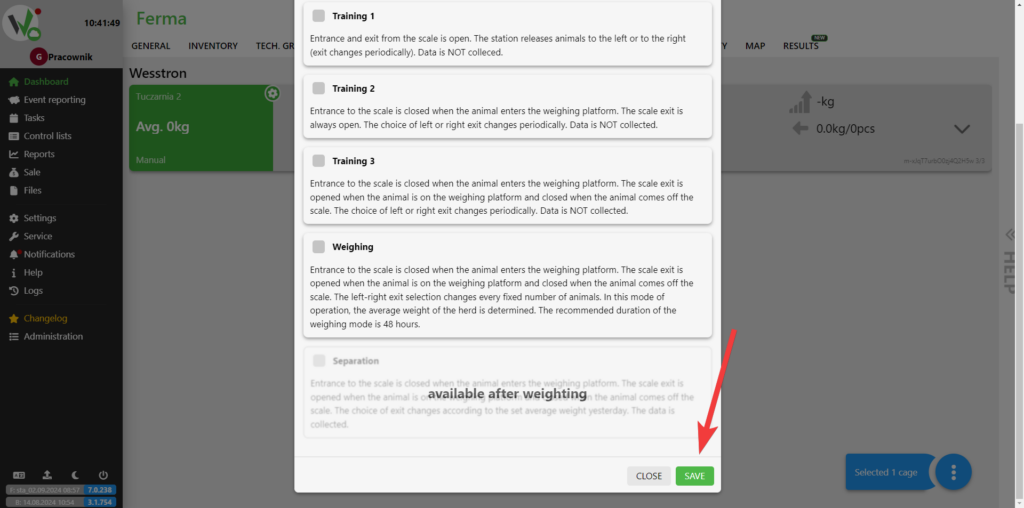
Nutri SORT modes available
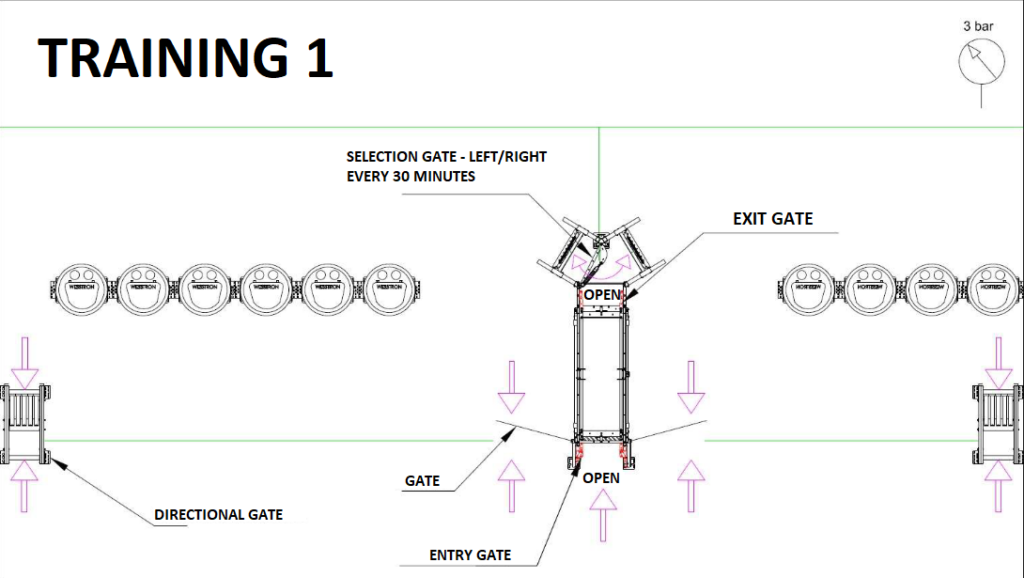
Training 1
Days 1 to 14
Separation gates, directional gates and wickets to the
feeding zone are open which allows animals to freely access feed in the
feeding zones.
The selection doors to the feeding zones switch
to the next exit, by default: every half hour.
The number of passes and weight are not recorded.
The operating pressure should be set at 3 Bar.
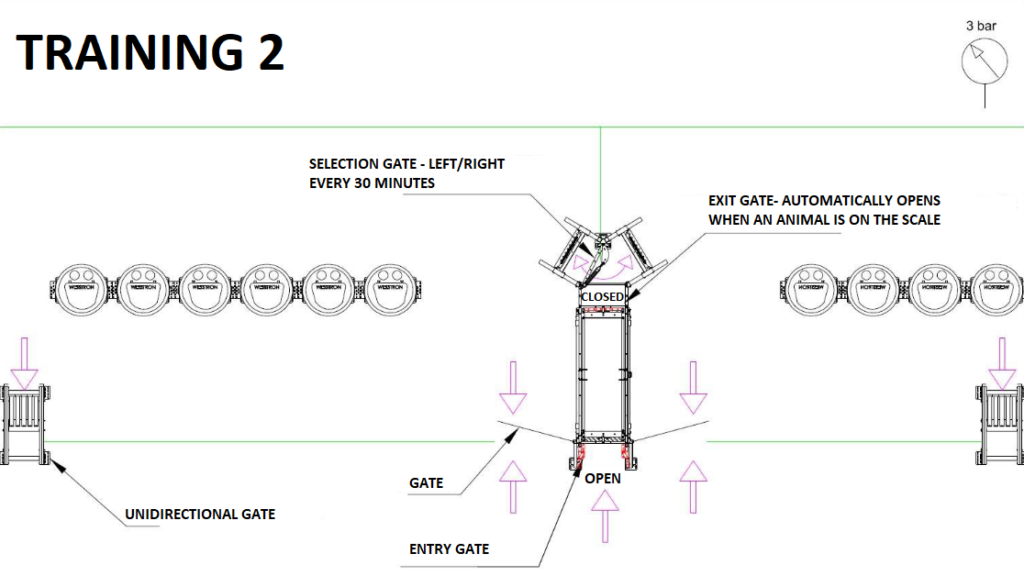
Training 2
Days from 15 to 21
Directional gates in one-way mode, gates to feeding zone
are open which allows animals to freely access feed in
feeding zones.
The exit door of the scale is closed after the animal enters the door
automatically opens, the entrance door to the scale is open all the time.
The selection door to the feeding zones switches to the next exit,
default: every half hour.
The number of exits and weight are not recorded.
The operating pressure should be set to 3 Bar.
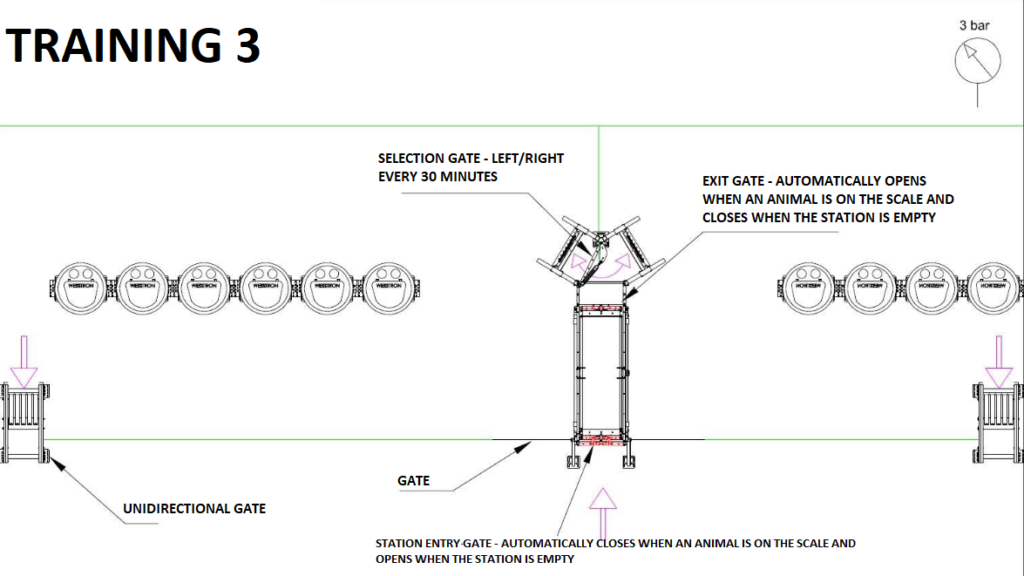
Workout 3
Days 22 to 28
Directional gates in one-way mode, and the gates to the feeding area
are closed. The exit door of the scale is closed, when the animal enters, the door
automatically opens, the entrance door to the scale closes after the animal enters the scale. The selection door to the feeding zones switches
to the next exit, default: every half hour. The number of passes and weight are not recorded. The operating pressure should be set to 3 Bar.
Weighing
Days 29 to 30
Directional gates in one-way mode, and wickets to the feeding area
are closed.
The station performs a full measurement cycle.
The animal is locked in the station
for a maximum of 10 seconds.
The average measurement takes about 3 seconds.
The number of passes
and weight are recorded.
Chains should be placed on the entrance door to limit the width of the entrance to the size of the animals, so that one animal enters per width.
RECOMMENDED: set the sprayer mode to mark all animals regardless of weight to verify that each animal has passed the scale at least once during this period. The operating pressure should be set at 3 Bar.
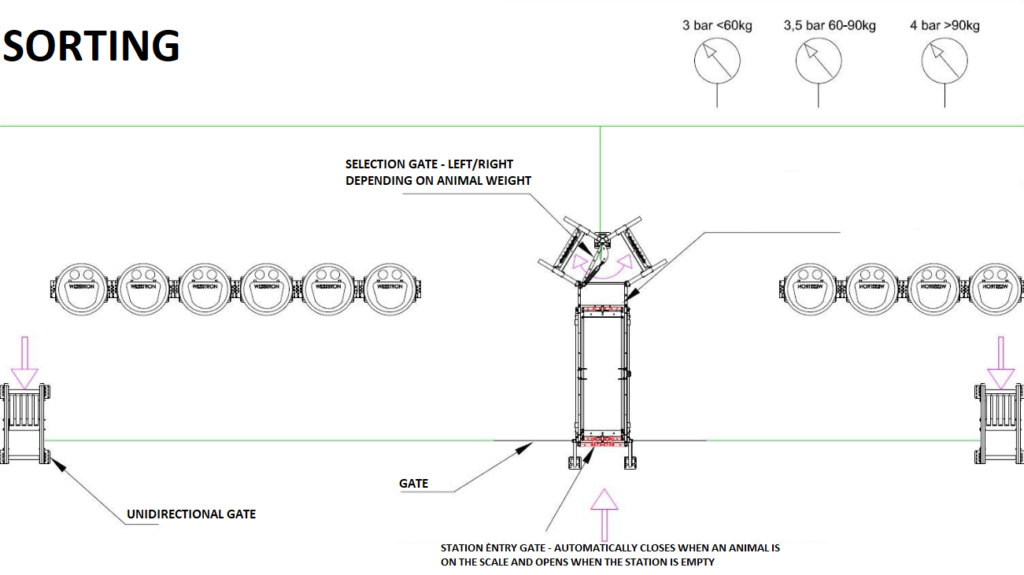
Sorting
Days from 30
The station sets the exit side relative to the weight. By default, heavier animals go out to the left side. In this mode, remember to successively increase the pressure up to 4 bar depending on the weight of the animals (3.5 bar from 60kg weight 4 bar from 90kg weight).
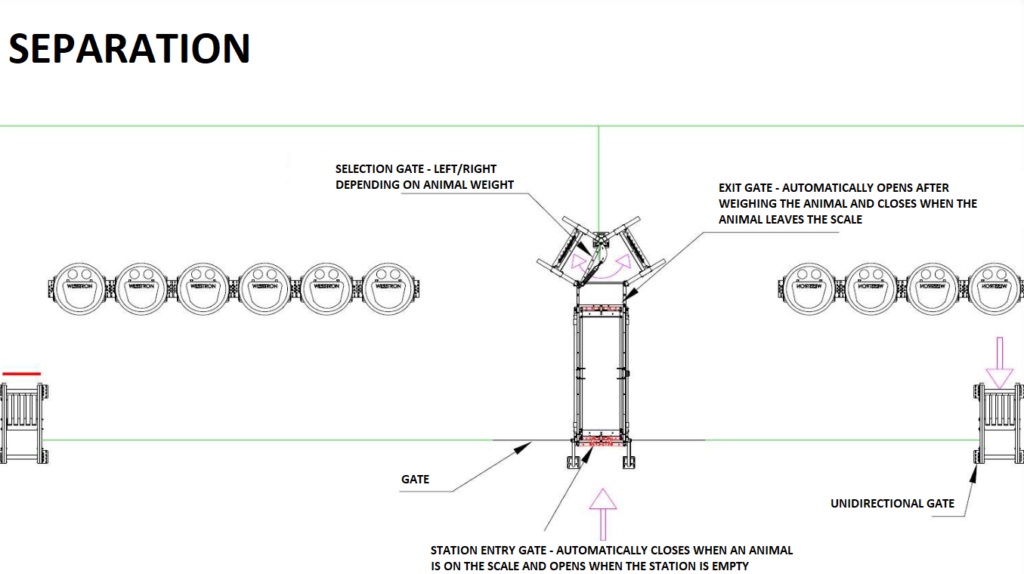
Separation
One day before the sale, certain parameters should be entered in the application :
– weight of animals to be sold
– number of animals to be sold
In the separation pen, one-way gates should be closed blocking the possibility of
returning to the lair area. The area of the livestock storage must correspond to the number of selected animals. During the operation of this mode, you can change the weight range and the number of animals to be sorted.
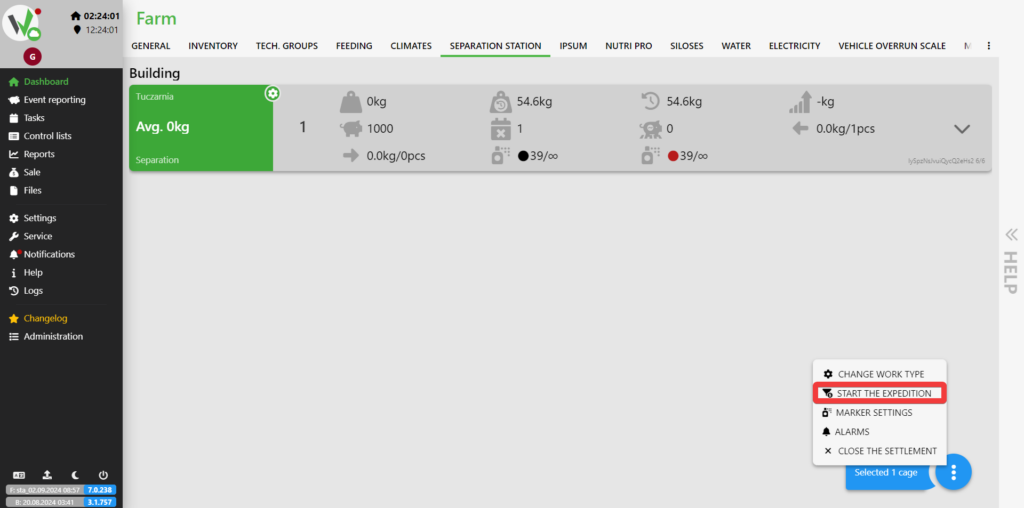
In the application, go to the SORTING STATION tab. Select the Nutri SORT on which you have set the separation, then open the menu and click START EXPEDITION.
On the newly opened form, enter the range of animal weights [1] and how many animals can maximally pass [2]. To save the changes, click the START button [3].
![Start the expedition dialog with numbered fields for the weight range of animals for the expedition [1], the number of animals to release [2], and the START button [3].](https://help.fetura.pl/wp-content/uploads/2024/08/ustawienia-ekspedycji-en-1-1024x508.png)


