1. Home
  2. Settings
  3. How to add prices to medicines

How to add prices to medicines

In this article, we will discuss the steps to add a price list on a farm.

  1. Switch to the Economy Section in Settings.
    • Start by going to the application’s home page.
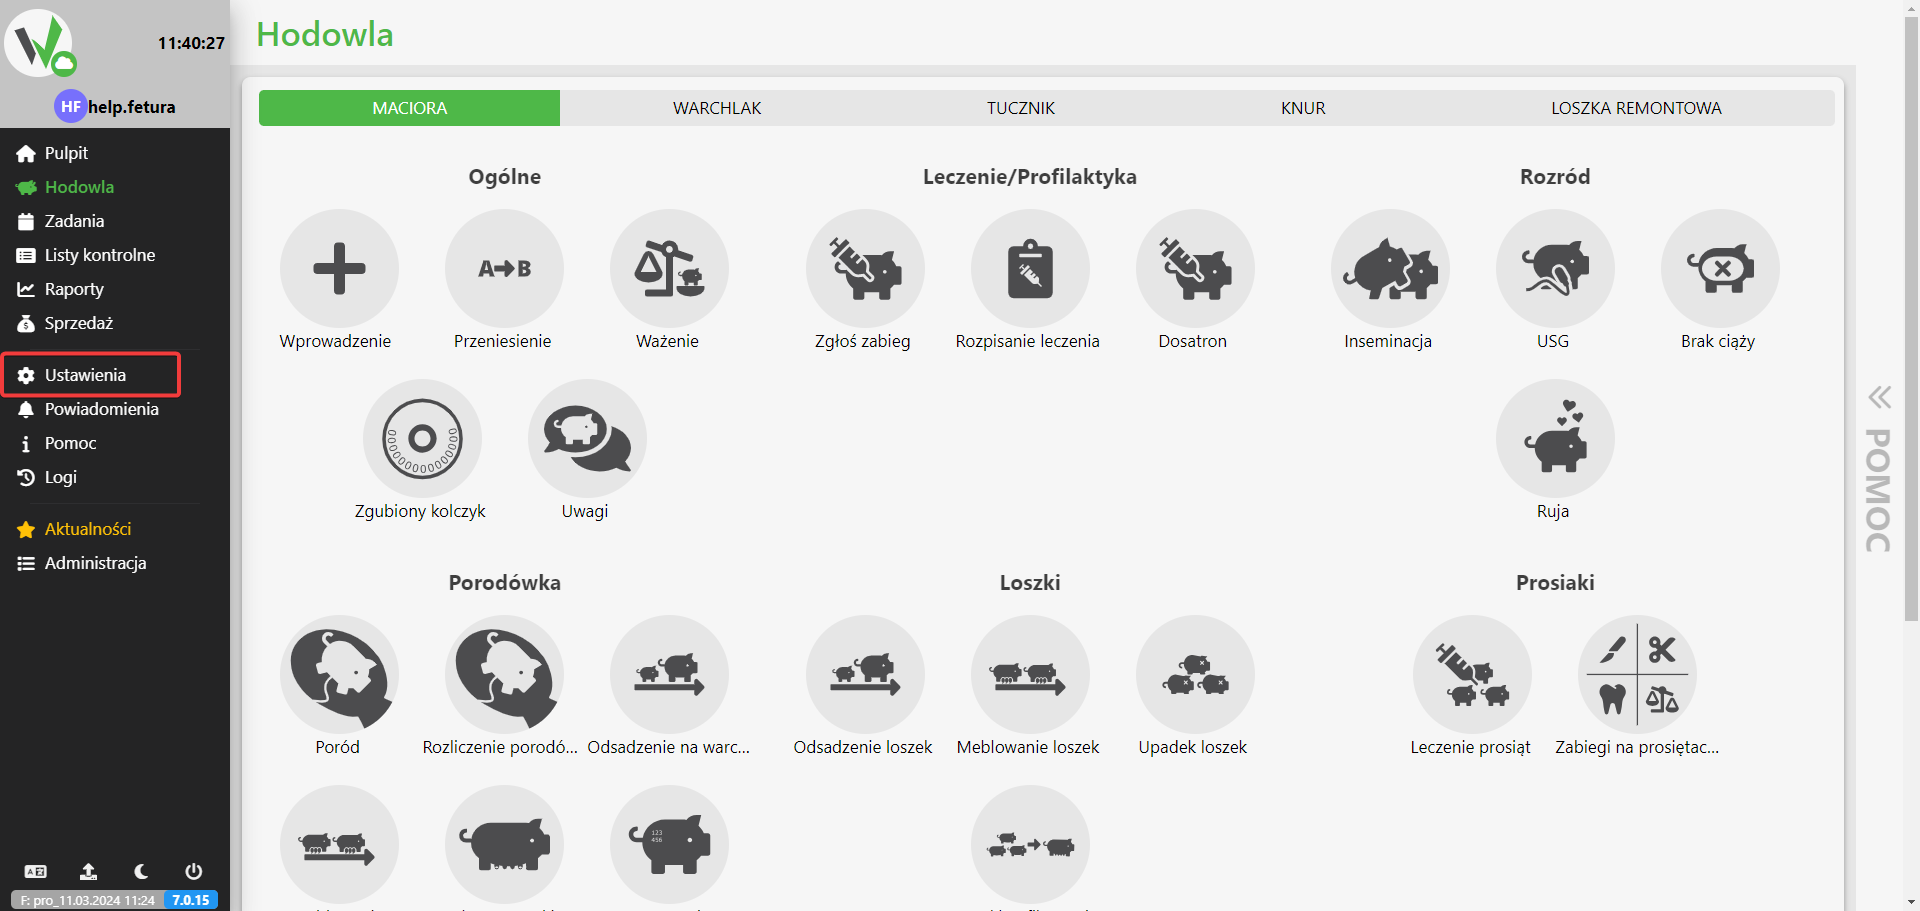
    • From the left side of the menu, select Settings.Breeding screen sidebar with the Settings option highlighted in red, used to access the Economy section.
  2. Select the Economics section
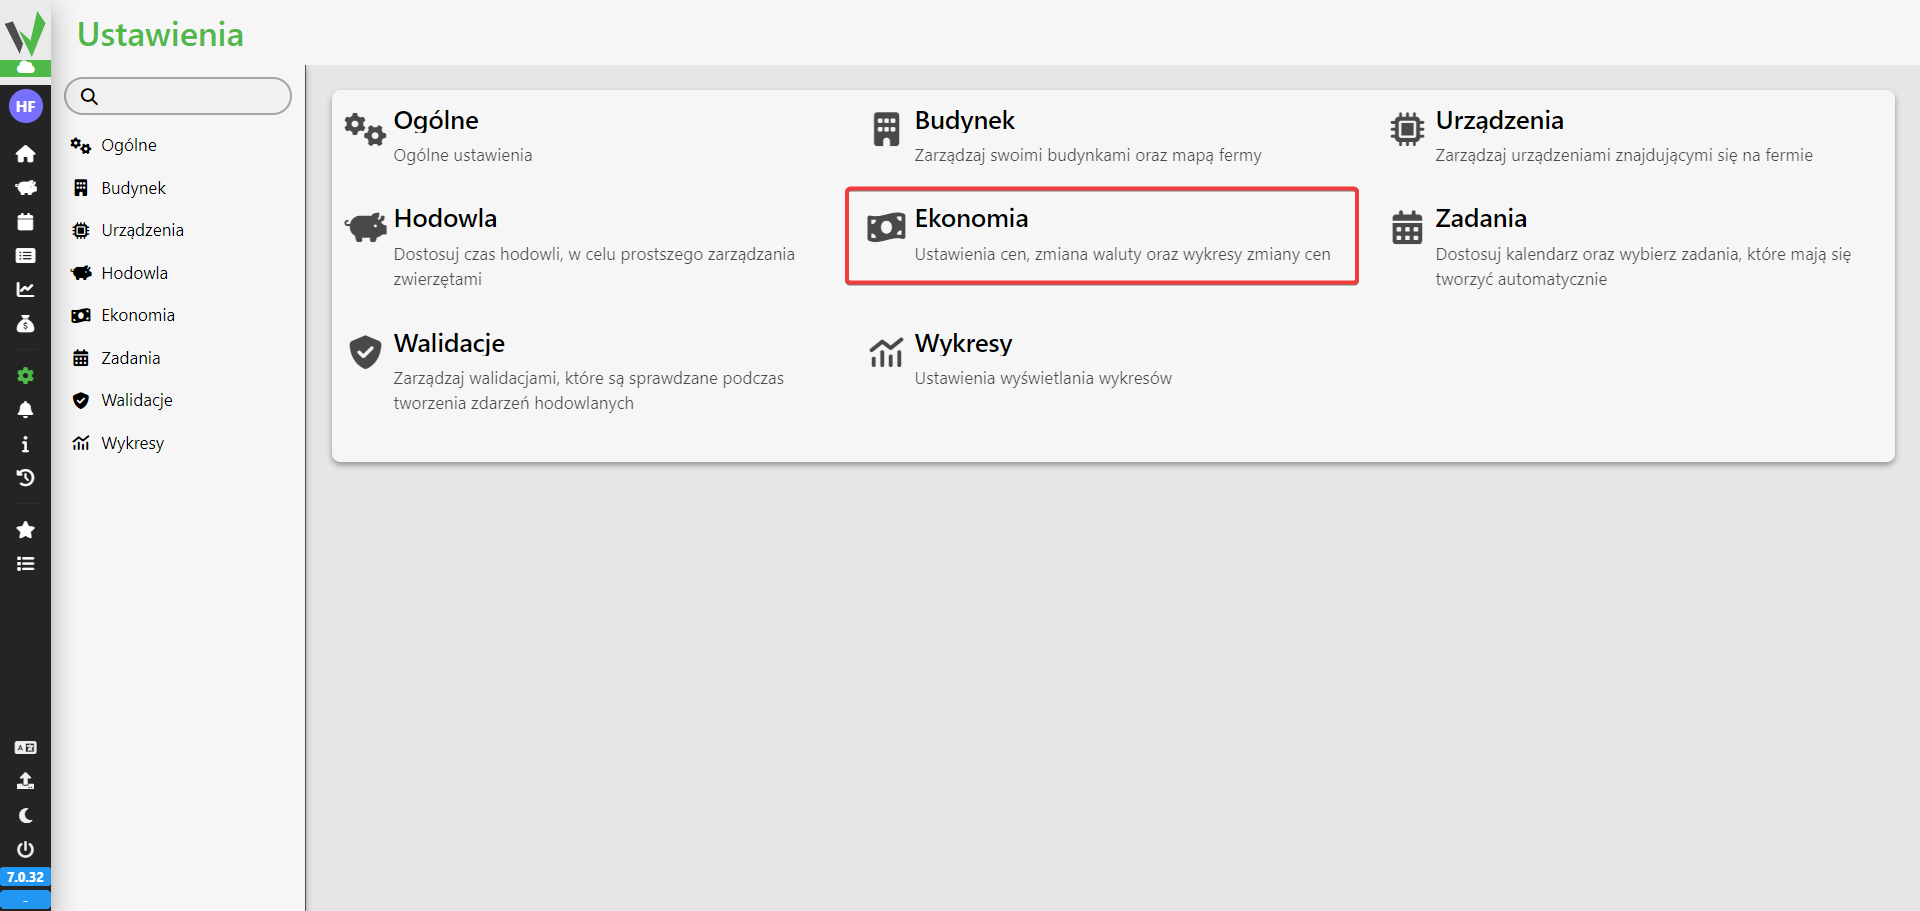
    • In the Settings section, find and select the Economy section.Settings screen with the Economy tile highlighted in red, used to manage price lists, currency and price change history.
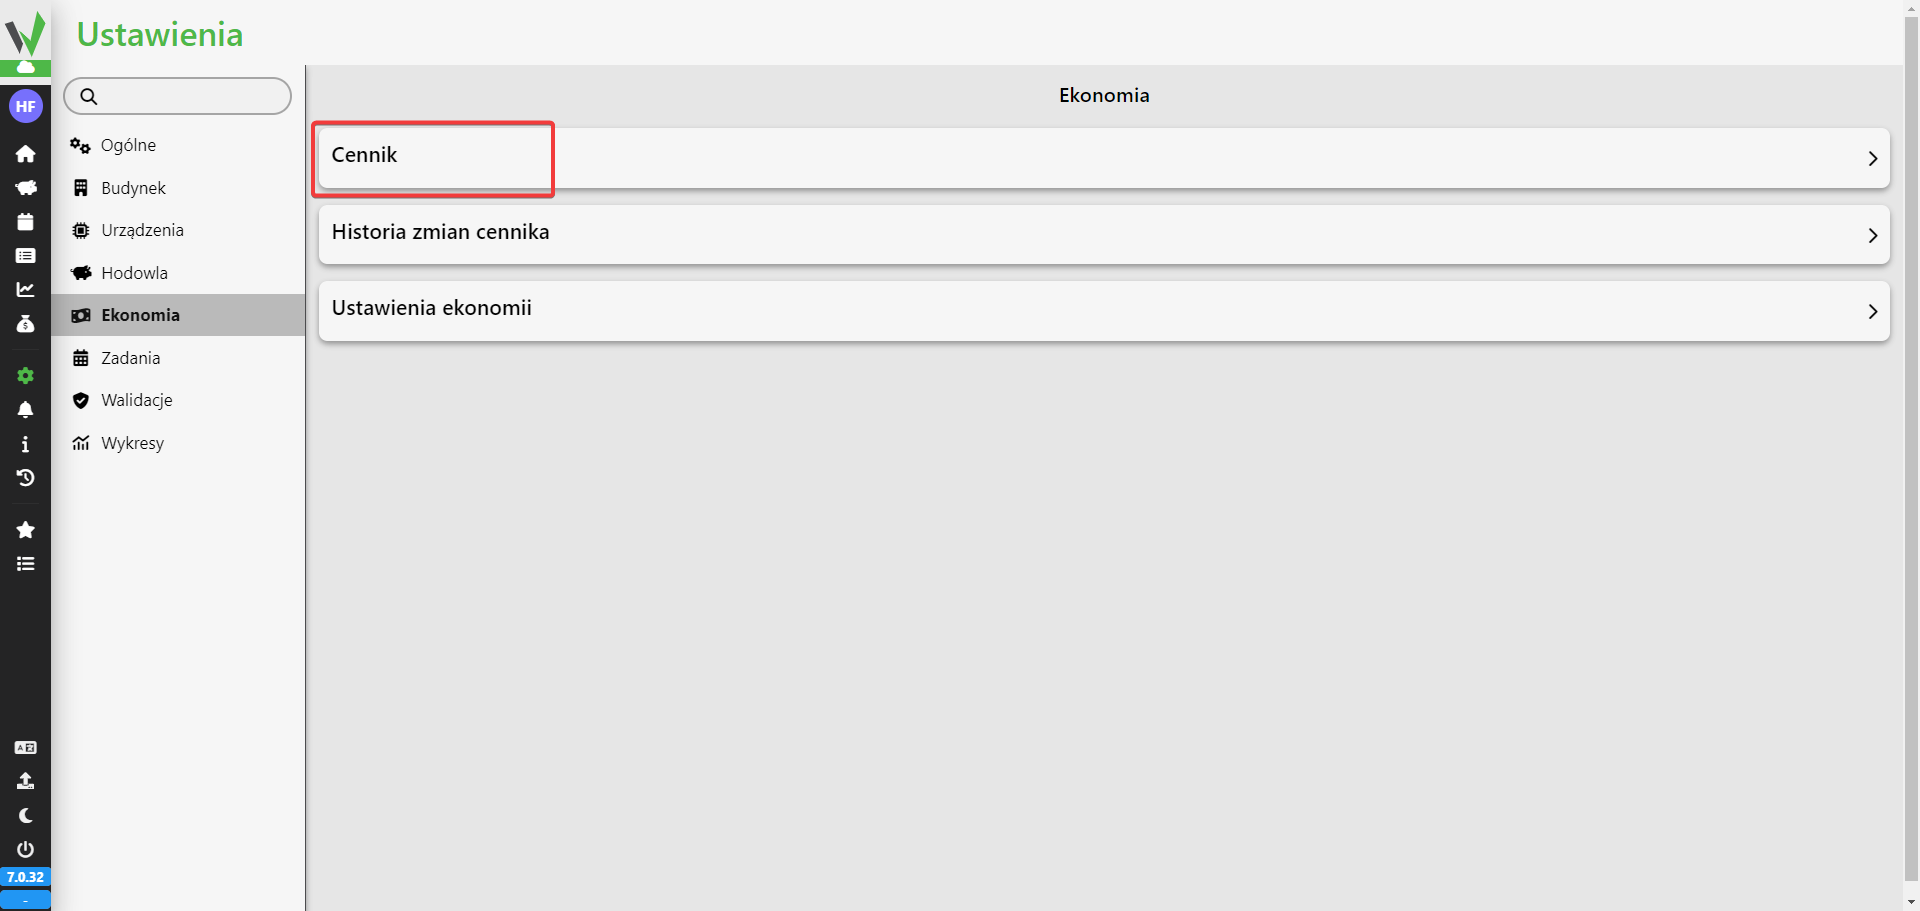
    • After entering the Economy, we have the following choices
      • Price list
      • History of price list changes
      • Economy settings
    • Select PricingEconomy section with the Cennik (Price list) option highlighted in red, used to open the medicine and item pricing form.
  3. Filling in the Currency Field
    • When you go to the Pricing section, several tabs will appear
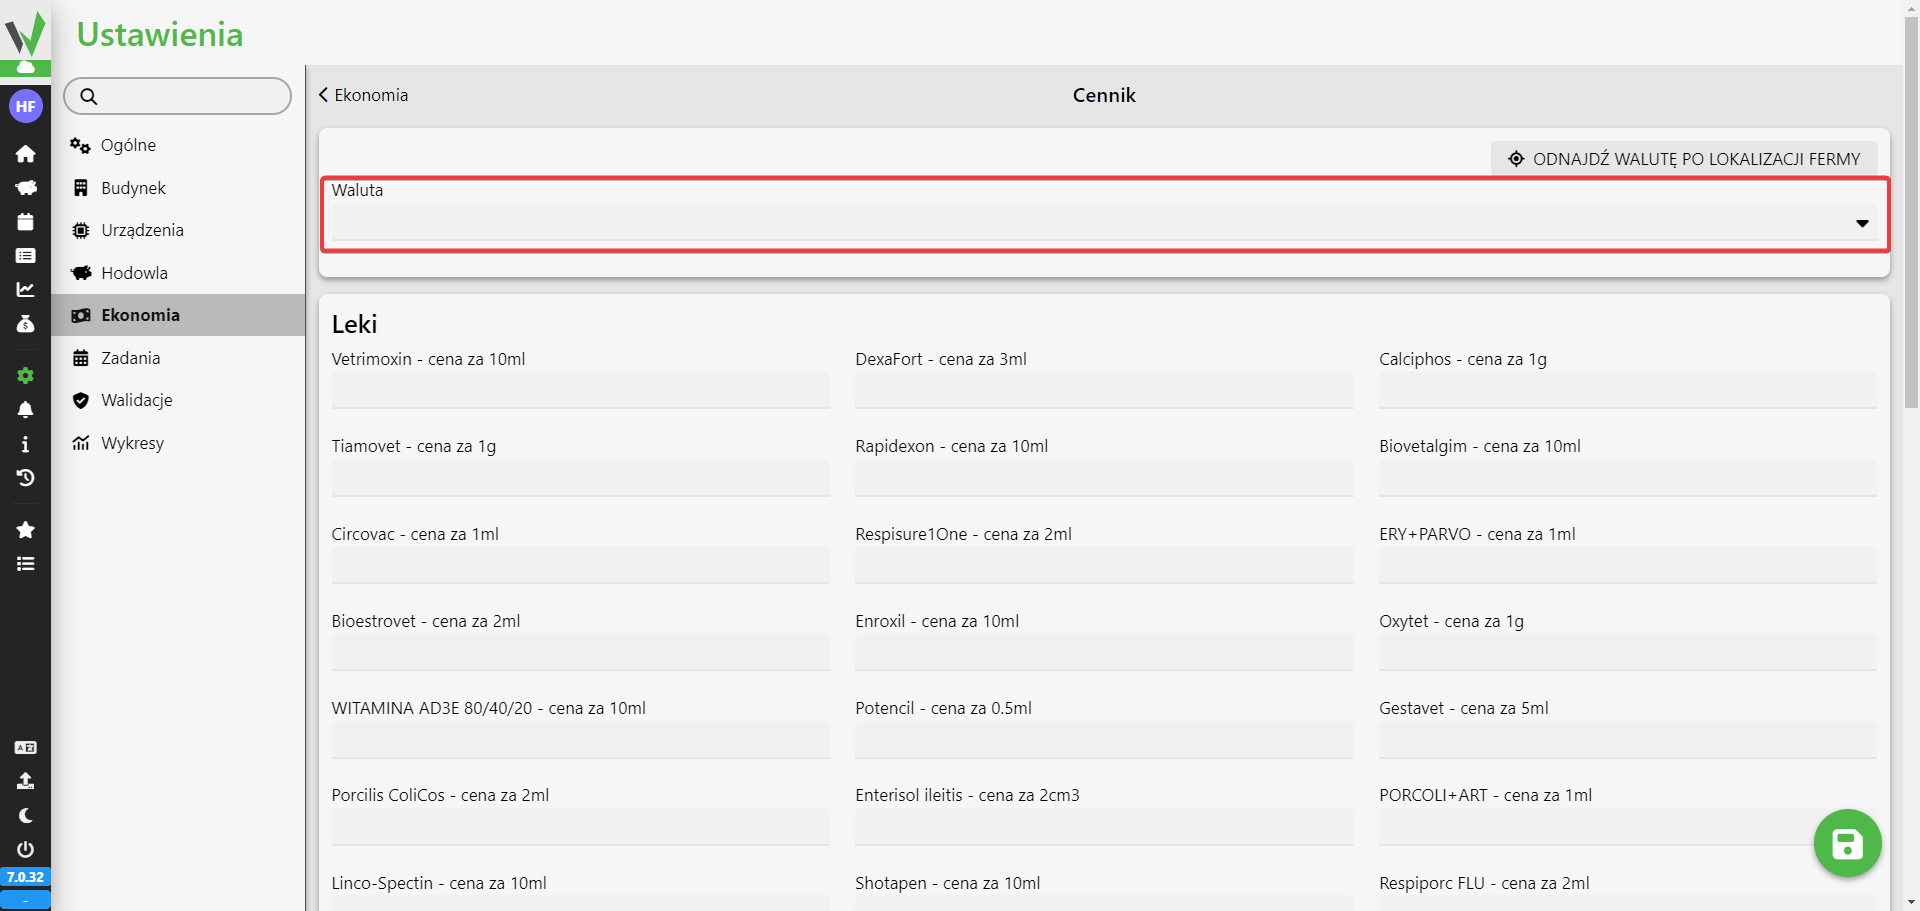
    • Start by filling in the “Currency” field. You can use the “Find currency by farm location” button, but be sure to give permissions to the location to our application (The browser itself will ask for permissions if we have not given them).Price list (Cennik) screen with the Waluta (Currency) dropdown highlighted in red and a button ODNAJDŹ WALUTĘ PO LOKALIZACJI FERMY (find currency by farm location) above it. Below, the Leki (Medicines) section lists every item with the unit the price is entered for: Vetrimoxin - per 10ml, DexaFort - per 3ml, Calciphos - per 1g, Tiamovet - per 1g, Rapidexon - per 10ml, Biovetalgim - per 10ml, Circovac - per 1ml, Respisure1One - per 2ml, ERY+PARVO - per 1ml, Bioestrovet - per 2ml, Enroxil - per 10ml, Oxytet - per 1g, WITAMINA AD3E 80/40/20 - per 10ml, Potencil - per 0.5ml, Gestavet - per 5ml, Porcilis ColiCos - per 2ml, Enterisol ileitis - per 2cm3, PORCOLI+ART - per 1ml, Linco-Spectin - per 10ml, Shotapen - per 10ml, Respiporc FLU - per 2ml. The list continues below the visible area; a green save button sits in the bottom right corner.
  4. Filling the Fields of Interest
    • Then you can start filling in the fields that are relevant to you. All fields are not required, so you can choose those that apply to your current needs.
  5. Saving the Form
    • After completing the fields of interest, you can save the form. Make sure all the data is correct, then save the changes you made.
Updated on 2026-07-28
Was this article helpful?

Related Articles

Need Support?
Can't find the answer you're looking for?
Contact Support

Leave a Comment