1. Home
  2. FarmWatch Pro
  3. How to add a new temperature sensor?

How to add a new temperature sensor?

1. Locate the device addition option

To continue, unlock the screen by entering your PIN (remember, the default PIN is 0000).
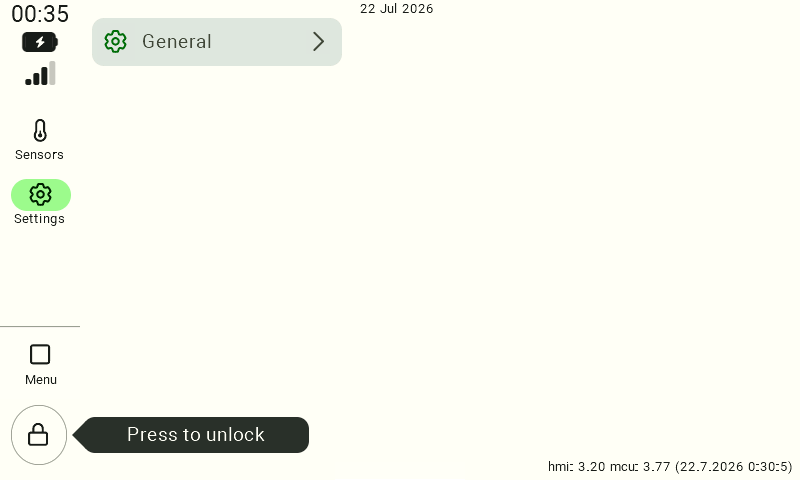
Main control panel screen. To unlock the menu and access the settings, the user must click the lock icon located in the bottom-left corner of the screen, indicated by the hint "click here".

Now select “Add device” – it’s easier than you think!
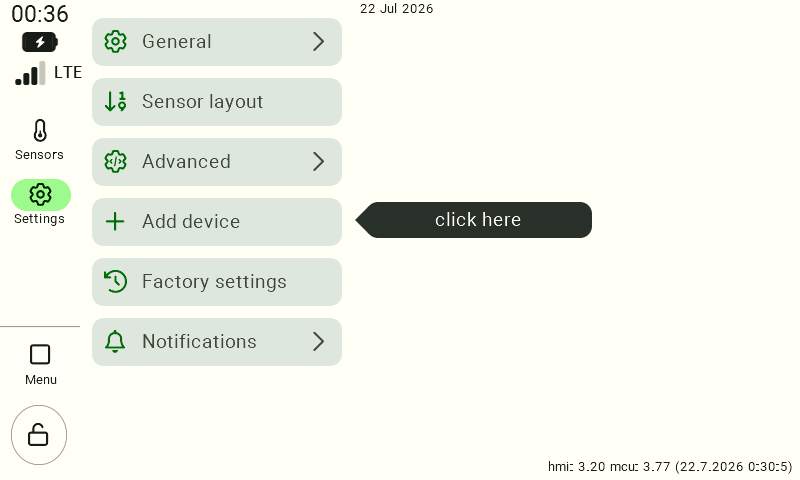
Unlocked settings menu view. To begin pairing a new temperature sensor, the user must locate and click the "+ Add device" button, indicated by a black arrow labeled "click here".

At this point, you should see the screen shown below.
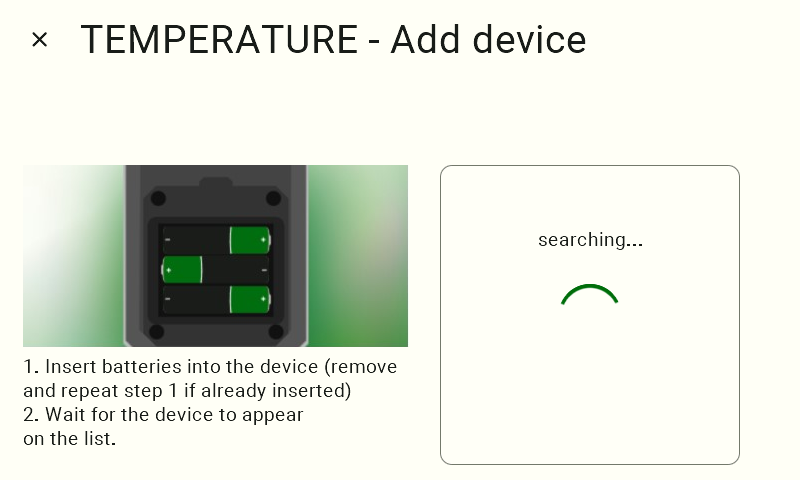
"Add device" screen in search mode. On the left side, instructions are displayed telling the user to insert the batteries into the device (or reinsert them) and wait for the sensor to appear in the list. On the right side, the interface displays a loading animation with the message "searching...".

2. Turn on the temperature sensor

Insert the batteries into the temperature sensor and get ready for the magic to happen.

After inserting the batteries, the green LED located above the battery compartment should light up briefly and then begin flashing rapidly. This indicates that the thermometer is powered on and searching for a connection.
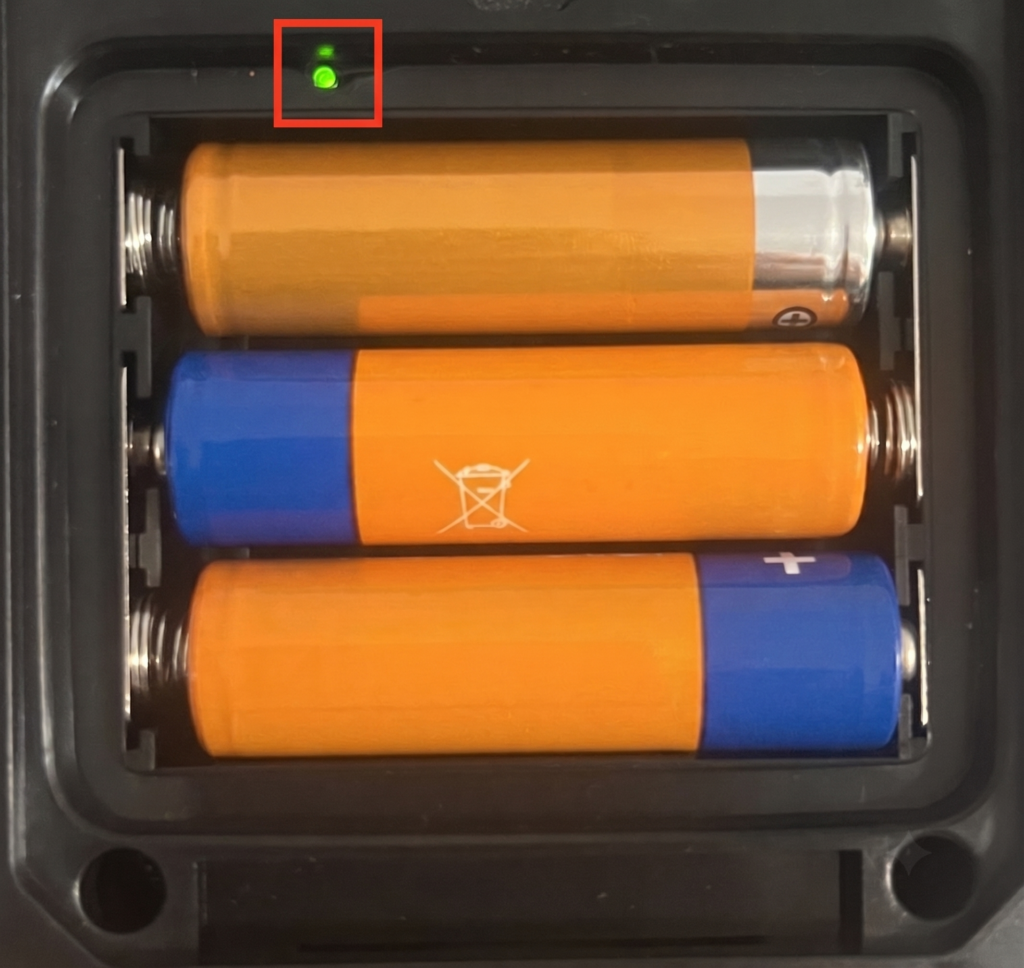
Photograph of a temperature sensor with the battery compartment open. Three correctly installed AA batteries are visible inside. Above the batteries, a small green LED is illuminated, indicating proper power supply and that the device is ready to be paired with the system.

When information about the detected sensor appears on the screen, click the green button to add it. You’re almost there!
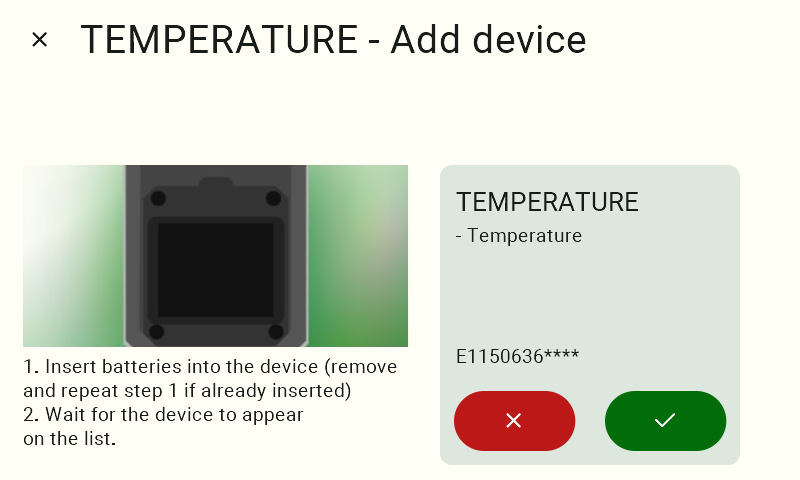
Make sure that the serial number of the displayed sensor belongs to you. The last 4 digits are shown as **** because they will be used to add the sensor in the next step.

"Add device" screen after successfully detecting a wireless sensor. A new tile appears on the screen containing the name of the discovered device and the beginning of its unique identifier. To confirm that this specific sensor should be added, the user must click the green button with the checkmark symbol (✓).

3. Add the device

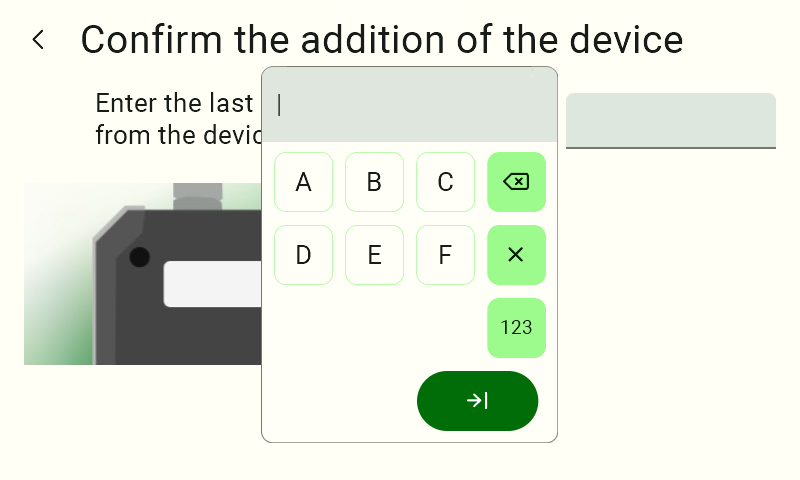
Enter the last four characters of the device serial number to complete the process. A helpful tip: to switch the keyboard to letters, press the ABC key. Want to switch back to numbers? The 123 key is your friend.
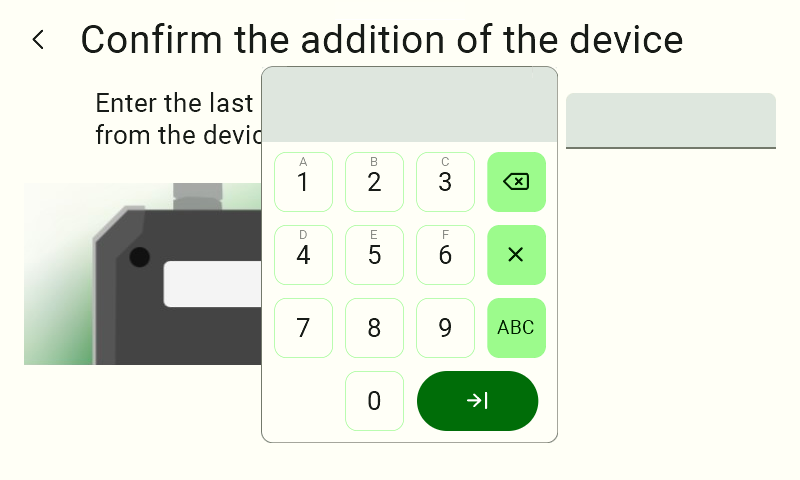
Device verification screen with the numeric keyboard displayed for entering the code. The keyboard allows the user to enter numbers, and clicking the light green "ABC" button switches it to letter input mode. Entered data is confirmed using the dark green arrow button located in the bottom-right corner of the keyboard.
Device verification screen with the alphabetic keyboard displayed (containing letters A through F), used to enter the code from the device label. The user can return to numeric input by clicking the light green "123" button. The dark green arrow button at the bottom is used to confirm the entered characters.

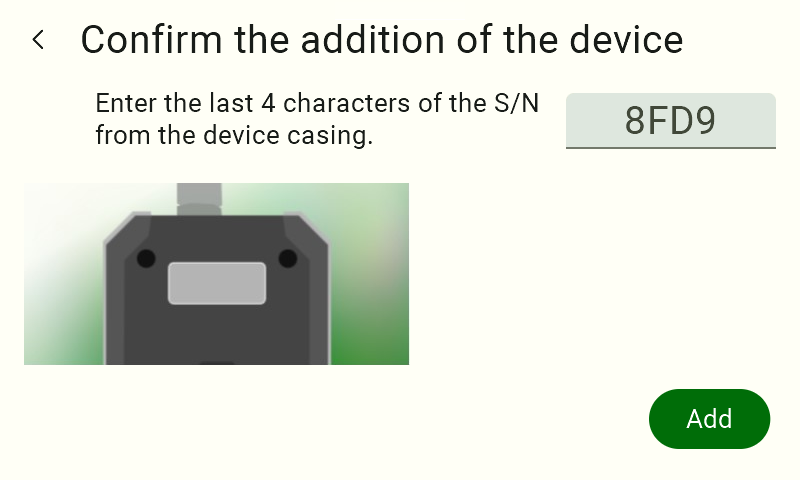
Press the “Add” button.

"Confirm device addition" screen. As a security measure, the user must click the light gray text field and enter exactly the last four characters of the serial number (S/N) printed on the sticker attached to the physical sensor. After entering the characters, complete the process by clicking the green "Add" button in the bottom-right corner of the screen.

Success! A confirmation message indicates that everything has gone according to plan.
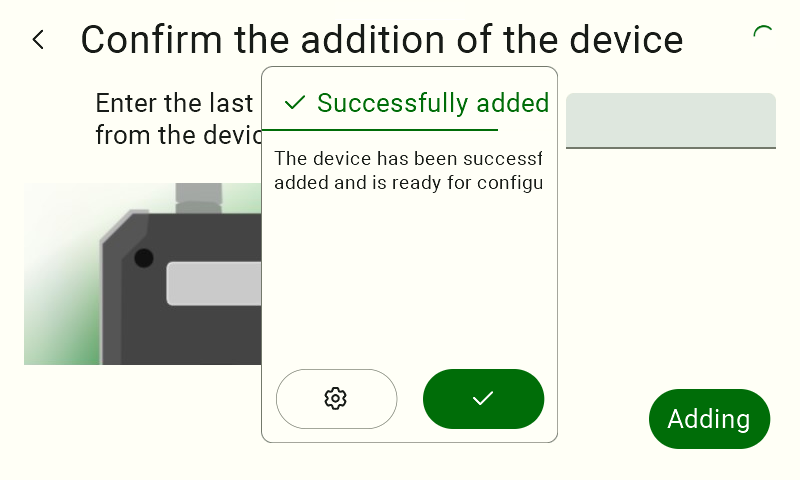
Pop-up window displaying the success message "Added successfully". This screen informs the user that the sensor has been properly authenticated, paired with the system, and is ready for further configuration. To close the information window, click the green circular button with the checkmark symbol (✓).
Updated on 2026-07-23
Was this article helpful?

Related Articles

Need Support?
Can't find the answer you're looking for?
Contact Support

Leave a Comment